For some time now I am looking for a way to add video to my Ableton Live performance. In this article I am experimenting with VideoRemix Pro from MixVibes. There are many people with a similar quest so it seems and equally as many solutions. Most solutions (Resolume, Modul8) revolve around the Apple MacOS. Since I am not in the Apple ecosystem, these are not available to me. Some quite elaborate solutions use many components that all are glued together. Sometimes with MIDI, sometimes with plugins.
As a first attempt am looking for a simple single piece of software that can run inside Ableton Live for a PC. Enter VideoRemix Pro. You need to have the Pro version to run it inside Ableton Live as a plugin. When you look at the instruction video, you can see that it runs in Session mode. Which is how I use Ableton Live live. Looking at this it seems simple enough, but there is a learning curve.
This learning curve is not helped by obvious glitches and problems when using the software. I had quite a battle installing it and getting it to run as a plugin inside Live. The first problem was Live crashing when dropping the plugin on a MIDI track. Which is how you are supposed to use it. My first reaction was to ask for a refund, but after a reboot and some experimenting I got it to work. The secret for me was to make sure that VideoRemix does not use the Windows Default audio. Once I switched to the ASIO audio option that Live also uses, the plugin stopped crashing.
VideoRemix Pro runs in desktop mode as well as plugin mode, but not at the same time. The desktop mode seems solid enough, but even there I have run into glitches. This had to do mostly with customizing the Novation LaunchPad Mini that I wanted to use to control the video. The LaunchPad Mini had been just lying around as a backup for the Ableton Push that I mainly use. It is however not supported by default. The makers of the software prefer you using the full Launchpad Mk2, which has more control options of course.
This means that in order to use it, you have to define a custom control mapping for the software. This seems easy enough, since you have a MIDI learn mode in the software. It took some learning for me to use it. In short, hover over the element in VideoRemix you want to control. Then click or turn the midi knob to link it. Press it again to see if the mapping worked. After this you will see a custom mapping in the list of midi devices in the preferences, which you could then rename.
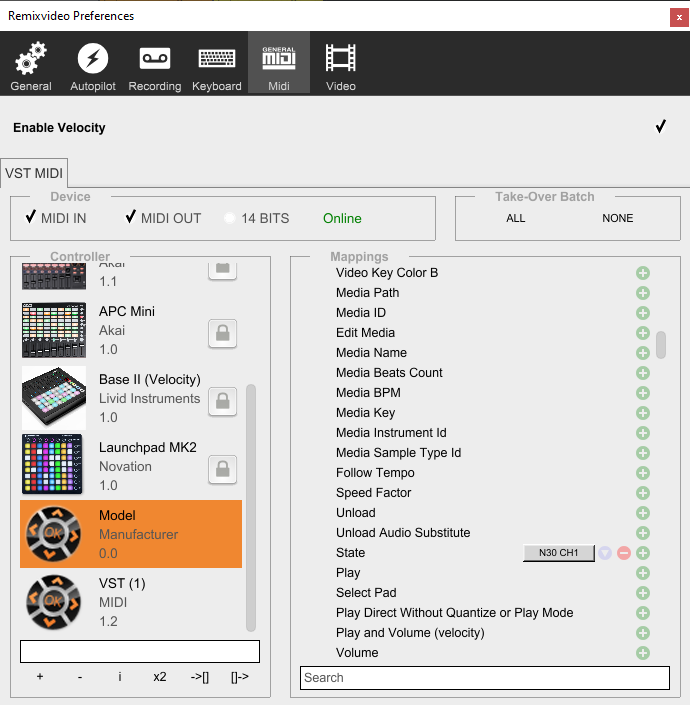
Then moving over to Ableton Live and running it as a plugin (remember: not at the same time), you will find this same list. Confusing enough there is a VST MIDI device there, but in my case that did not respond to any attempt to control the video. If you switch over to your custom mapping that you created in the desktop mode, things start moving. Now you can record your video sequence.
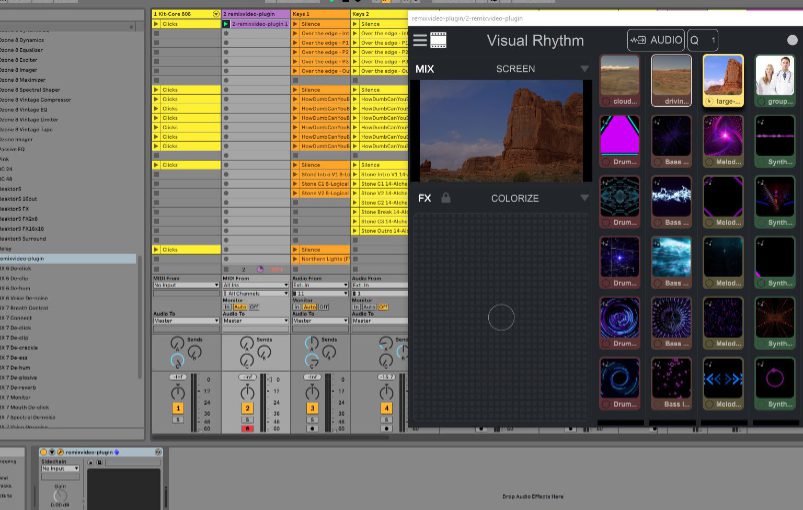
Creating or recording a video sequence is based on the 6×6 grid of buttons in VideoRemix. This means that you are limited to 36 clips that you can launch. One clip can run for 100 seconds. Hit a clip to start it. Hit it again to stop it. By default running clips is column oriented. You cannot start more clips running on the same column. One clip on the same column will stop a clip on another row. You can start an entire row with a single command. You can start an entire column, but only if you enable all clips playing in a grid of course.
If you want a more complex mix of clips with more than a few clips per song and more then a dozen of songs, you’re probably out of luck with 36 slots. It seems you have to simplify your VJ mix if you are using this software standalone. For now it will have to do for me.

The effects (FX) section is quite elaborate. You can control it as well as all the faders, through MIDI. The moment you hit full screen on the top right you will see your VJ mix full screen. Hopefully on the right video output, but I will have to look into that yet. The default set of clips also loops sound and this sound can be mixed, so you can also have sound effects playing as part of your performance.
This is my first attempt at working with video as part of a Live based performance. After quite a battle to get it working, it is now seems actually possible to have a video running as part of a Session mode sequence, like there is a real VJ at work. I am still quite worried about the overall stability of the setup and I need to get to grips with the quirks of the software.
If you have experience with this or other software setups, please comment below!
Ah! The documentation is sparse, but I found that you can create a new grid layout of 8×8. This doesn’t look that well, but at least it gives you the option of having 64 different clips. When splitting in two for two performance sets, this might give you 128 clips to play with.
Mind you, the documentation states that you can set up up to 10×10. This might work on Macs with retina screens. It only goes up to 8×8 on Windows 10.