You might already have seen this on my socials. A nice photo of a new box stacked alongside my MIDI patchbay. Lately studio life got more complicated. I have 2 mixing tables. One for working in the studio and one for practicing live gigs. I found myself plugging instruments in and out of these mixing tables. Also, the studio mixing table, a Yamaha 01v, is getting old and some switches now already noticeably start making noise. For me this was the sign to start saving the desk and considering a patch panel.
You can spend any amount on a good one, but for my modest home studio purposes I chose the Behringer Ultrapatch Pro PX3000. With 48 channels it is well beyond my need to patch 6 channels across 12 inputs. But hey, who knows what will happen in the future. And it doesn’t break the bank at around 80 euros.
Plugging the instruments across the inputs of two tables now won’t wear down the inputs on the more expensive mixing desks any more. There is even be an option to use the patchbay in half-normal mode. In this mode I can make a setup to send the instruments to both inputs at the same time. Then you have to factor in the impedance of both mixing desks against the line outs of the instruments, but to my calculations it might just work.
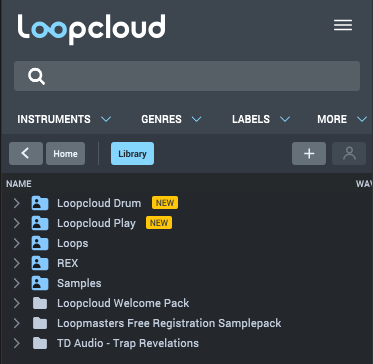
This maybe something that I had overlooked for too long: Loopcloud. For years the talk of the sampling library town, but I didn’t look at it until I got a demo of the new Loopmasters Loopcloud 5.0 version at the Amsterdam Dance Event this year. I also had looked at other sample managers like Algonaut Atlas, but that may be only drums oriented. Intriguing, because Atlas uses machine learning to recognize the types of samples. For me, up to now, a sample manager was simply a folder in Ableton Live to browse through. And I had always put Loopcloud away as simply a shop to buy samples with a subscription model.
How to work with the application
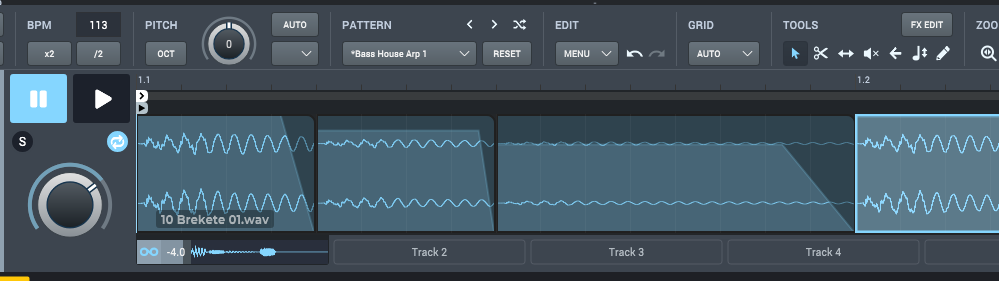
The Loopcloud application is a standalone application, but it integrates with your DAW through a Loopcloud plugin. You can only have it on one track in your DAW. All samples that you browse then play through that track. The idea is to start with a sample in the Loopcloud application. You can have random sorting to free your mind. Then use that to edit, slice, dice, sequence, mash up and add effects if you wish. You can drag the final result into your DAW as a sound file. Quite something different than finding a sample and then edit it in the DAW. All with the tune and tempo of your DAW. It nicely prevents you using kind of preset sounds over and over. Clever!
Loopcloud sample editor
It means however, that you have to keep two applications open while working. For those of you with two monitors, maybe a no-brainer. But then again, it could just be that you already have a nice workflow with your two monitors and now you need to fit in yet another application. Anyway, there is an option to have the application dock to the sides of a window at about 20% of the width. Combined with scaling and other options, you might manage with one screen. The application sometimes forgets how you docked and scaled it.
Your library manager
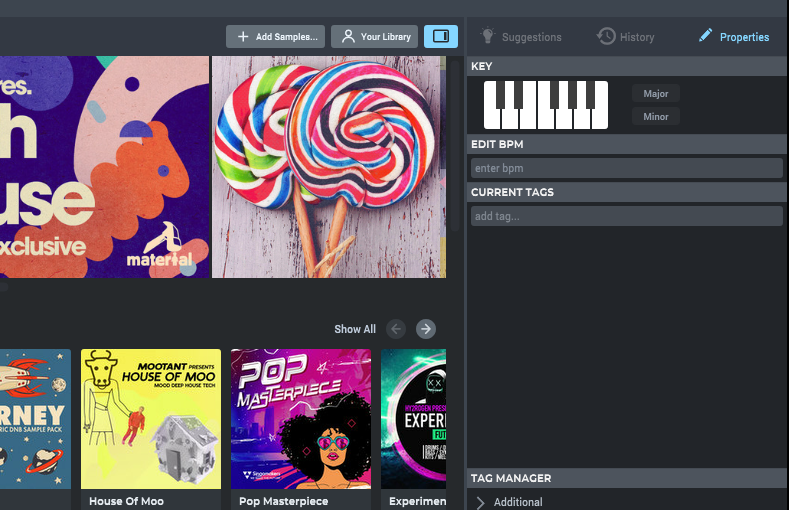
Now about the library management. The moment you add your own samples to the Loopcloud application it starts scanning all the samples in it. It will try to find BPM and key information and it will try to read other information from the name of the sample or the loop. It will probably not correctly discover more complex information like the genre, loop or one-shot, or the exact instrument. All is then marked down as tags and you can start searching for things like key and BPM.
Loopcloud docked
For this you need to click the button marked “Your Libary”. If you also want the detailed information of your scanned samples to be correct you will have to start tagging yourself. Its quite advanced, you can tag whole folders and batches of files. For a more in-depth dive into the tagging and searching you should dive into the tutorials.
Additional plugins!
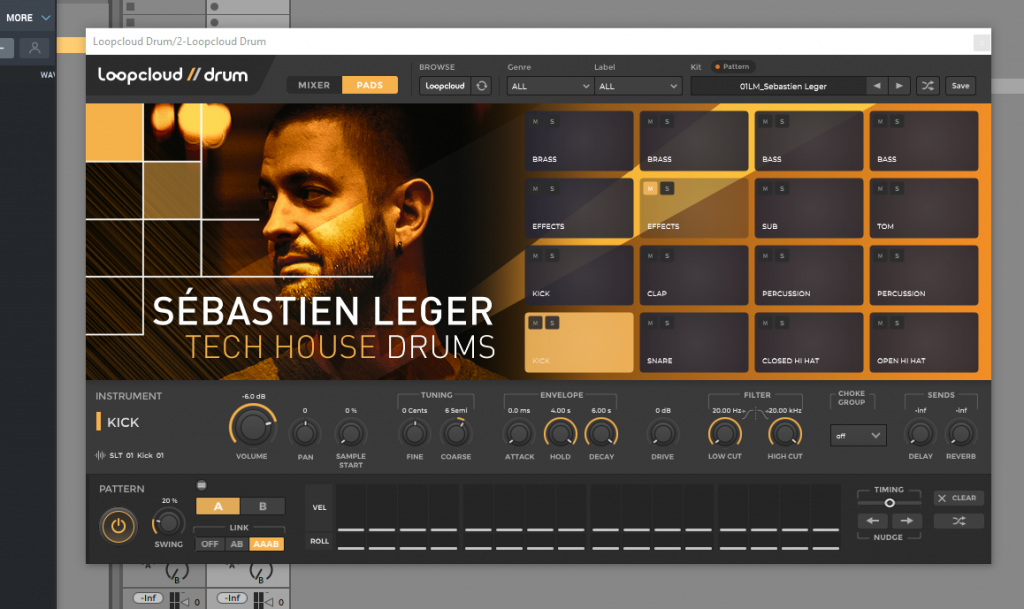
But then when I found out Loopcloud as a sample manager, the tutorial also pointed me to Loopcloud Drum. A separate plugin that is actually a full sample drum instrument. It uses its own Loopcloud drumkit format and will open up a separate section in the Loopcloud manager. A strange find in a sample library manager. As a separate instrument it has its own format and its actually more of a pattern beatmaker with its own sequencer. A preset list of drum kits get activated that have been assembled from Loopcloud one shot samples of course.
Loopcloud Drum plugin
I didn’t find any option to change the patterns in the beatmaker, other than with a mouse. You would also expect an option to edit drum kits and build your own. You can edit the mix of the kit and save that as a “user” drum kit, but I didn’t see any way to create a drum kit from your own set of one shots. Maybe this is in a future version, or in a Loopcloud subscription model that I didn’t explore. I was kind of on the lookout for tools to start making beats, other than with loops or Nerve, but this is not it yet.
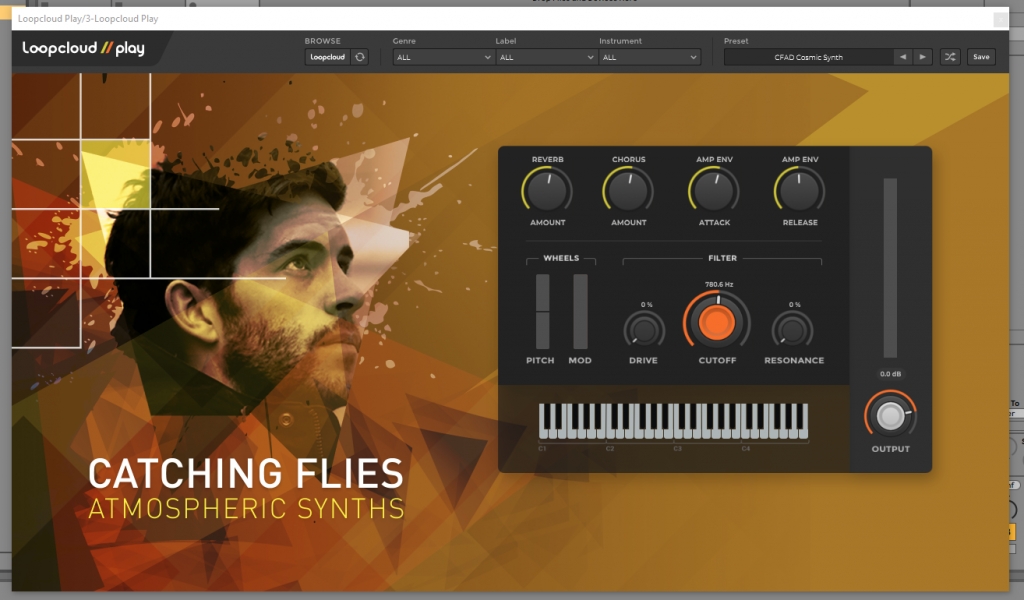
Loopcloud Play plugin
And even more? The tutorial also points to the Loopcloud Play plugin. Yet another sample instrument, but this time melodic. As an instrument its quite basic, maybe so basic that you fall back into the preset trap again. There are about 7 knobs to turn and that’s it. Like the Drum instrument it has its own place in the library and again no way to choose the samples. You can save tweaks to the knob as “User” instruments. I think it needs work, as this is no match for Native Instrument’s Kontakt.
Closing out
Loopcloud has a quite intricate subscription model and not all of the features are available in all tiers. Specifically on using multiple tracks and the sample editing. However, if you just want to use it as a sample library manager you can even use the free subscription model tier. If you already own Loopmasters stuff it will automatically appear in your library. Even though it could do with more advanced detection of the samples that you load in the library, for me this was a great find and it surely beats the user folders in Ableton Live.
I am a big fan of custom made covers for all studio equipment. Dust kills the quality of connectors, sliders and switches. If possible I try to use the dust covers from the instrument or equipment manufacturer. Otherwise I try to look for a Decksaver, because actually these are very clever desk space savers as well. And they fit like a glove. All too often however I find that there is no custom cover that exactly fits.
I tried to find custom covers for the Yamaha 01v and the MicroKorg, but couldn’t find any. My current solution for this is to buy flexible transparent foil and have it cut to a little more than the surface area of the device. It can attract dust, but at least the dust does not get in the equipment. It also looks quite professional and is easy to pull over the surface and slip away again.
For me this beats ill fitting cloth covers and other half baked solutions, like putting it in a box. The best alternative could be to buy thick sheets of perspex and glue a custom cover. There are shops that support you in building your own perspex cover. It will however never be as sophisticated as Decksaver covers, with extra space for knobs and bends in the device. If you’re on a budget, at least put a sheet of transparent foil over your equipment and make it last longer.
For a while now I have been starting up my live show. After five years of building a repertoire, I feel the next step is playing it live. I have been lucky to have had my “real pop star moment” with my previous band. A CD recording contract and live touring abroad. Now I am back to step one with my own music project.
Starting up, the most important for me is to record all practice sessions and to record all tryouts. For this purpose I have invested in multitrack recording stuff. It might just be that there is a gem in these recordings that needs exploring and investing in. This is what I learned in the previous band. Recoding, recording, recording… Learning, exploring, improving….
Multitrack live recording is easier than ever. It used to be only Tascam with analog 4 track tape recording, but now its digital 8, 12 or 16 track recording with computers, or Zoom or more exotic brands. CD quality or studio quality even. For now I focused on Zoom, because they make really affordable devices. I am not scared of using computers, but for me now it needs to be one single reliable device. Not another chain of devices with a computer at the end.
Zoom R16
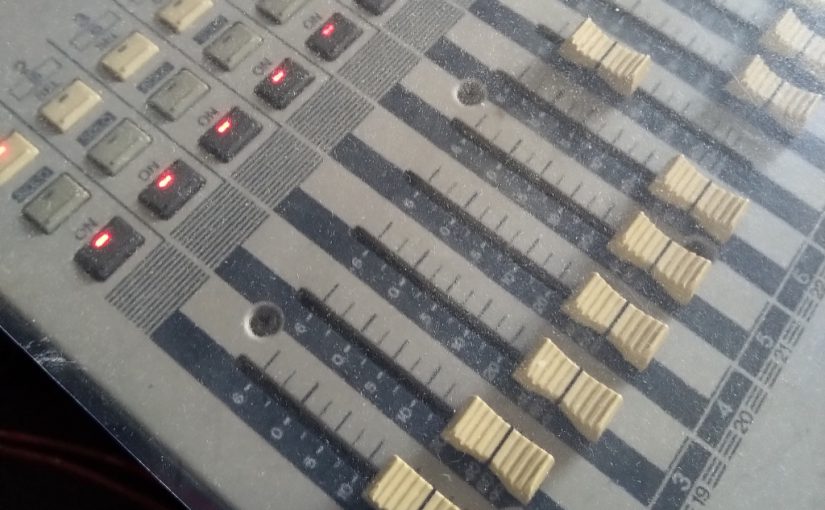
So I tried the Zoom R16 first. This is a true 16 track recorder. It has the shape of a mixer, but it is actually only a multitrack recorder. It can record 8 channels at once, but has a limitation for the SD card at 32GB. My problem with it was the sound quality as a mixer, that makes it difficult to make sure that the recordings are Ok. Also it tempts you to use it as a live mixer, but it does not have adequate send/return/monitoring chain at all.
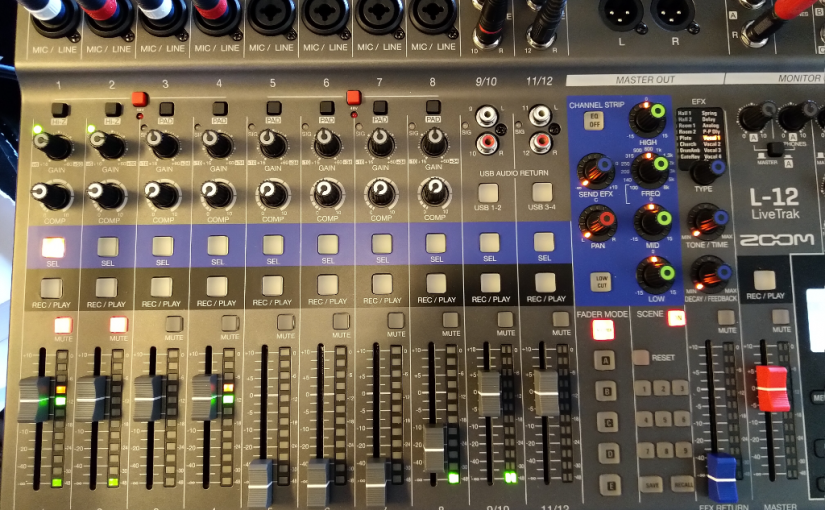
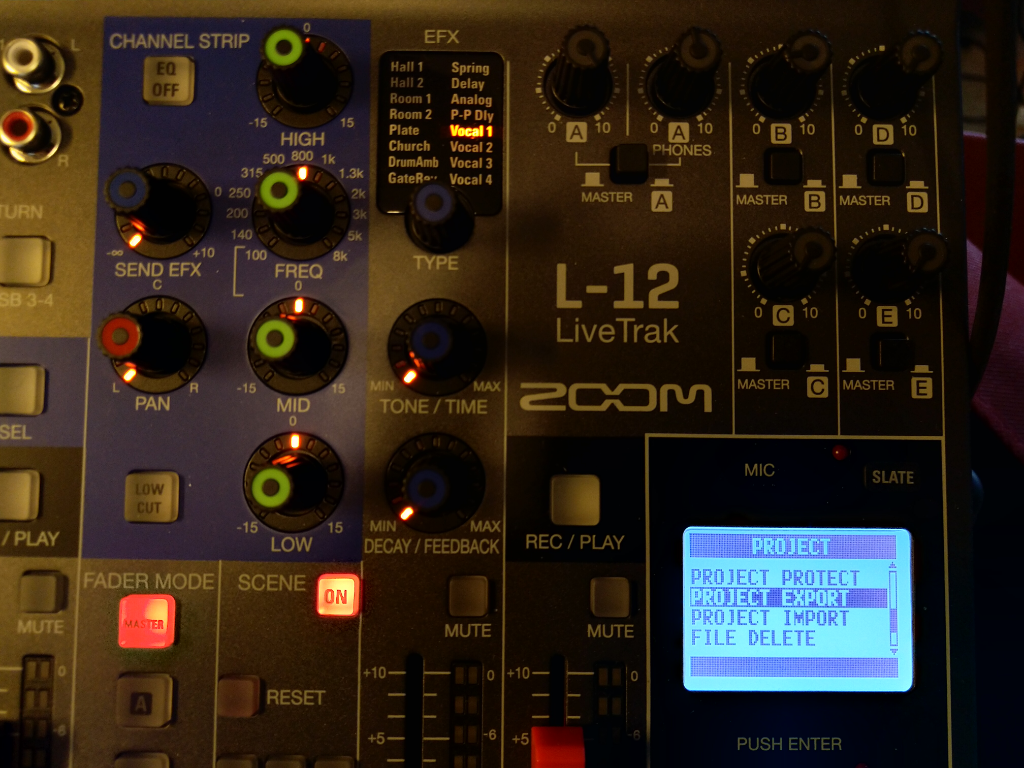
Enter the Zoom LiveTrak L-12. The sound quality of the mixer is immediately a lot better. It can record 12 channels at once. It also accepts larger SD cards and record at higher bit rates then CD quality. Unfortunately, the send/return and single effect chain is still a bit meagre. You do have a compressor per channel, but when you use it, its recorded compressed as well. This might not be what you want. The monitoring chain is a different story. Its amazing. Four, or even if you really need it a fifth monitoring channel if you separate it from the master mix.
All in all, this cannot be your live mixer for all purposes. Just because of the limitations of the send/return and single effect and the compression with the penalty of also recording it. However it is probably exactly the mixer that you’ll find in any commercial practice room. So just replace it with this one and you could have a multitrack recording of all your practice sessions. Awesome! Now if you hit a gem, you can mix it down to a demo later.
Can it be your mixer for live venues? Absolutely! Connect some active speakers and you’re live. Unless you need more send/returns and effects live of course, then you need to bring a real live mixer. The challenge will then be to connect separate tracks of that mixer to the multitrack recorder. Hopefully, that live mixer has at least enough monitor channels or busses. Otherwise you’re stuck with a recording that does not give you enough options to remix the live recording.
Now in practice, how does it work when using the LiveTrak as a multitrack recording mixer? First of, as a mixer it will remember all your mix and recording settings as part of something that Zoom calls a Project. It will save it all on the SD card when you switch off and on. You will need to make sure that you do switch off and on again on the device, not just pull the power plug. When you switch projects then you can save different mix and recording settings per project.
Like an advanced digital mixer all fader settings are saved. But because it does not have motorized faders, a led shows the stored fader settings and such. When you hit that point of the fader again, you can change the value and save that again. This applies to all mixer settings in general. To extend on this you can save 10 different scenes per Project.
Zoom Export to USB
This is nice, but you cannot from the menu simply clone a project. There is a trick however, if you switch to USB host mode you can save and restore projects on a USB stick. The trick here is to save and restore an existing Project to a new name. This way you can start recording to a new Project with settings from an existing Project.
So there you have it. This is how I use this now and I know what it can do for me. I think it is great as a practice room mixer and for small venues. Please check the Zoom site or review sites to read more about all other modes and features of the LiveTrak. I don’t use any of the other modes, so I have no experience with any of the other features. It might work for your specific purposes as well.
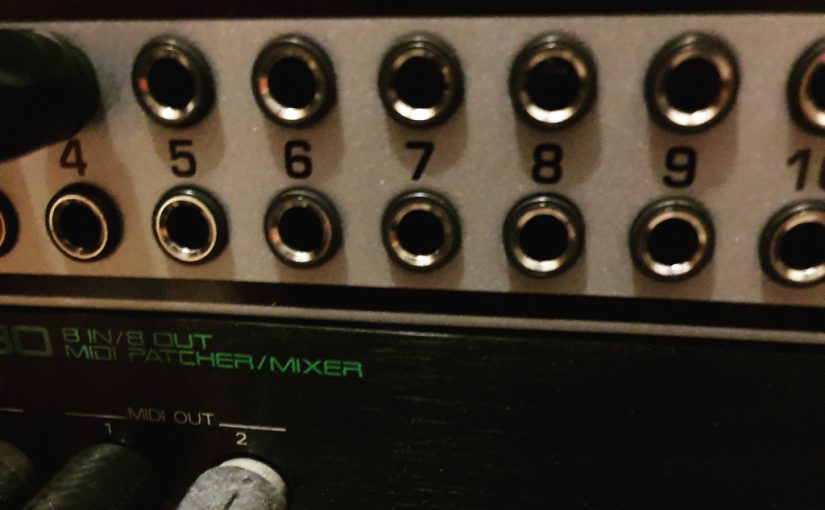
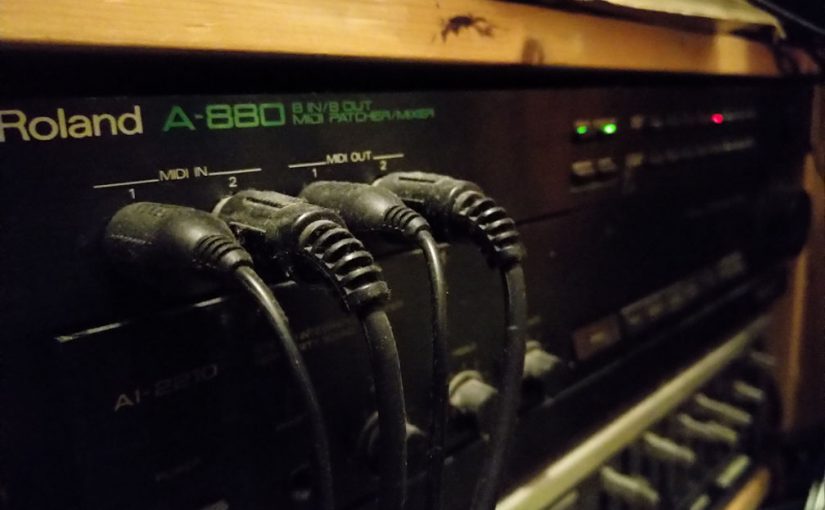
Recently I had to revise some cabling and routing under the mixing desk, when I found a rack device. A MIDI patch bay, the A880. It was happily blinking and had silently done its useful job there for at least 10 years. After looking it up, it turned out to be an actually more than 30 years old product from Roland! You can also see the dust on the cables in my setup.
Then the question is: do you need a MIDI patch bay? The answer is twofold. MIDI itself is an ancient protocol. If you have MIDI devices and a computer hooked up via MIDI, I will say that you cannot do without a MIDI patch bay. However, MIDI is showing its age and probably some of you are using USB instead. Also, new MIDI standards are now seriously being discussed. Possibly resulting in something altogether new that may not be supported by the A-880.
The current standard MIDI protocol is ancient. And when you look at it technically it is also slow and limited. Of course it is fast enough to connect a keyboard to an instrument or a computer. Most devices allow daisy-chaining to connect any chain of computer and keyboard and MIDI instruments you have. However, that is when you will find that MIDI has its limitations. If you daisy-chain more than three devices you will likely hit one of its limitations: bandwidth. When too much information passes through a single chain, then you will get traffic jams and you might start hearing hick ups.
This is where a MIDI patch bay kicks in. Instead of daisy-chaining you can now connect devices in parallel. The A-880 connects 8 inputs to 8 outputs. Each of the individual connections to a midi device from the patch bay can now pass the maximum amount of data without traffic jams. Also with some simple button presses you can determine which input gets sent to which output. Allowing you to have more keyboards and route inputs from there to more devices. The forever friendly blinking lights show you which inputs go to which outputs.
Inputs 1 and 2 are special. They are positioned on the front panel and easily reachable when you assign those as merging inputs (<- edited because of Fred’s comment below). I use the patch bay in its most simple and useful form. The inputs from my main master keyboard are mixed with the input from the computer and then sent out through all remaining outputs at once. This is the blinking pattern that been the core of my setup for more than a decade. Only occasionally I push the Signal button. Then the blinking lights show which devices actually send data.
It may be that the future of MIDI does not include the A-880. This will be the moment when I will switch off this blinking, silently working work horse. And I will remove it from its hidden place under the mixing desk.
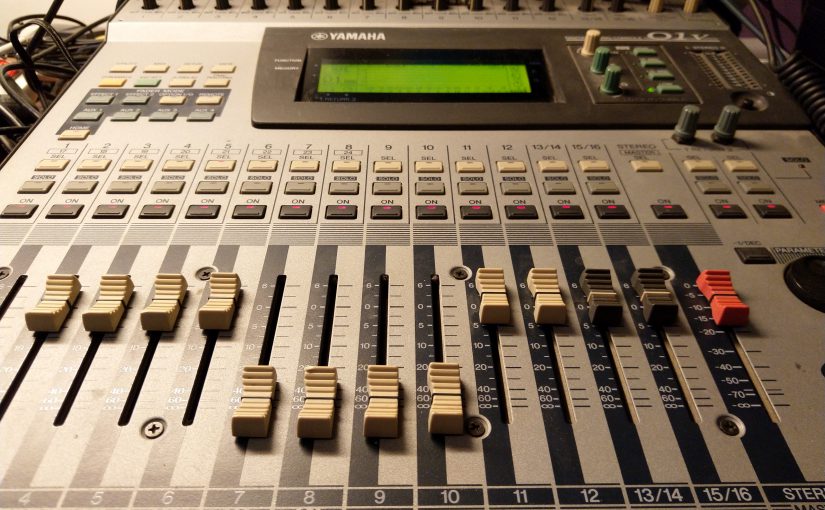
This is something that has puzzled me for some time. Do I actually need a digital mixing desk in my home studio? Well, technically no. Modern audio interfaces have a mixer on-board. So if you need 8 inputs, you could just make sure that you have an audio interface with 8 inputs. Starting at around 200 euros. Going up all the way to 3000 euro’s if you can or want to spend it for top quality. Now there are several reasons for me opting for a digital mixing desk and it all comes down to flexibility.
What you don’t want is a chain of devices that add noise on every recording. So an analog desk connected to your digital audio interface is probably a bad idea. Unless it is a very high quality analog desk with a unique sound. Something that would set you back the price of a new car. So lets try to stay in the digital domain for a better price/quality ratio.
One of the reasons to eye the higher priced segment of audio interfaces is the option of a direct cue mix. A singer, or solo musician is usually best recorded dry if you don’t have the luxury of working in a room with a nice sound or at least a quiet room. On the other hand lots of singers like to have monitoring with a bit of ‘room’ on it. A bit of reverb or even echo. When you can at least make a cue mix with just a touch of some effects on it, it can make the difference.
Now lets have the best of both worlds and flexibility. I chose the Focusrite Scarlett 18/8 2nd gen. It has 16 inputs, 8 analog and 8 digital and 6 analog outputs. Additionally it has stereo S/PDIF digital in/out. hence the total of 18 in and 8 outputs. Now connect the digital mixing desk to the ADAT 8 digital inputs of the Scarlett audio interface and there you have it: 16 inputs and enough cue mix options to accommodate recording of a complete band.
Ok, I was lucky to get my hands on a classic Yamaha 01V with ADAT interface, but I think it is still possible to get your hands on it or something equivalent for around 500 euros. Add to that about 300 euro’s for the Focusrite and there you have it: an affordable and also flexible setup that can accommodate any home studio recording session.
Please note: starting with version 10.0.5, support for the A40 keyboard is integrated in Ableton live. If you use a new version of Ableton Live please read this article.
I was looking out for a MIDI controller and control surface for Ableton Live. The Komplete Kontrol S series and comparable Novation controllers were strong contenders, but then came the news of the new Komplete Kontrol A series. This caught my eye, because the pricing of these was well below that of the S series. Previously I switched out my old faithful but battered Korg Triton workstation for a Nord Electro 6D. The Nord is absolutely the right keyboard for my purposes, but I already knew I would miss the pitch bend and modulation controllers. The Push is perfect control surface, but there is some flow missing when you really want to play on the keyboard and interact with the sounds.
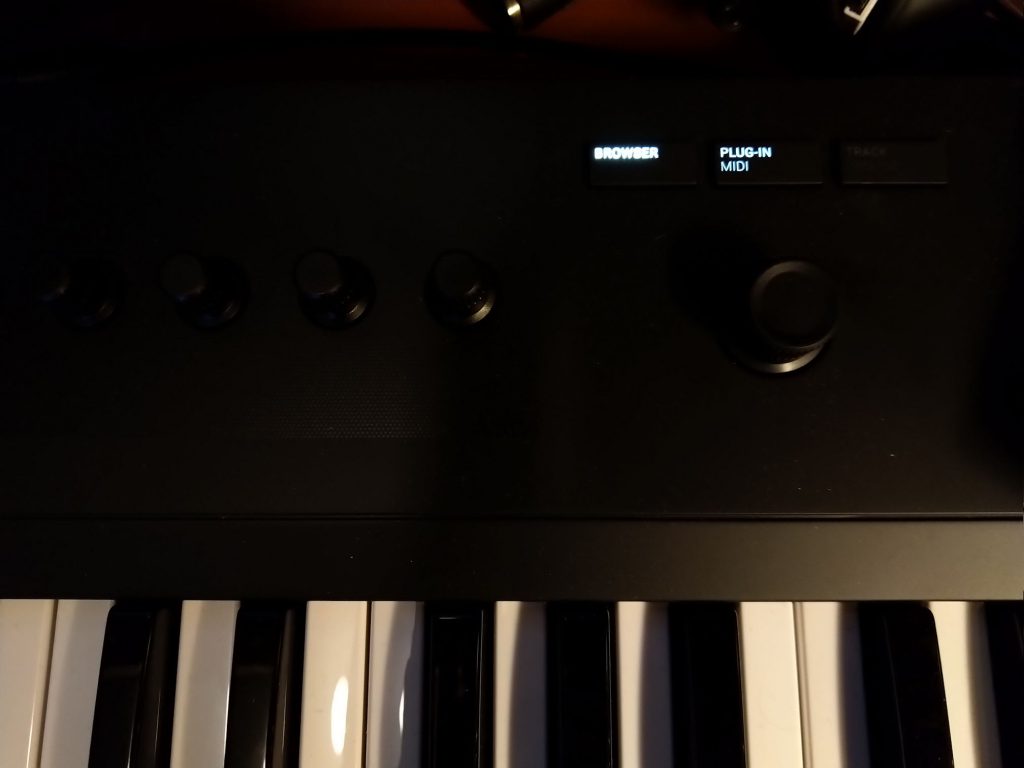
Enter the Komplete Kontrol A49. I first tried the controller at the Amsterdam Dance Event and there I noticed that some things were not working right. The person that demonstrated the device there said that it needed some firmware updates. This was some weeks before the official release. After the official release I ordered it and started working with it. Immediately it showed the same limitations in controlling even the Komplete Kontrol application that comes with it. Selecting a sound works fine. You can browse instruments in the Komplete Kontrol application with a ‘prelisten’ sample for every sample by just clicking, turning and nudging the Browse button as a joystick. All other buttons and knobs remained dead.
Komplete Kontrol A49 Browser
An update!
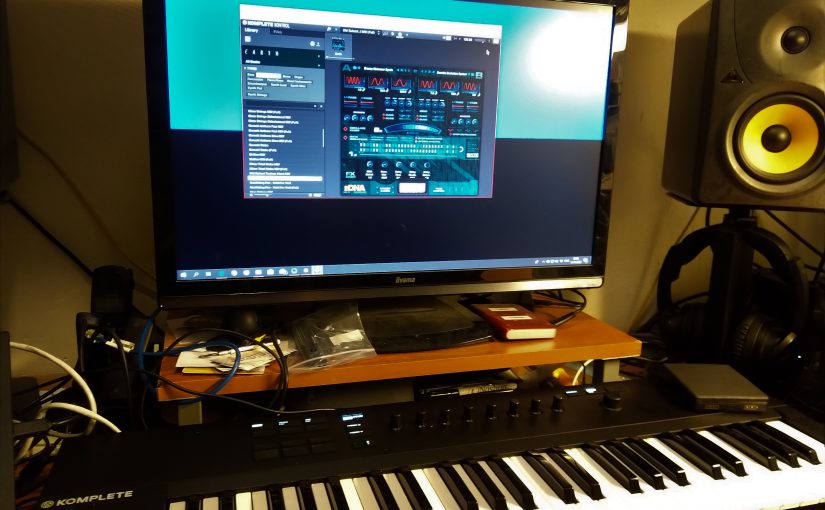
Then after a week an update to Komplete Kontrol rolled out and a firmware update for the A49 controller. Only after that the knobs came to life as macro controllers within the Komplete Kontrol application. Then the next step came where I installed the keyboard on my desk to work as the main controller for writing songs within Ableton.
Ableton can use ready made scripted or compiled templates to allow MIDI controllers to work as control surfaces. Sure enough when you dig into the documentation of the A series MIDI controllers, you will find reference to copying the right scripts into the Ableton system folders. Essentially you need to copy over scripts from a Host Integration/Ableton folder to Ableton program data control surface script directories. This allows the control surface scripts to appear in the Preferences popup of Ableton under the Link MIDI tab. Once the script is selected, the A49 should not only be able to control instruments and play them, but it should also be able to control Ableton itself. Also the transport controls, like Play/Record etc.
Do not follow the instructions!
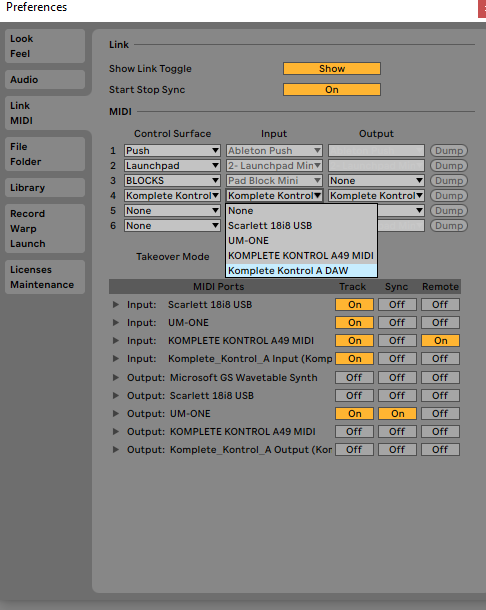
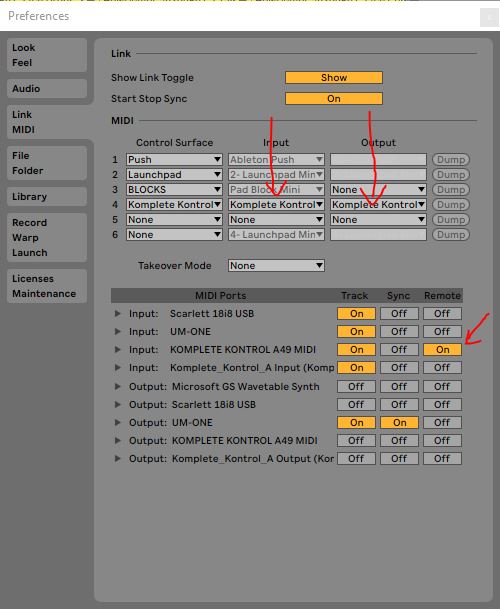
However, that’s where it all breaks down. When following the instructions you will end up with just the MIDI template on the controller. The transport controls remain dead. Fortunately when browsing several forums, I found that the instructions are wrong. Probably copied and pasted from the S series. The essence is that you have to ignore the part where it says that you don’t need to specify templates for the Input and Output settings of the control surface scripts. Setting these to the Komplete Control A DAW options magically enables the transport controls. From then on you have to manually switch back to the MIDI controller template by using SHIFT – Plug In/Midi. Don’t forget to also enable the Remote settings for the Komplete Kontrol MIDI ports and you will have it all.
The instructions from Native Instruments will also give you a Kontakt instrument rack that maps controller inputs to Kontakt instrument macro’s and now you are completely in control (or Kontrol hahaha). By all means it is not that easy to get to all the good stuff, but at least its there. This is now my workflow:
Want to browse Kontakt instruments? Start the Komplete Kontrol application and use the Browse option to quickly browse instruments. Also the sounds from others then Native Instruments can be browsed I noticed. I am using Spitfire eDNA Earth and Epica for instance.
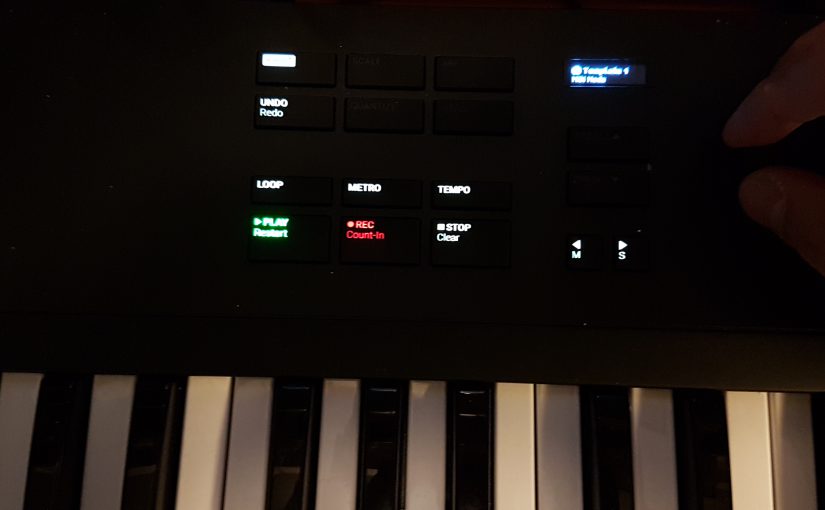
Want to start recording in Ableton? Use the Track/Instance transport controls. Even including the loop , metronome and tempo tap options. The controller knobs control the mixer levels of the Session channels.
Want to play and control instruments? Press SHIFT Plug-In/MIDI and make sure you have MIDI mapping to the controls. Make sure you have the knob controls mapped to macros in your instrument. You may need the Kontact instrument rack for that.
The verdict? Its not very intuitive and it takes some getting used to, but all in all you get a very playable semi weighted MIDI controller and a controller surface that really can give you the basic controls that replace the keyboard and the mouse. A nice touch is the touch sensitivity of the knobs. The tiny display informs you of the current function of a knob if you only touch it.
I will try to write about my impressions with the Earth instrument. However, I will not completely review it. For in-depth reviews please check MusicRadar or TheAudioSpotlight or others. For me, ever since Camel Audio was bought by Apple and its Alchemy synthesizer disappeared as a standalone virtual instrument, I felt lost. Alchemy had a granular synthesis engine and a unique way to parameterize its sounds. The unique sound of this instrument disappeared and there was nothing to replace it. Omnisphere apparently is capable of recreating some sounds, but that is mainly because it can synthesize anything and its priced accordingly. The moment I heard a demo for Earth, I heard back some of that Alchemy sound again.
Technically its a completely different beast, compared to Alchemy. The Earth sounds are based on an orchestral sample library, but are then processed by the Kontakt engine to sound, cinematic, outer worldly and sometimes electronic. Yes its a Kontakt instrument, so you need at least the Kontakt player. Inside Kontakt you will find the eDNA interface of this instrument. As an owner of a Komplete Kontrol A series keyboard, this is very convenient. It means I can use the Komplete Kontrol browser to quickly browse through the sounds and immediately tweak parameters of the sounds once loaded.
The Kontakt engine and the eDNA interface of Earth takes some getting used to. To make sure you fully understand its workings its a good idea to go through the walk through on the Spitfire Audio site. In short, every sound consists of two samples from the library. Which are mangled, then mixed, then chopped up and lastly processed by a set of effects. Very important is to see that you have sounds, but also full versions of the same sound. The full version contains the full range of orchestral samples. This allows you not only to start with a fixed set of samples, but eventually switch out one of the samples for another.
The result is that you get a sound that is usually cinematic. Sometimes a wash or a drone in the background and sometimes a sharp stab in the foreground. Because of the mangling and the chopping, sounds can really get that grainy Alchemy sound, or a dirty sound. None of the patches is really clean. I can only say: I love it. All sounds immediately inspire to let you build a soundscape. Even better, with a Komplete Kontrol Keyboard you can also immediately start changing the sound, bringing it even more to life.
If are looking for cinematic sounds, drones, or dirty stabs and you want an affordable synth then I invite you to take a look at this Kontakt library. In most reviews you will find some comments on eDNA interface of this instrument and I have to agree that it can be kind of hard to find your way in elements that are not inviting you to click or drag. After some getting used to it is not that bad. All in all: recommended!
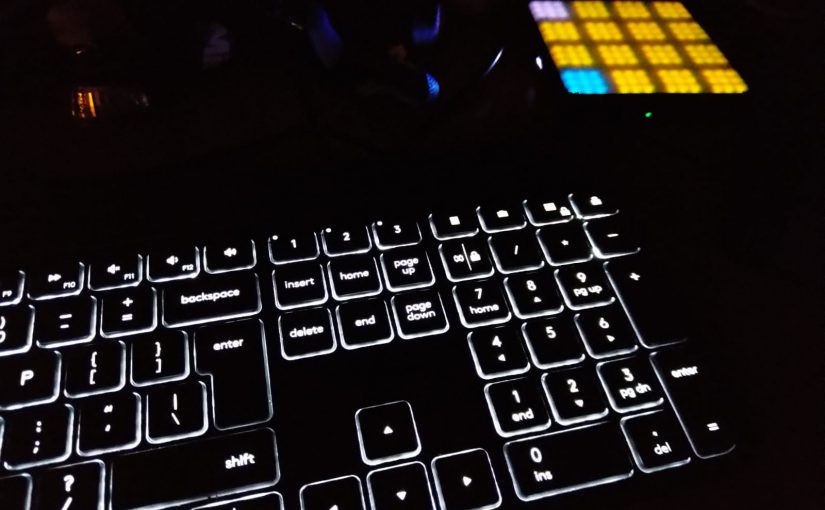
Inputting music with a mouse and a computer keyboard, even though its possible in most DAWs, is (as I see it) very limited. Firstly in its expression, it misses touch sensitivity so by default every note typed has the same velocity. Not good. Secondly because when you start adding expression, for instance by drawing it with the mouse, you are focusing on the details not on the song.
Keyboard input
What better way than a MIDI piano keyboard that allows you to input music in an expressive way in one go? Well, it might be that the piano keyboard is not your thing, but a guitar or flute is. Then you might want to use that to input notes. But other than recording the sound from the instrument is that any use when you want to record different sounds? Probably not. The most flexible way to record music is through MIDI notes and expression. The recorded notes can be connected with different synthesized or sampled sounds and voila. Lots of room for experimentation.
Enter the pads
As a keyboard player I am used to find my way on a piano keyboard, but why would I then be interested in alternatives? In short, I personally am not. Until now I have tried finding my way on new pad based alternatives:
The last one is the latest addition and the inspiration to start writing about it. The Push and the Launchpad were in a way less inspiring to use than the Lightpad M or so it seems. Also, the Lightpad M is nice and soft.
When trying to find my way on the Push, I found that its main inspiring purpose for me is controlling the Ableton Live Session View. For the Launchpad this also seems to be the main purpose. This is the view that you would use when playing live, or when jamming and piecing together a new song. The jamming and piecing together a new song has some clever tricks to allow you to enter musical notes and make sure you’re never out of key.
Push chord key
But then you have to set the right key to play in. And what if your song modulates through several keys? Not very intuitive there when I tried it. Most dance mixes keep it simple, so fair enough. And of course since its first inception these products have evolved and I might not have caught up. It is probably better than ever, but probably most for people that do not enjoy playing on a regular piano keyboard.
Triggered!
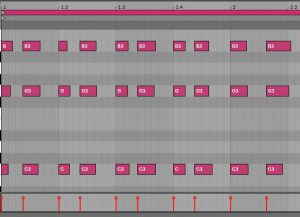
Maybe you noticed that I said musical notes, because its different for drums. When the pad changes to a drum pad it is actually better than hitting the piano keys. The mapping on screen is already a square 4×4 pad in Ableton and when you have the same mapping on the pads of Push or the Lightpad M it all starts to make sense.
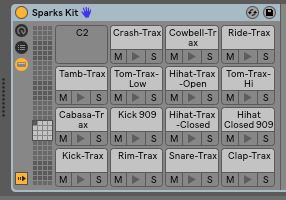
Ableton Drum Kit
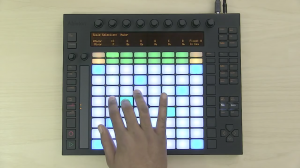
Lightpad M Drum Kit
I found that the Lightpad M takes some practice (for me), but in the end really results in inspiring drum tracks. Until now I used Xfer Nerve as a drum machine and then layered real drum loops and recording over it. Starting with the Lightpad M I see an alternative. Expressive in the Roli way and intuitive.
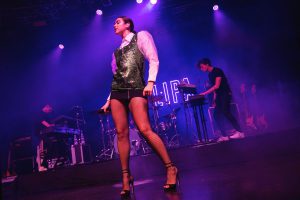
Also this year I saw a lot of pads appearing on stage supplementing regular keyboards, mostly not synths but controllers by the way. I imagine that these pads mostly trigger a few notes and samples
Dua Lipa live keys and pad
The labeling on these is so tiny that you can’t see it from the audience, but I’m guessing its mostly the Launchpad. The Lightpad M is, like others of its kind can also be charged and used wirelessly, MIDI over Bluetooth. I would personally not bet my live performance on a wireless Bluetooth connection, but that’s just me.
So in short. I am sold on the concept of using pads for triggering sounds and drums, being a piano keyboard player. If I look around on the live stages, its here to stay. When you are not a piano keyboard player it might just be your new way to play notes.
I know its quite pretentious to state that I would know how you can remain creative, but this is for me just a space to remind myself how I get things done. I hope this can help you in some way and inspire you to be creative. Please comment if you have your own tricks to remain creative. Maybe these will also help me.
So this is how I work:
#1 Keep a notebook at hand
I always have my phone on me and even if i am on the train or on holiday, I always have my online notebook at hand on my phone: OneNote. It can be something I hear. It can be something I think of or feel. I know I have to write it down immediately. As part of a general notes page, or as title of a new song or as a part of new lyrics for a new song. Even though I am quite sure that I would remember it again in the evening or even five minutes later, this usually turns out not to be true. So I Write It Down!
I let OneNote sync to the cloud and use the same notebook in the studio. Notes that change while on the road sync to the studio and vice versa. Eventually lyrics take their ‘final’ shape and then they are updated and saved as such. New versions get added and my OneNote pages always contain all lyrics from all songs and all lyrics and remarks that I collected while on the road.
#2 Work out of the box
Nothing is more inspiring than a real instrument. Even though it is entirely possible to write a song with a mouse and keyboard, its not my thing. Usually after practicing just playing away can easily result in new ideas. I try to record ideas immediately and with any fitting name its a joy to browse through all loose ideas and stumble upon a new song.
#3 Do not repeat
The thing that will surely kill creativity is putting some section of a new song on repeat. Even when perfecting a part of a song or a new idea I avoid putting it on repeat. After three times its time to look at another part of the song or start working on something new. All kinds of controllers, like the Ableton Push might try to make me work in a repeat loop, but I stay as far away from it as possible.
#4 Work fast, keep focus
Know your gear, don’t get stuck in finding stuff out while you need to be recording. Eventually when working on one song for a long time the dreaded hearing fatigue will kick in. Time to stop and do something different. Preferably not related to making music. Start listening again the next day at the earliest. Preferably in a different setting. Al too famous is listening in a car of course. If it sounds right there, you’re getting somewhere.
I use cookies on this website to see statistics and make sure that you can find your way. By clicking “Accept”, you consent to the use of cookies for only this.
I will never sell your personal information. I'm in it for the music!
This website uses cookies to improve your experience while you navigate through the website. Out of these, the cookies that are categorized as necessary are stored on your browser as they are essential for the working of basic functionalities of the website. We also use third-party cookies that help us analyze and understand how you use this website. These cookies will be stored in your browser only with your consent. You also have the option to opt-out of these cookies. But opting out of some of these cookies may affect your browsing experience.
Necessary cookies are absolutely essential for the website to function properly. These cookies ensure basic functionalities and security features of the website, anonymously.
Cookie
Duration
Description
cookielawinfo-checkbox-analytics
11 months
This cookie is set by GDPR Cookie Consent plugin. The cookie is used to store the user consent for the cookies in the category "Analytics".
cookielawinfo-checkbox-functional
11 months
The cookie is set by GDPR cookie consent to record the user consent for the cookies in the category "Functional".
cookielawinfo-checkbox-necessary
11 months
This cookie is set by GDPR Cookie Consent plugin. The cookies is used to store the user consent for the cookies in the category "Necessary".
cookielawinfo-checkbox-others
11 months
This cookie is set by GDPR Cookie Consent plugin. The cookie is used to store the user consent for the cookies in the category "Other.
cookielawinfo-checkbox-performance
11 months
This cookie is set by GDPR Cookie Consent plugin. The cookie is used to store the user consent for the cookies in the category "Performance".
viewed_cookie_policy
11 months
The cookie is set by the GDPR Cookie Consent plugin and is used to store whether or not user has consented to the use of cookies. It does not store any personal data.
Functional cookies help to perform certain functionalities like sharing the content of the website on social media platforms, collect feedbacks, and other third-party features.
Performance cookies are used to understand and analyze the key performance indexes of the website which helps in delivering a better user experience for the visitors.
Analytical cookies are used to understand how visitors interact with the website. These cookies help provide information on metrics the number of visitors, bounce rate, traffic source, etc.
Advertisement cookies are used to provide visitors with relevant ads and marketing campaigns. These cookies track visitors across websites and collect information to provide customized ads.