Running a live stream with OBS can be tough if you want to have a little bit of a show and you’re making music at the same time. In OBS you can dynamically change whole scenes or switch individual sources (video clips, images, text, cameras, audio) on and off. In my case I want to launch different video clips for different songs. And I have a panic scene without camera and audio to just show that I’m busy fixing something. Fortunately OBS is full of neat little tricks to allow you to run the show with just keyboard shortcuts, or if you want to, with a push of a button on a remote control. No need to wander around with the mouse to try to hit the right spot.
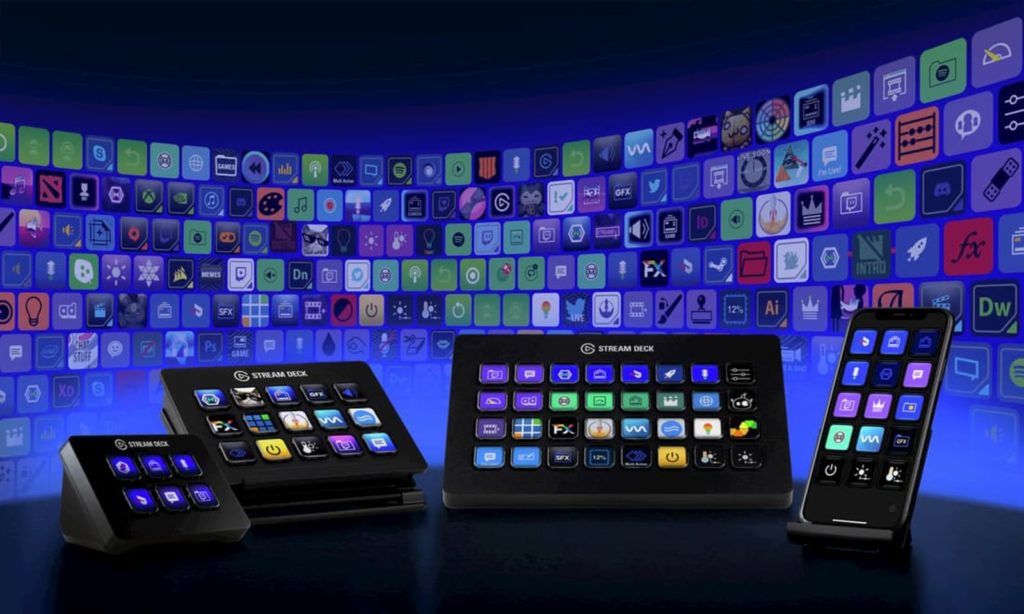
Elgato Stream Deck options
One of the many options is an Elgato Stream Deck but I always hesitated to buy it. The different sizes cater for different needs, but I find it a bit pricey for just the single purpose of controlling OBS remotely. As a musician it seemed more logical to use a Novation Launchpad or other MIDI controller. The Stream Deck is the Rolls Royce option, no doubt, but it is an investment.
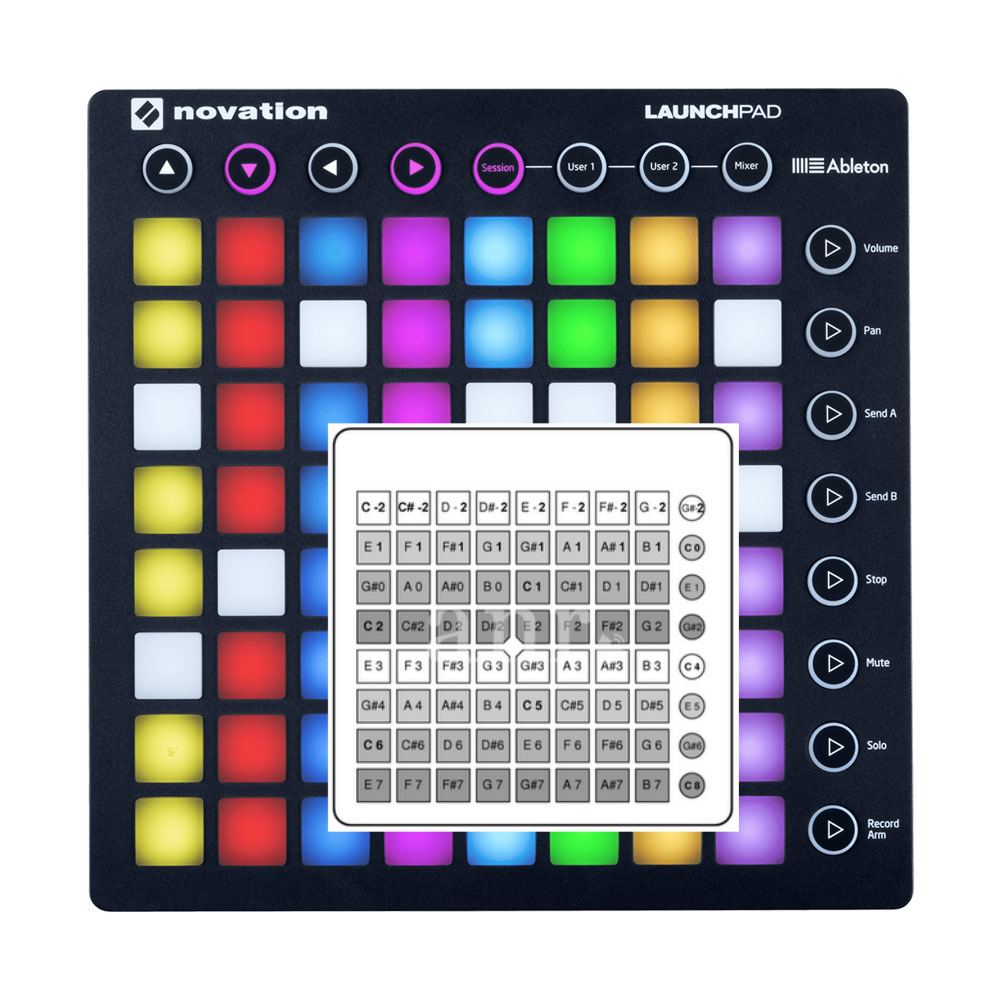
Unfortunately there is no standard MIDI support for OBS and also it needs to be two-way. When you push a button this sends a message and to light up the button to confirm your choice OBS needs to report back. That is what I would expect to happen on a Launchpad. You also need to map OBS events to MIDI keys. A Launchpad has very specific key sequence per row of buttons. Up to now I did not find an acceptable plugin or solution for MIDI. If you have please let me know.
Novation Launchpad and its MIDI key mapping
Maybe you noticed the mobile option in the Elgato line-up above? For the past months I controlled OBS remotely using a phone or the iPad, but I didn’t use the Elgato Mobile app. You can opt for Elgato mobile, but it has a monthly or yearly subscription model. Again there are more affordable options. All starting with installation of the websocket plug-in in OBS. There are several to choose from. I’ve used the StreamControl app the longest, but eventually reached its limits. If you have just a set of scenes to control it’s perfect. It couldn’t handle my 20+ video sources to choose from during a live stream.
Please note that if you use Streamlabs OBS you can remote control with the Streamlabs Deck app. The Streamlabs Deck app can be paired with a QR code. I have the pure OBS version running, so this is why I need the websocket plug-in and I can’t use the Deck app.
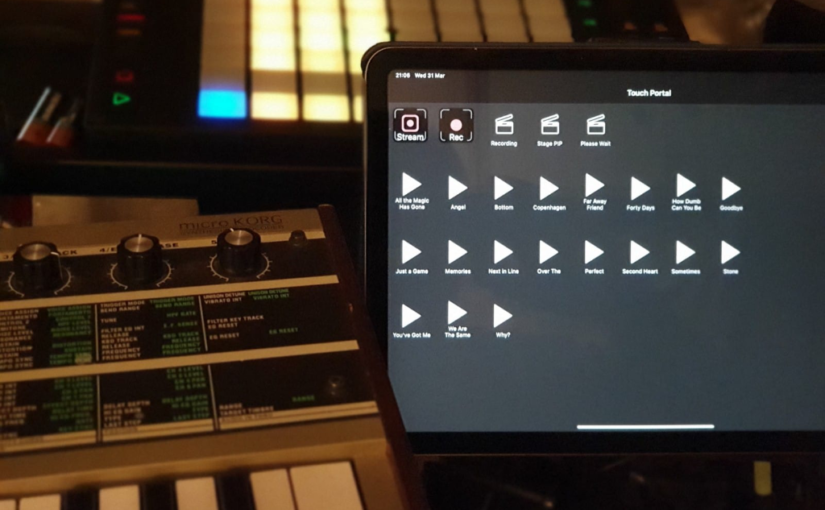
Touch Portal application
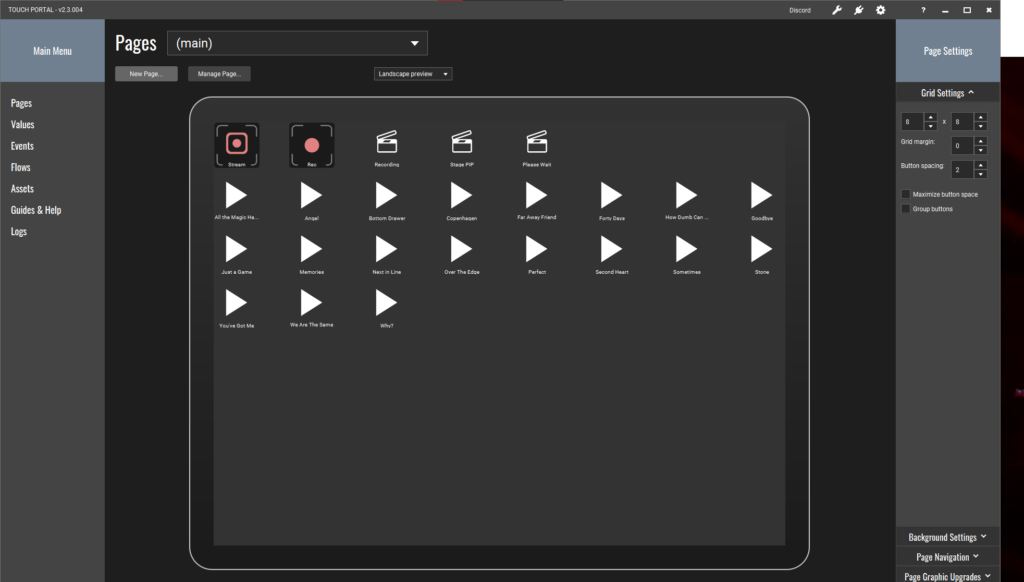
Eventually I stepped up to Touch Portal and that is what I use now. It can do your dishes, the laundry and reserve a table for your next dinner and also controls OBS. It also needs the OBS websocket plugin by the way. It has a companion Touch Portal app that you can install. I use the paid version on an iPad so I can use the full surface of the iPad to remote control so in total I invested 14 euro. I saw no other way to be fully in control and up to know it hasn’t failed me. If you have found a better way to remote control OBS during a live stream show, please let me know in the comments!
This is my first adventure with Deepfake technology. This blog is intended to show you how to get you started. In short its actually a technology that has a very dark side where it seems to be possible to make photo’s that show faces of people in videos or photo’s they’ve never appeared in by swapping faces. It can be done very fast and usually very unconvincingly by some apps on your phone.
The full blown and latest software can actually let politicians or your neighbor do and say crazy things very realistically and this way can corrupt your believe of what is truth or fake. Very scary. It also has a very creative side. Why can’t you be a superhero in a movie? I experimented with this creative side.
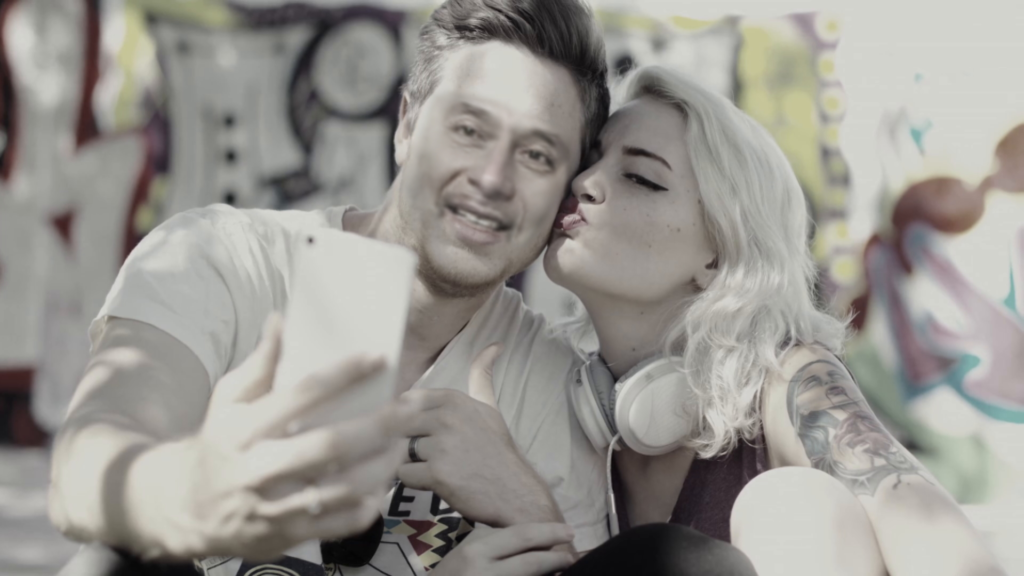
A new song for me is a new story to tell. Then a second way to tell the story is with a video clip and I like to tinker around with new ideas for video clips. Most musicians leave it at just a pretty cover picture and dump it on YouTube, but I like to experiment with video. There is a new song that is in the making now and I already found beautiful footage with a girl and a boy. The first step I take is to make a pilot with the footage and ask people if they like the concept of the clip.
Then I bumped into someone very creative on Instagram and when I showed the video it triggered some crazy new ideas. Why not make the story stronger with flashbacks? And there I thought why not swap myself in those flashbacks? The idea to use Deepfake technology was born. But how to get going with Deepfake?
Tools
First investigations led to two different tools: DeepfaceLab and Faceswap. There are many more tools, but in essence its probably all the same. Extraction tools to find faces in pictures. A machine learning engine like Tensorflow to train a model to swap two faces and converter tools to generate the final video. For you machine learning may be magic, but I already knew it from earlier explorations. Simply said its possible to mimic the pattern recognizing (read: face and voice recognizing here) that we humans are so good at.
Machine learning
Machine learning in the form that we have now in Tensorflow requires at least somewhere in the range of 1000 examples of something to recognize and the correct response to output when something is recognized. By feeding this into the machine learning engine it uses it can be trained to output a picture with a face replaced when recognizing the original face. To be able to make a reliable replacement the original and replacement data have to be formatted and lined up to make automated replacement possible. One aspect of the machine learning process is that it benefits a lot by GPU processing i.e. a powerful video card in your PC. This is important because current training mechanisms need around a million training cycles.
Faceswap software
I chose Faceswap, because for DeepfaceLab it was harder to get all the runtimes. Faceswap has a simple setup tool and nice graphic user interface. The technology is complex but maybe I can help you getting started. By the time you read this there are probably many other good tools, but the idea remains the same. The Faceswap setup first installs a Conda Python library tool. Then all the technology gets loaded and a nice UI can be launched. There is one more step you need to do. You need to find out which GPU tooling you can use to accelerate machine learning. For a NVidia graphics card you will need to have CUDA installed.
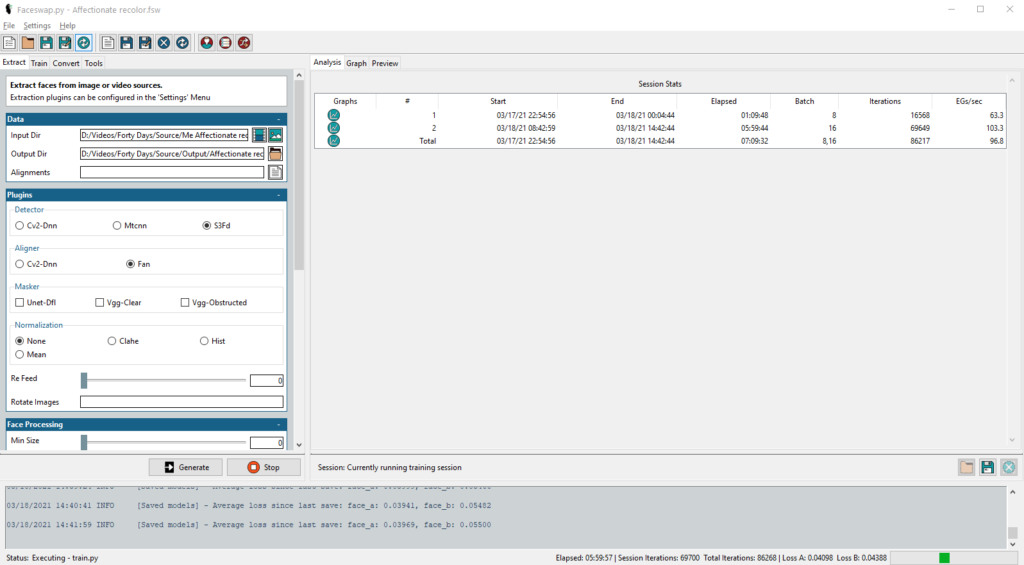
Step 1: Extraction
The first step is actually getting suitable material to work with. The machine learning process needs lots of input and desired output in the form of images. At least around 1000 is a good start. This could mean 40 seconds of video at 25 fps, but 10 minutes of video will work even better of course. You can expect the best results if these match up as closely as possible. Even to the point of lighting, beards, glasses etc. If you know the target to do the face swap on you should find source material that matches as close as possible
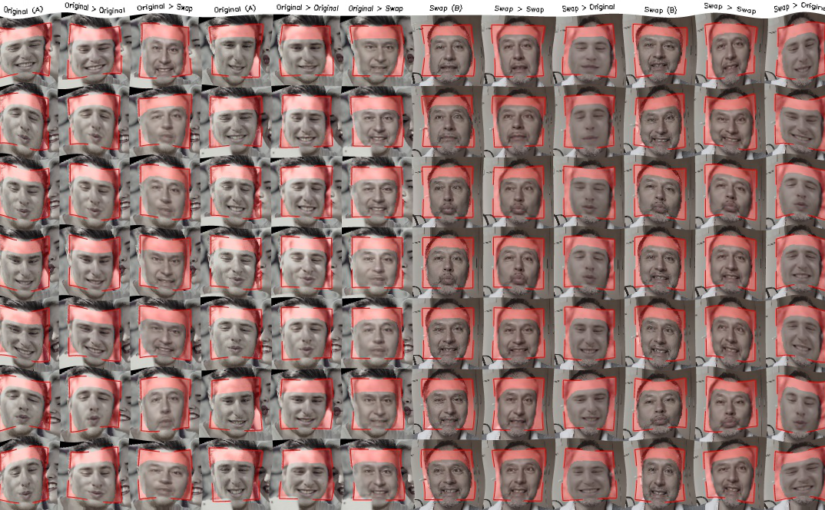
Then its extraction time. This means already applying machine learning to find faces in the input and then extract these as separate images. These images contain only the faces, straightened up and formatted to get them ready to be used for the face swap training process. You need to extract faces from both the target and source video. For every face image the extraction process also records where the extracted image is found and how to crop and rotate the face to place it back. These are stored in Alignment files.
After extraction you need to single out only the faces that you’re interested in in case there are multiple faces in either source or target. From that point you can go to the next step, but the quality of the end result depends very much on the extraction process. Check the extracted images and check them again. Weed out all images that the learning process should not use. Then regenerate the associated Alignment files. Faceswap has a separate tool for this.
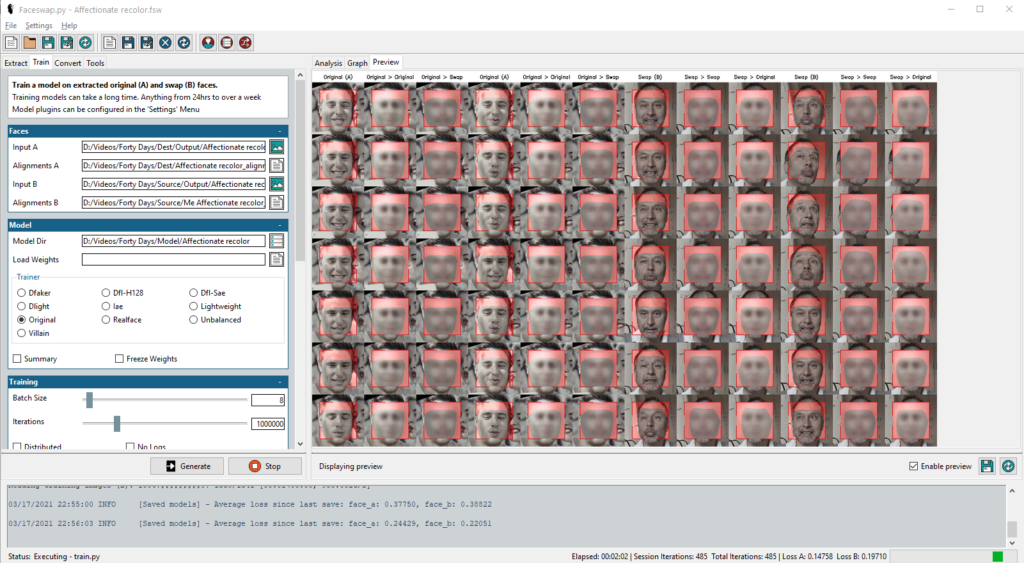
Step 2: Training
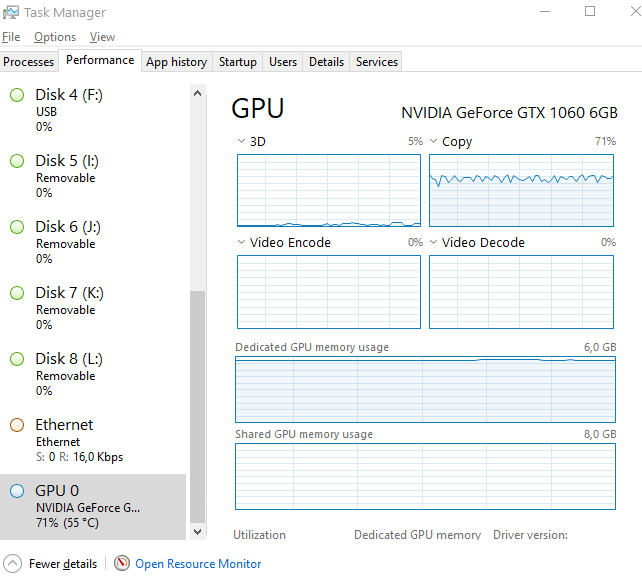
By passing in the locations of the target (A) and source (B) images and Alignment files you are ready for the meat of the face swap process, the machine learning training. Default settings dictate that training should involve 1.000.000 cycles of matching faces in target images to be replaced by faces in the source images. By default for all machine learning the software hopes that you have a powerful video card. In my case I have an NVidia card and CUDA and this works by default. If you don’t have a video card you can work without one. I found it slows the process down by a factor 7. My GPU went from 35% usage to 70% usage.
Deepfake GPU usage
In my experiments I had material that took around 8 hours to train 100.000 times, so it would take 80 hours to train 1.000.000 times. Multiply that times 7 and you know its a good idea to have a powerful video card in your PC. During training you can see previews of the swap process and indicators for the quality of the swaps. These indicators should show improvement and the previews should reflect that. Note that the previews show face swaps vice versa. So even at this point you can switch source and target.
Training process with previews
I saw indicators going up and down again, so at some point I thought that it was a good time to stop training. I quickly found out that the training results, the models, where absolutely useless. Bad matches and bad quality. At that point I went back to fixing the extractions again and rerunning the training. Much simpler, if the previews show fuzziness of the swap, the final result will also be fuzzy. So keeping track of the previews gives you a good idea of the quality of the final result. The nice thing about Faceswap is that it allows you to save an entire project. This makes it easier to go back and forth in the process.
Step 3: Converting
This is the fun part. The training result, the model, will be used to swap the faces in the target video. Faceswap generates the output video in the form of a folder with the image sequences. You will need a tool to convert this to a video. The built-in tool to convert images to video didn’t work for me. I used stop motion functionality from Corel VideoStudio. If the end results disappoints, its time to retrace steps in extraction or training. Converting is not as CPU/GPU intensive as training. You can at any point stop the training and try conversion out. Then when you start training again it builds on the last saved state of the model. If the model is crap, delete it and start over.
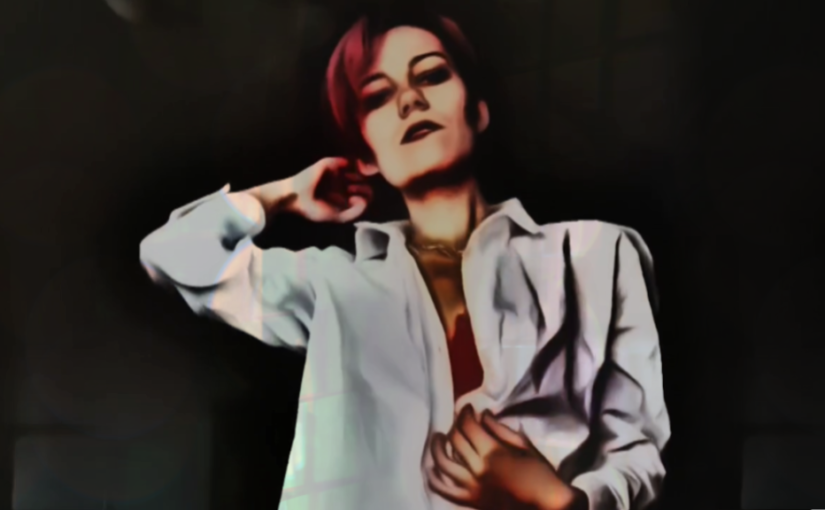
Deepfake sample (video DanielDash)
Here is a snip of the first fuzzy results. The final end result is not yet ready. Mind you, the song for the video clip is not yet ready. I will share the results here if it is all done. I hope now this is start for you to try this technology out now for your video’s! Please note that along the way there are many configuration options and alternative extraction and training models to choose from. Experimenting is time consuming, but worth it.
One more thing. Don’t use it to bend the truth. Use it artistically.
So this is what one of the interviewers said when I visited the local radio station here: “why not a cartoon video?” It was a passing remark when going over my video channel after the radio interview. Its something that this person, working with lots of creatives at the art academy in Den Haag, can easily say. But what if you’re just this guy in the attic? How to make a cartoon video? Not easy. This is how I got close to the result I was looking for with my video release for Perfect (Extended Remix).
A go to place is of course Fiverr. Here you can find animation artists and have your cartoon video in no time. There are actually animation sites that allow you to make your own animated video with stock figures and objects and I tried it. The first results where promising, but you need to go on a payed subscription to have maximum freedom. Even then you’ll find its mostly targeted towards business animations and infographics. A fun video clip animation is still hard to make. If you want you can try it: Animaker.
Eventually I stumbled upon this Video Cartoonizer. Its not free, but it seemed like it could do some pretty amazing stuff with “cartoonizing” existing video. You can see parts of the original video material here. Its quite funky and in many ways old fashioned software. It takes agonizing days to process video recordings like this, but the end result was quite amazing. Model Sara was also pretty pleased with the result. So there you have it. My first “cartoon” video.
I use cookies on this website to see statistics and make sure that you can find your way. By clicking “Accept”, you consent to the use of cookies for only this.
I will never sell your personal information. I'm in it for the music!
This website uses cookies to improve your experience while you navigate through the website. Out of these, the cookies that are categorized as necessary are stored on your browser as they are essential for the working of basic functionalities of the website. We also use third-party cookies that help us analyze and understand how you use this website. These cookies will be stored in your browser only with your consent. You also have the option to opt-out of these cookies. But opting out of some of these cookies may affect your browsing experience.
Necessary cookies are absolutely essential for the website to function properly. These cookies ensure basic functionalities and security features of the website, anonymously.
Cookie
Duration
Description
cookielawinfo-checkbox-analytics
11 months
This cookie is set by GDPR Cookie Consent plugin. The cookie is used to store the user consent for the cookies in the category "Analytics".
cookielawinfo-checkbox-functional
11 months
The cookie is set by GDPR cookie consent to record the user consent for the cookies in the category "Functional".
cookielawinfo-checkbox-necessary
11 months
This cookie is set by GDPR Cookie Consent plugin. The cookies is used to store the user consent for the cookies in the category "Necessary".
cookielawinfo-checkbox-others
11 months
This cookie is set by GDPR Cookie Consent plugin. The cookie is used to store the user consent for the cookies in the category "Other.
cookielawinfo-checkbox-performance
11 months
This cookie is set by GDPR Cookie Consent plugin. The cookie is used to store the user consent for the cookies in the category "Performance".
viewed_cookie_policy
11 months
The cookie is set by the GDPR Cookie Consent plugin and is used to store whether or not user has consented to the use of cookies. It does not store any personal data.
Functional cookies help to perform certain functionalities like sharing the content of the website on social media platforms, collect feedbacks, and other third-party features.
Performance cookies are used to understand and analyze the key performance indexes of the website which helps in delivering a better user experience for the visitors.
Analytical cookies are used to understand how visitors interact with the website. These cookies help provide information on metrics the number of visitors, bounce rate, traffic source, etc.
Advertisement cookies are used to provide visitors with relevant ads and marketing campaigns. These cookies track visitors across websites and collect information to provide customized ads.