OBS: With Green Screen

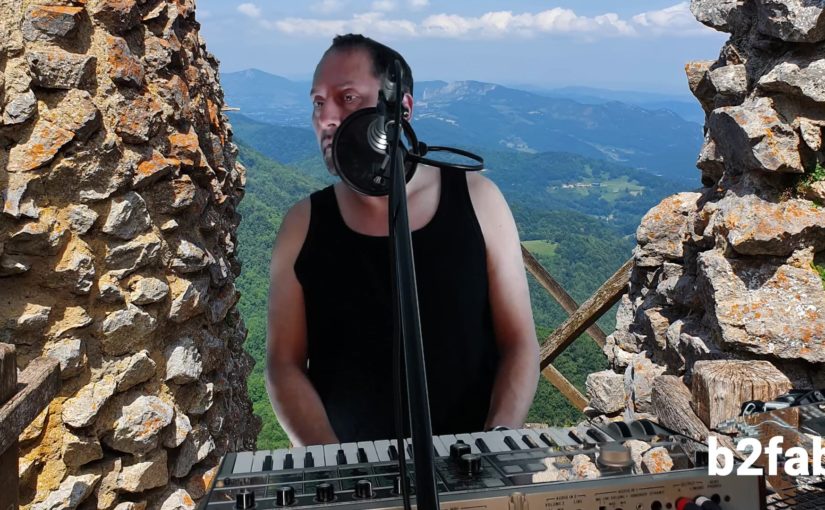
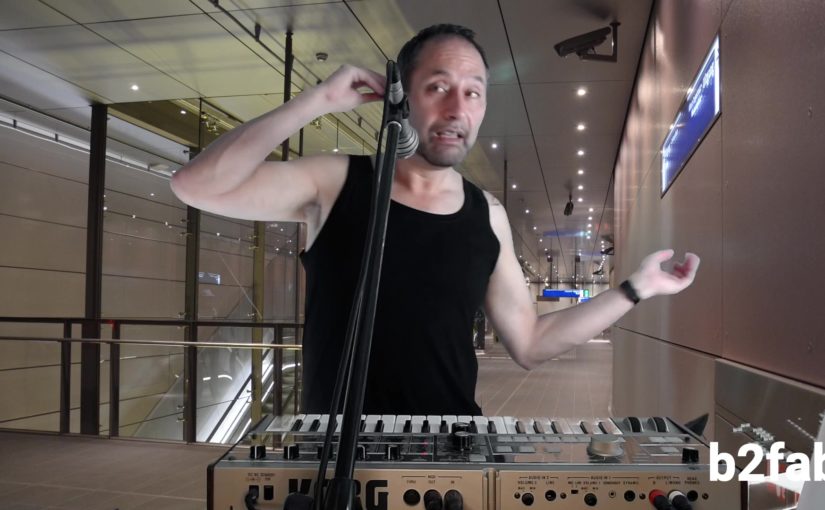
If you have seen my recent live streams, you will have noticed that I ‘travel around’ these days while live streaming. I’ve started to use the Green Screen effect. With OBS Studio its so dead simple that you can start using it with a few clicks in your OBS Studio scenes. Of course there are also some caveats I want to address. The main picture for this post shows you what it can look like. It may not be super realistic, but it is eye catching.

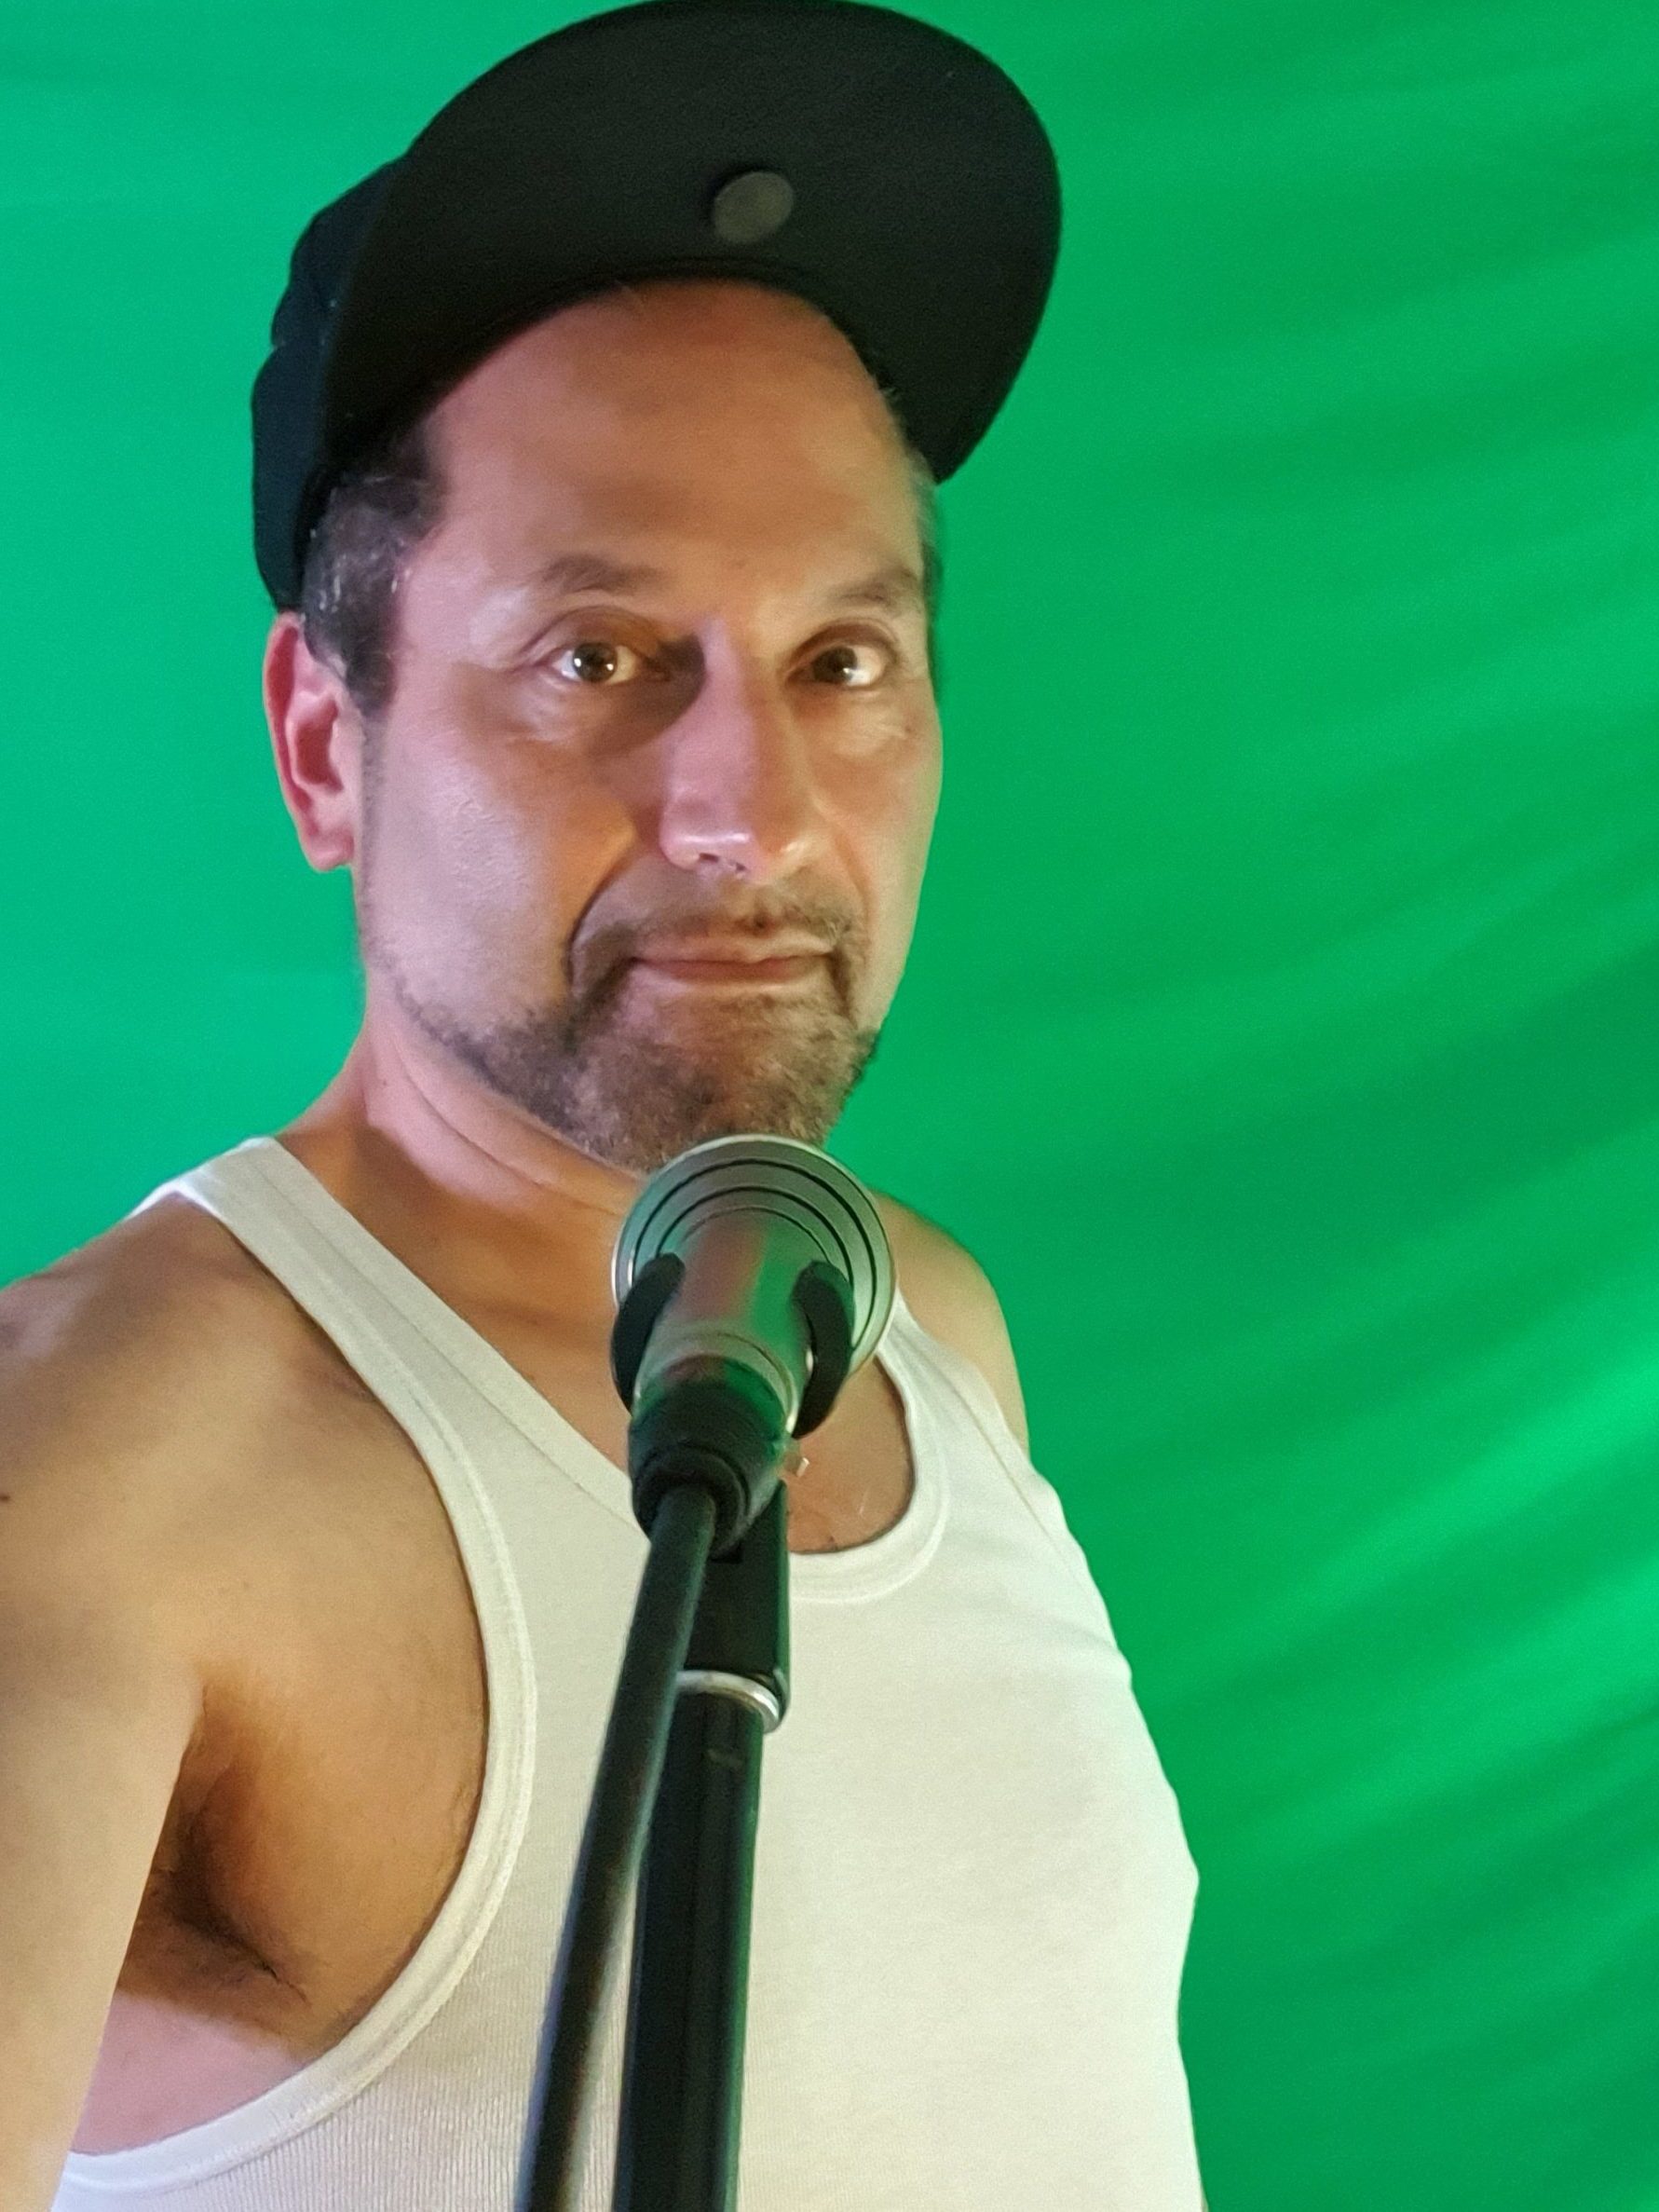
So what do you need to get this going? A Green Screen is the first item you need. It does not have to be green. It can be blue or blue-green, but it should not match skin color or something you wear. It should cover most of the background, so it will need to be at least 2 meter by 1.6 meter, which is kind of a standard size you can find in shops. It should be smooth and solid. Creases and folds can result in folds in the backdrop, but some rippling is OK.

Green Screen selfie
Green Screen selfie

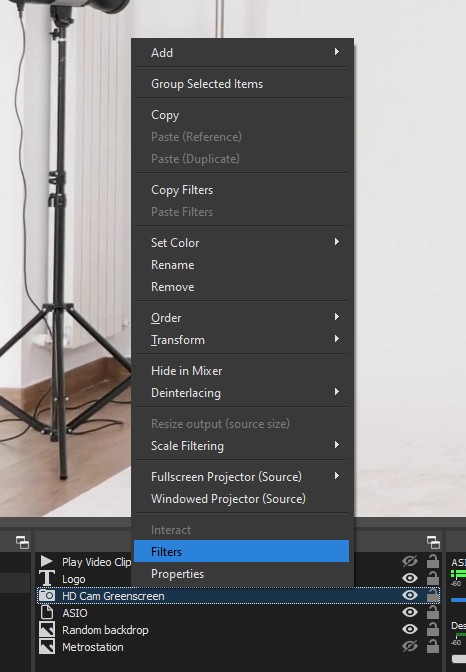
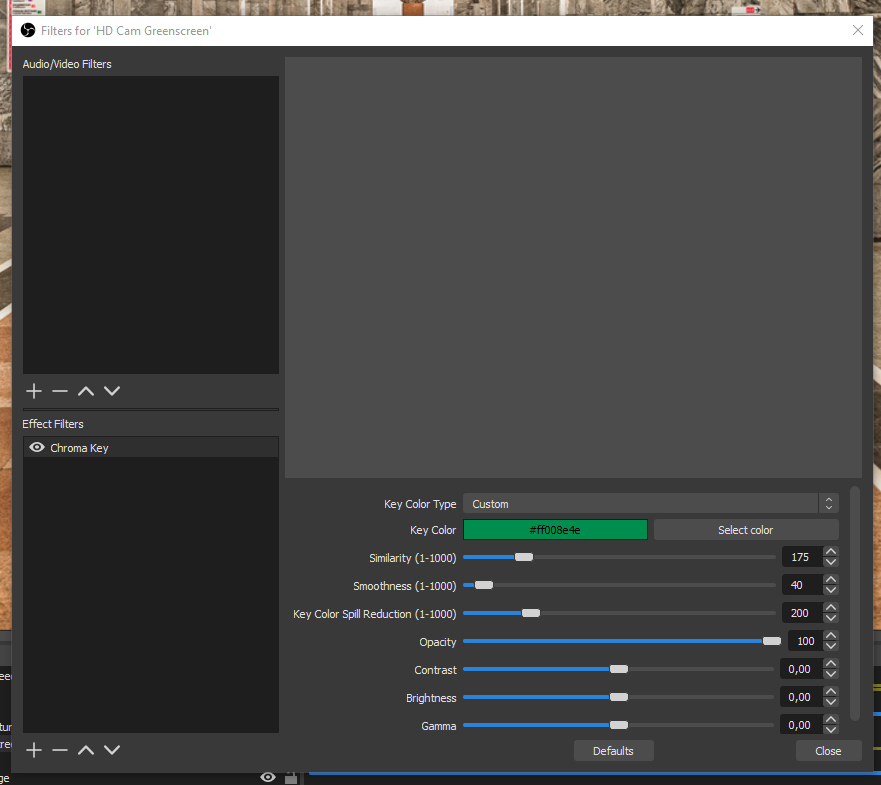
Then you need to set up OBS Studio. Its as simple as right-clicking your camera in the scene and selecting the Filters properties. In the dialog add the Chroma Key filter and select the color of your green screen. Then slide Similarity from somewhere around 100-250 to get a good picture. Everything outside the color range will become black. Then add a backdrop image (or video!) somewhere below the camera in the the scene list and you will have your Green Screen effect.

OBS Camera Filter
OBS Camera Filters
OPBS Chroma Key Filter settings

The first caveat I bumped into was that I set it up during daytime and it kind of worked, but then I found I stream in at night time and then you need light. In fact it turned out that 2 photo studio lights came in handy. When you use at least 2 studio lights they also cancel out shadows through folds and creases in the green screen. It does however bleed a little onto you as a subject, so you will be strangely highlighted as well. This is something you can also see in my first Amsterdam subway picture. Because of the uneven lighting in subways it does not really show. Not every picture is suitable as a backdrop. Photos with people or animals don’t work, because you expect them to move.

The second effect you see is that instruments with reflective surfaces also reflect the green screen. This will result in the background shining through reflecting surfaces. My take is that its a minor distraction, so I accept some shining through of the backdrop. Its also possible that some parts of your room don’t fit well with the Green Screen, doorways or cupboards. In that case you can choose to crop the camera in the scene by dragging the sides of the camera in the scene with the Alt-key (or Apple key) down. The cropped camera borders, will be replaced by the backdrop.

OBS: Live streaming with good audio quality

In a previous post I mentioned that I use OBS Studio for my live streaming and a little bit about how. It shows that I use an ASIO plugin for audio in the OBS Studio post, but why is it needed? For me in the live stream I want to recreate the studio quality sound, but with a live touch. After all, why listen to a live stream when could just as well listen to the album or single in your favorite streaming app? Lets first see where the ASIO plugin comes into play.

Live Streaming Setup

My setup in the studio is divided in two parts. One part is dedicated to studio producing and recording, with a Focusrite Scarlett 18i8, a digital Yamaha mixing desk and a MIDI master keyboard. For recording I use Ableton Live. The other part is the live setup, with (again) Ableton Live, another Focusrite Scarlett 18i8, a Clavia Nord, Micro Korg and the Zoom L12 mixing desk. The live setup will directly connect to the PA with a stereo output. Both sides run on separate PCs (laptops).

Home Studio Live Side

For OBS Studio and the live streaming setup, I chose to use PC on the studio recording side. Its directly connected to the Internet (cabled) and can easily handle streaming when it doesn’t have to run studio work. I play the live stream on the set dedicated to playing live and i use the live side stereo PA audio out to connect it to the studio side to do the live streaming. This means the live side if the setup is exactly as I would use it live.

Home Studio Recording Side

It all starts with the stereo output on the Zoom L12 mixing desk, that normally connects to the PA. On the mixing desk there is vocal processing and some compression on all channels to make it sound good in live situations. To get this into the live stream as audio I connect the stereo output to an input of the Yamaha mixing desk. This is then routed to a special channel in the studio side audio interface. This channel is never used in studio work.

Of course it could be that your live setup simpler then mine. Maybe only a guitar and and a microphone. But the essential part for me is this that you probably have some way to get these audio outputs to a (stereo) PA. If you don’t have a mixing panel yourself and you usually plug in to the mixing desk at the venue, this is the time to consider your own live mixing desk for streaming live. With vocal effects and the effects that you want to have on your instruments. Maybe even some compression to get more power out of the audio and make it sound more live.

But lets look at where the ASIO plugin comes into play. The ASIO plugin takes the input of the special live channel from the Yamaha mixing desk using the studio side audio interface and that becomes the audio of the stream. Because I have full control over the vocal effects on the live side, i can just use a dry mic to address the stream chat and announce songs. Then switch on delay and reverb when singing. Just like when I play live, without the need for a technician even.

Playing a live stream is different from playing live, because it has a different dynamic. In a live stream its OK to babble and chat minutes on end, this is probably not a good idea live. I find however when it comes to the audio, it helps to start out with a PA ready output signal. Similar to the audio you would send to the PA in a real live show. Also it helps to have full hands on control over your live audio mix to prevent you having to dive into hairy OBS controls while streaming live. Lastly, for me its also important that streaming live is no different from a playing live at a venue in that you can break the mix, miss notes, mix up lyrics and that you feel the same nerves while playing.