Understanding audio mixing and routing in OBS

Last Friday I had a Halloween themed livestream in OBS. I wanted point the viewers to my upcoming song release and I wanted to play back a video with an interview I had with Pi.A about our collaboration on the new song. I tested everything in the afternoon and in the evening it turned out that there was no sound on the stream from my audio system. Bummer. After restarting the stream seemed to work again. Just a touch of real Halloween horror? I hope I can help you troubleshoot or make more advanced use of audio mixing and routing in OBS.

I spent this whole afternoon checking and rechecking my audio mixing and routing in OBS and I found no problem at all. It turns out that these things just happen. Let’s say that that is the charm of performing live, lol. However, it was something that had been long on my list to check out thoroughly, because I also had problem earlier with audio. So here is a recap of everything I know now.

Since you are probably a musician reading this, I won’t bore you with mixer basics like dBs and I’ll assume that you know how clipping sounds on audio output. I will also assume that you have no interest in Twitch Video On Demand stuff that is baked into OBS, because it is more geared towards gaming streamers.

It all starts with the sources

Every OBS source that outputs sound will appear in your center Audio Mixer panel. You can adjust the levels to your needs. Green is the safe area. Yellow is where your speech and music should ideally be. Red is the danger zone where the dreaded clipping might occur. You can mute a source to make sure it will not be recorded or streamed. By default all audio sources will be mixed to your stream or recordings.

OBS for now misses a master output level indicator. It might be added in the future. So if you mix in many different sources you end up guessing if the output will be OK. For now I exclusively mix the ASIO source, so that makes it easy to make sure the output is right. I mix in the Desktop audio just in case I have a sound from the PC I want to quickly mix in.

Just to be sure I added the Limiter as a filter. It’s not impossible to get an overcooked sound in the livestream, but the risk of clipping or overcooking goes down.

On the right track
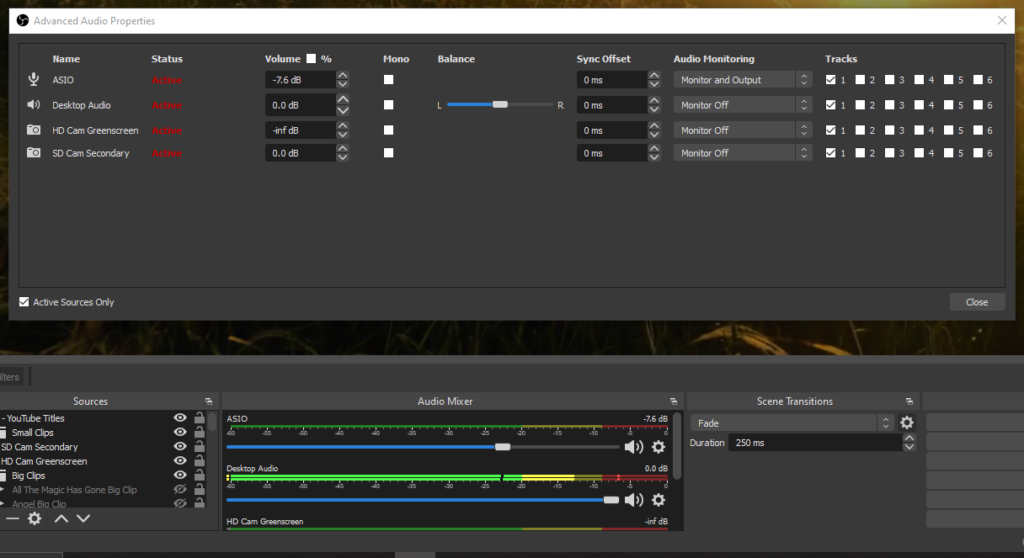
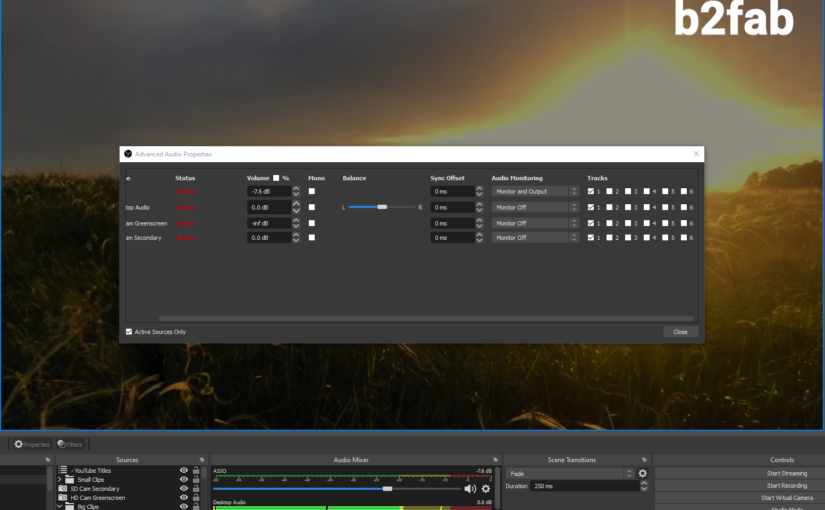
If you right click in the Audio Mixer section you can go to the Advanced Audio Properties. Here you see all your sources, that is to say you can still choose to see only active sources. I have more complex scenes where I choose per song I play live which sources are active. On the right side you will see a block of six Tracks. These are stereo tracks you can mixdown to, so in fact you have a mixer before you with six stereo tracks.

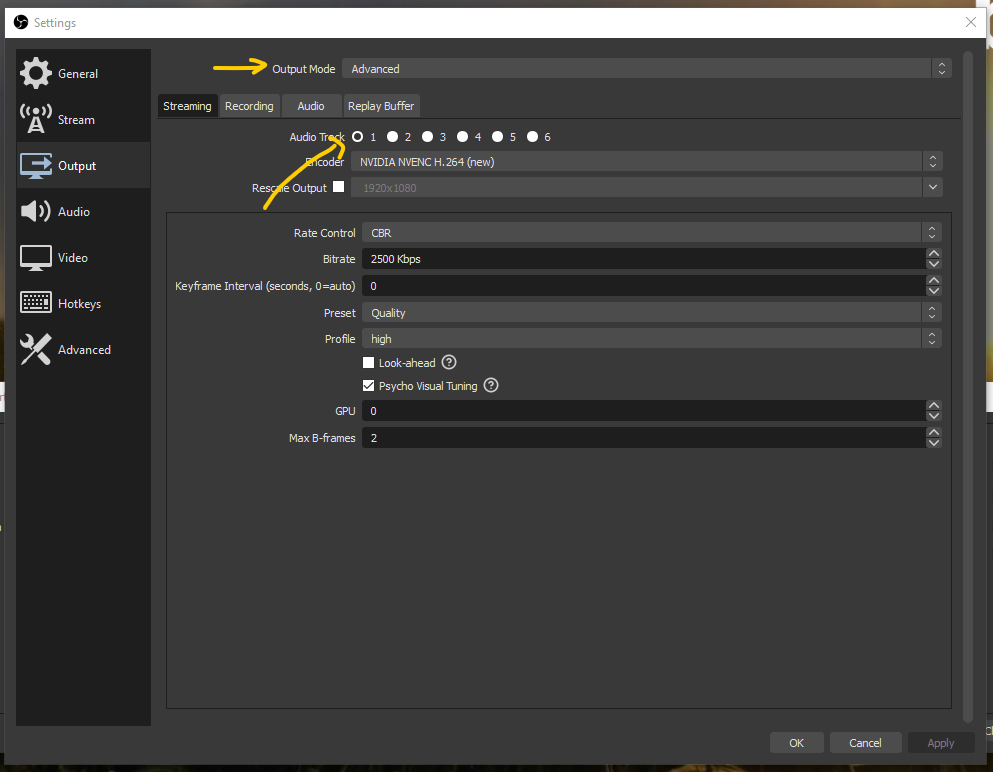
Your live stream will use only one track. You can choose which one in the Advanced Streaming Settings for Output. By default it will be track 1. Now what is the use of having separate tracks to mix to? These tracks can be used for recording video with OBS. The tracks will end up written separately in the video file it records.
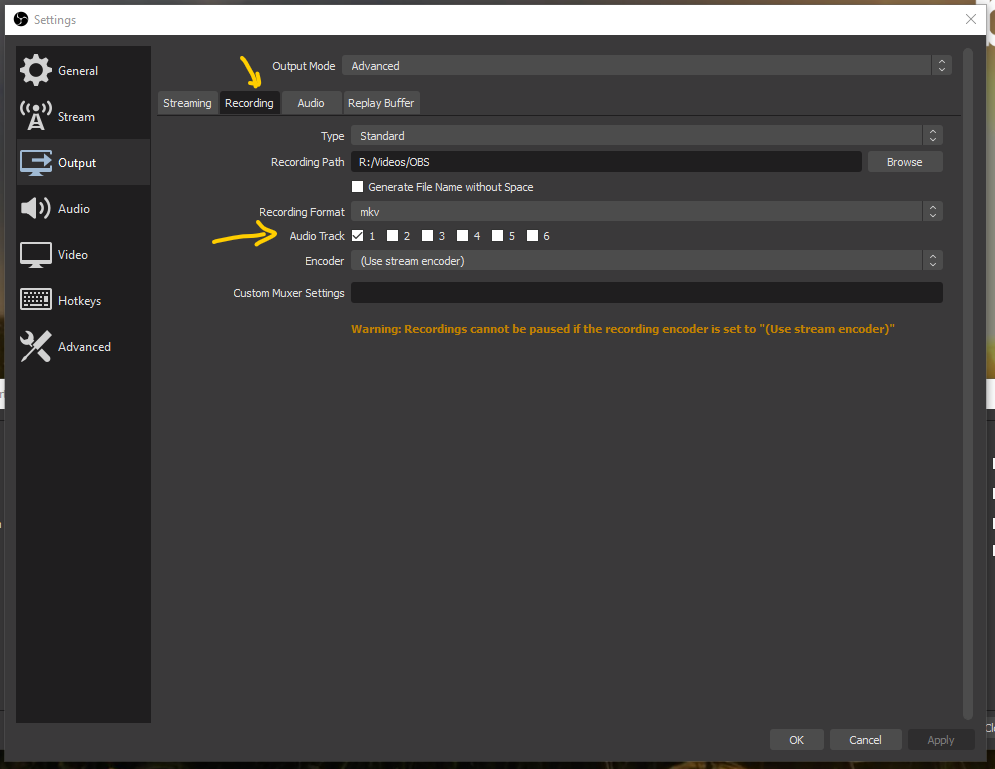
Gamers use this to have a track with the sound of the game and a track with their voice-over. Maybe also a separate track for sound effects and one for music. Then when they stream to Twitch they can leave out copyrighted music and still upload to YouTube with music. In the Advanced Recording Settings for Output you can choose which tracks will be written into the video output file.
Monitoring the output

If you leave everything set up as it is by default, all audio sources will output to your stream or recordings as you have just set it up. However there will not be any monitoring of the streamed or recorded output. This makes it heard to find the balance between different sources, if you have them. If you want to start monitoring you will have to select a Monitor option in the Audio Mixer settings. So there is also a stereo monitoring channel next to the six tracks.

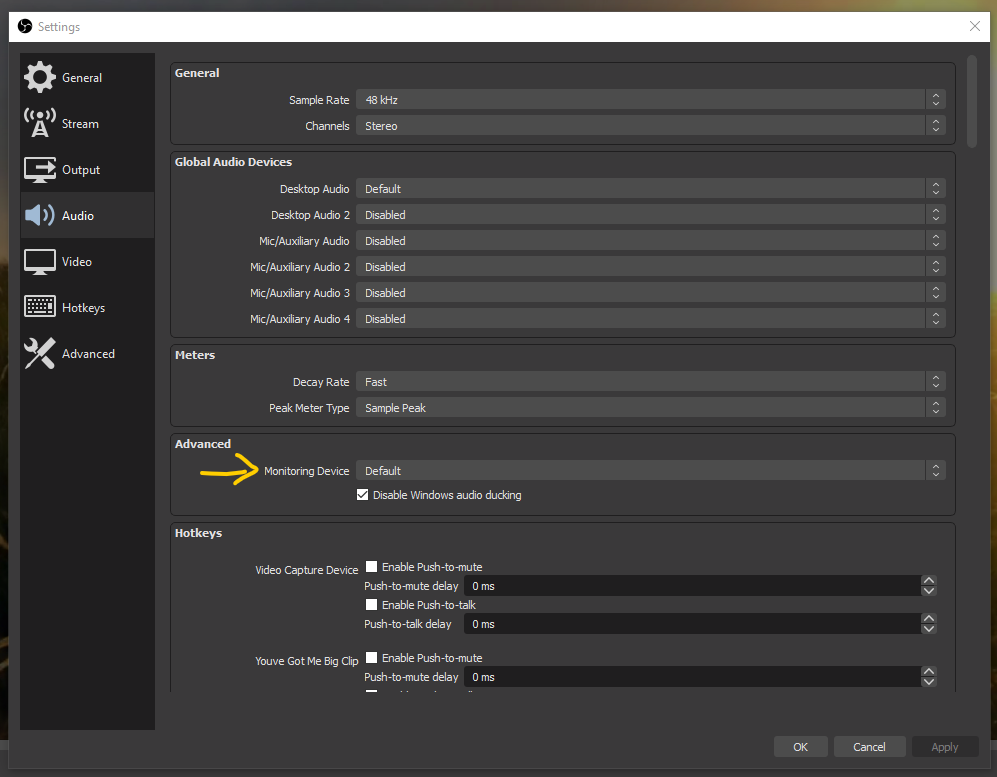
In the Audio Settings, you will find the monitoring section. Here you can choose where to output the monitoring to. Please be aware of the latency that OBS introduces on the monitor output. You can’t use it live. You can just use it to find the right balance between different audio sources.
So what if there is no sound?

If you look in the monitoring options for an audio source in the Audio Mixer, there is even option to output sound to the monitoring channel, but not to the output tracks! So there is the option to set the level of an audio source to -inf, to mute the output and the option to switch off output to any of the output tracks. On top of that you could choose a track that does not get mixed to your stream. Very flexible, but it can also make it hard to find out why you have no sound on your stream.

There are only two ways to test your audio before really going live. The first one is to make sure you output the same track as your streaming track on a recording and then record a short video. The second one is to stream to an unlisted (YouTube) or private (FB) stream and then check the result. In short it is a miracle that this was the first time in maybe 50 livestreams that I had audio problems. Because it is live it is hard to know what the audience is hearing. I always ask at the start of a stream. Audio is really a tricky thing in a livestream to get right.
Let’s fix it in the mix!

Of course, a good mix starts with a good recording. Buzzes, clicks, mouth noise, pronunciation problems, phrasing, irritating transients can all spoil the core of your song. For me in the home studio it’s just a question of starting over again, but for you it might mean booking more studio hours. Always hoping to get the same setup as before and the same flow.

If all else fails: let’s fix it in the mix!

After many years of working in the studio I think I have all the tools ready to fix all of the problems I described above and more. I had one article before about Fixing phase problems in a mix. Another time I got to fix the audio of a precious video recording that was completely blown out and clipped. After having fixed maybe thousands of instrument and vocal recordings, I can now truly say:

If you have a precious recording or anything that needs to be rescued to bring it back to useable in your mix, please contact me to have it fixed.

Home Studio Recording Side

Livestreaming with good audio quality with the Zoom Livetrak L-12

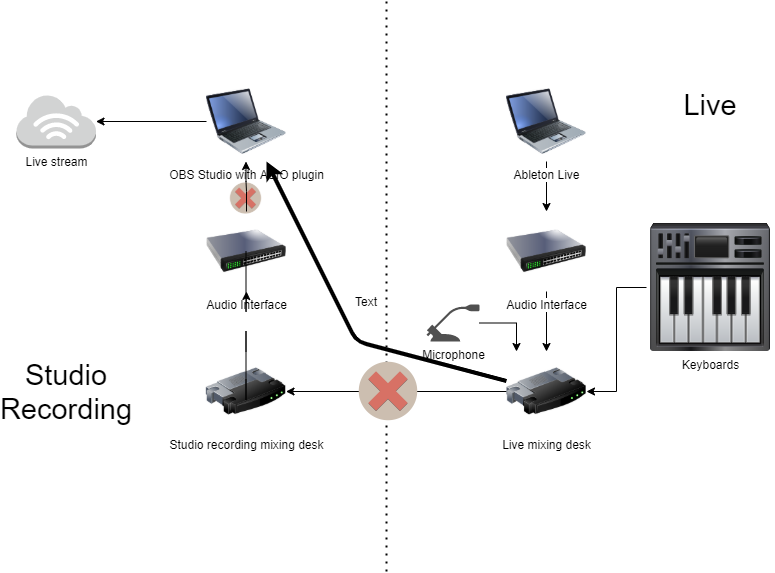
In a previous post I discussed how I try to have good audio quality for my livestream with OBS, by linking up a mixing desk I use for all live performances with a studio audio interface that I use for live streaming. So the idea is that when I know how to mix my live performance I can also livestream that mix with good audio quality. OBS supports high quality audio with an ASIO plugin, so all is great.

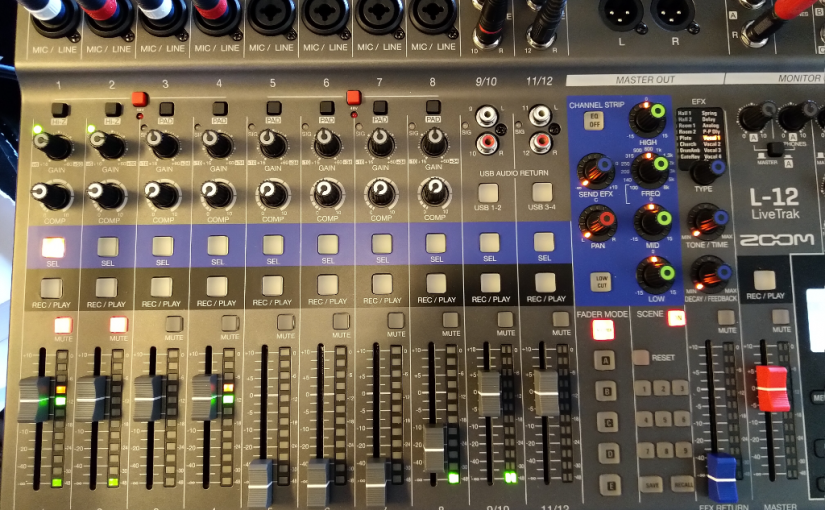
The mixing desk I use for live shows and streaming is the Zoom LiveTrak L-12. Lately I started using a separate laptop to do the livestreaming, not hooked up to the studio. For a livestream I would switch over the interface cable to the laptop. Only a few days ago I realized that the L-12 itself is an audio interface and I slapped my forehead.

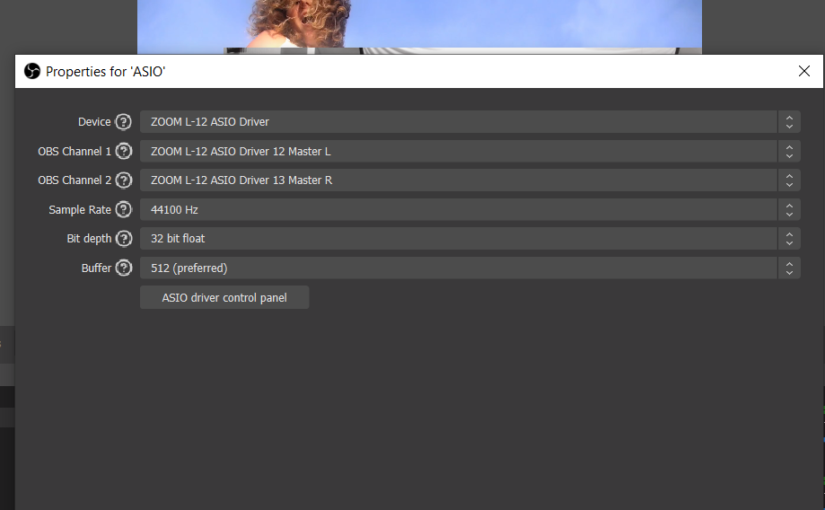
Sure enough, when installing the L-12 driver software and starting up OBS with the ASIO plugin, I could find the Zoom device. After assigning the master output channels to the OBS inputs it worked immediately. So now the setup is way simpler. The livestreaming laptop is hooked up directly to the mixing desk. The master mix now is hooked up directly to OBS.

Livestreaming setup simplified the L-12 connects to the streaming laptop

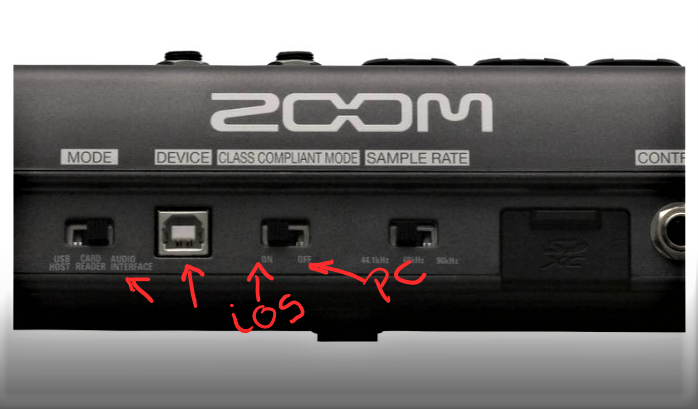
Now I asked myself, can I use the same trick to hook the L-12 directly to an iPad or iPhone to do livestreaming on Instagram, or other phone based streaming platforms? The L-12 can connect as a class compliant interface, so its no problem to hook it up to iOS devices. Software like Garageband will find its way in the Zoom inputs and outputs. You have to set a switch for this on the back next to the USB port.

Zoom LiveTrak L-12 Backside USB connector and switches

However, the master outputs are not output channels 1 and 2, so iOS devices cannot pick it up as the default audio input. So no easy live streaming on the iPad or iPhone directly from the L-12 unfortunately. For this you will need to hook up another class compliant interface that picks up the mix desk outputs and does output the master mix on channels 1 and 2.

The secret sauce: Molekular effects

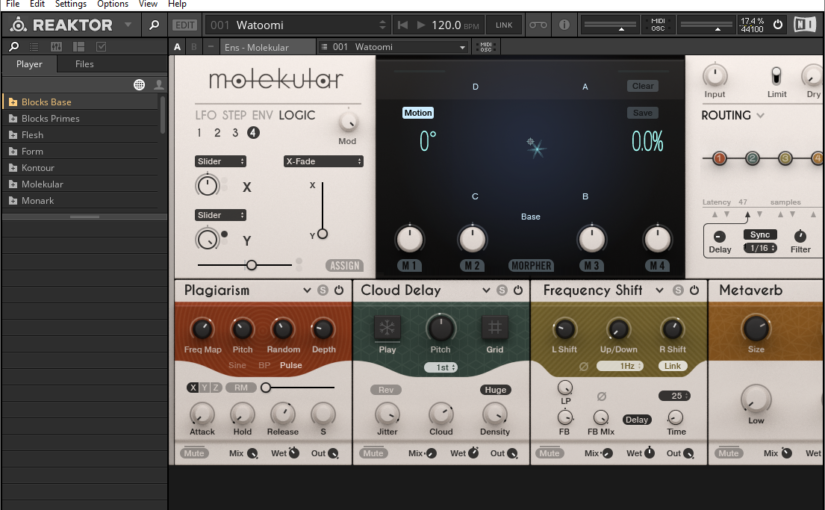
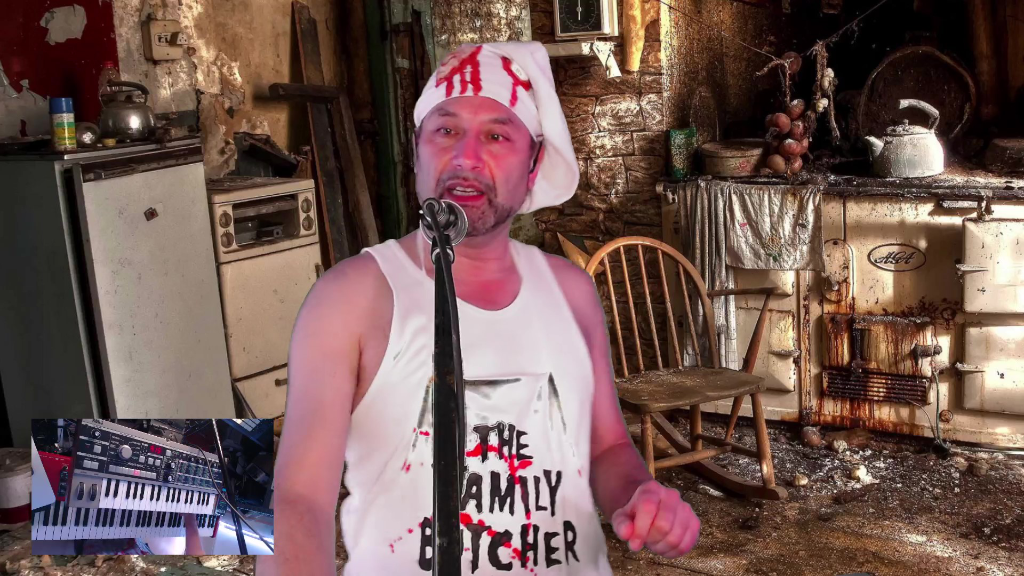
This is a glance in my kitchen where I will tell you my kitchen secret: the sauce. You will find it somewhere on almost every song I released, the Molekular effects inside a Reaktor FX chain. This is an effect powerhouse that I use to bring life to otherwise maybe repetitive or otherwise uninteresting sounds. It’s well hidden somewhere in the infinite sound and effect library of Native Instruments. However, if you use Reaktor as part of your workflow, you might already know it. It’s sound experimentation to the max.

Sound experimentation to the max! A messy kitchen
Sound experimentation to the max!

It’s hard to dive into the features of Molekular, because its really overflowing with possibilities. Just a look at the interface can already make your brain explode. Imagine that underneath that interface all kinds of wires are running to connect everything with anything. Reaktor users will be used to it, because it will be just a set of modules like all other modules. Please check out all video’s explaining the Molekular effects chain on the Native Instruments site.

Molekular effects
Molekular effects

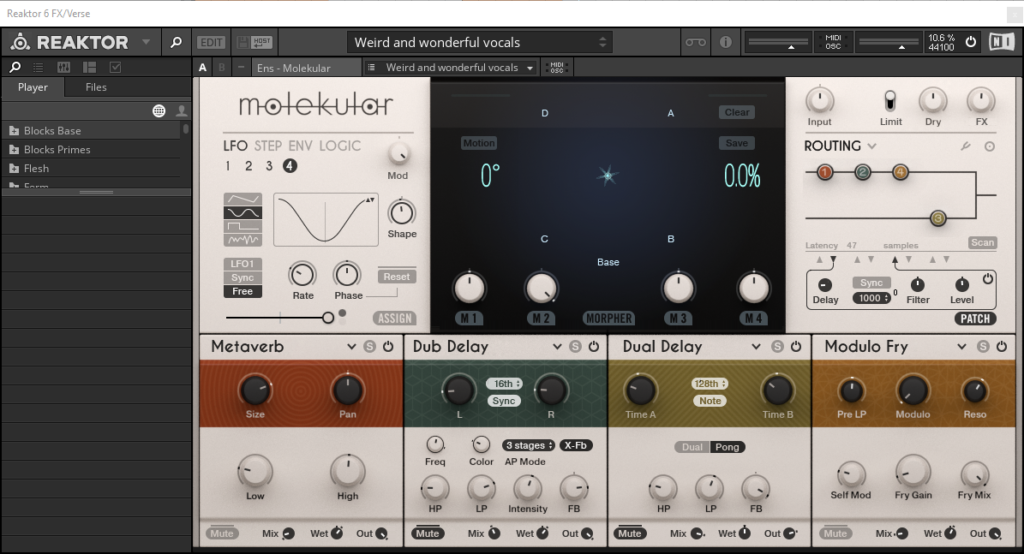
I will try to make a start though. It starts with putting a Reaktor FX plugin in your effects chain. Then inside the FX plugin you load Molekular. Then in essence it starts on the bottom row. There you will see a chain of effects, that you can start modulating. The chain connections are depicted in the top right section. Effects can be chained one after the other, or parallel, or a combination of serial and parallel mixed. Then in the top left and middle you can choose how to modulate all the effect parameters.

The effects are just plain awesome. Hard filters, delays, reverbs, pitch shifters. Everything you need to bring bland sounds to life. You can make a rhythmic track tonal, or vice versa. You can drown sounds in distorted delays or otherwise alienating effects, or bring subtle life to a sound.

On the left side there are LFO’s, Envelopes, a step sequencer and a complex form of logic modulation. The modulation methods kind of overlap here and there and can then be interconnected to multiply or randomize the modulation of the effect chain. Then in the middle is a center piece, an X-Y modulator that can be set in motion by logic or the step sequencer, or by you.

The greatest power of this all is that if you replay your song you will have all modulations, no matter how complex, take place exactly the same way. The modulation can have complexity, but also repeatability in time. If you are a fan of totally random every time, this is always an option. For me the magic is the repeatability.

It means that I can just try some alchemy in effect chains and mess around with the modulation. If I find something that sounds cool, I can let it sound as cool every time. Assuming that you, like me, start the render from the same point every render time, the modulation of the effects will be the same. I find it inviting for experimentation, because it is rewarding if I find something that works.

There is only one problem now. With my luck, now that I tell you about it, it will probably jinx everything and it will be discontinued or stop functioning soon. This will really mean that I will have to freeze a machine software wise to allow it to keep running Molekular. With this in mind I will just tell you about it, so you can do the same.

When you need a patchbay

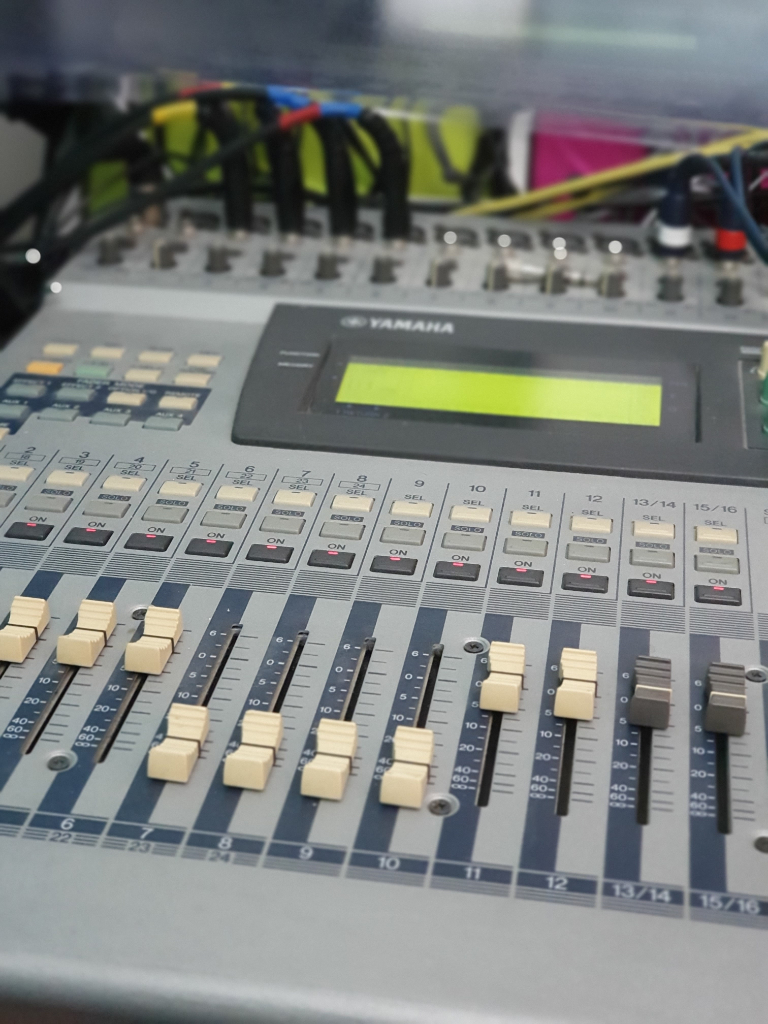
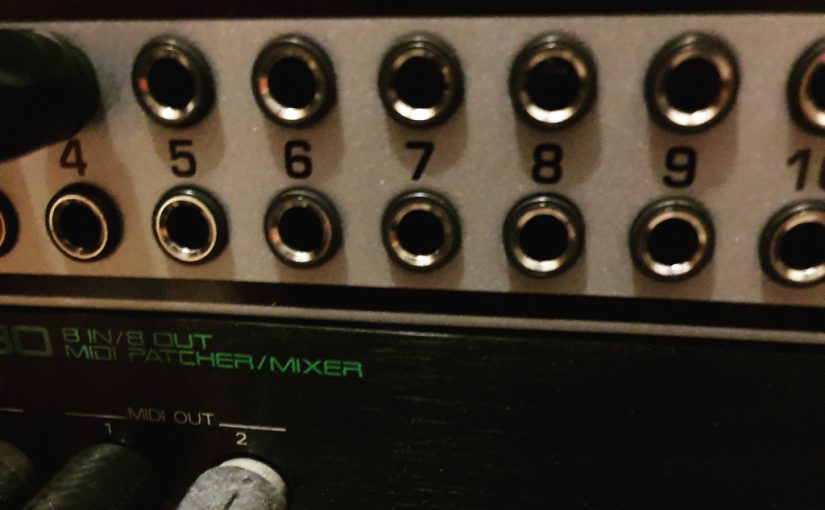
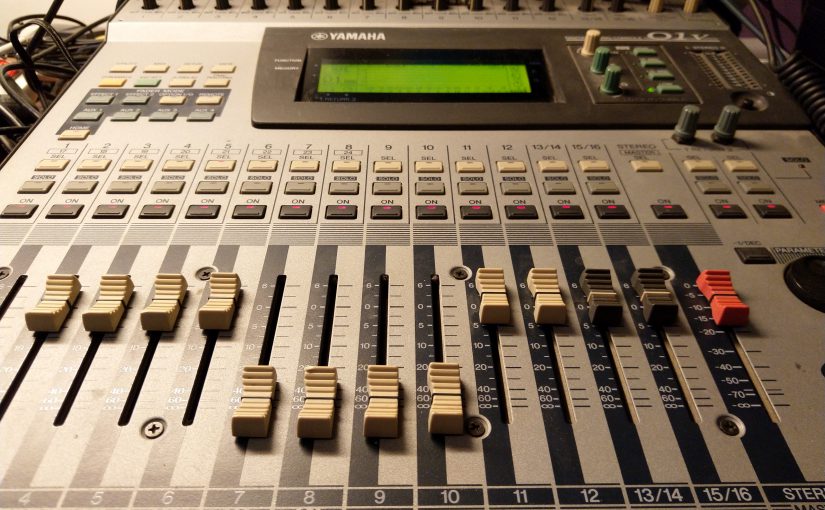
You might already have seen this on my socials. A nice photo of a new box stacked alongside my MIDI patchbay. Lately studio life got more complicated. I have 2 mixing tables. One for working in the studio and one for practicing live gigs. I found myself plugging instruments in and out of these mixing tables. Also, the studio mixing table, a Yamaha 01v, is getting old and some switches now already noticeably start making noise. For me this was the sign to start saving the desk and considering a patch panel.

You can spend any amount on a good one, but for my modest home studio purposes I chose the Behringer Ultrapatch Pro PX3000. With 48 channels it is well beyond my need to patch 6 channels across 12 inputs. But hey, who knows what will happen in the future. And it doesn’t break the bank at around 80 euros.

Plugging the instruments across the inputs of two tables now won’t wear down the inputs on the more expensive mixing desks any more. There is even be an option to use the patchbay in half-normal mode. In this mode I can make a setup to send the instruments to both inputs at the same time. Then you have to factor in the impedance of both mixing desks against the line outs of the instruments, but to my calculations it might just work.

Make your own affordable dust covers

I am a big fan of custom made covers for all studio equipment. Dust kills the quality of connectors, sliders and switches. If possible I try to use the dust covers from the instrument or equipment manufacturer. Otherwise I try to look for a Decksaver, because actually these are very clever desk space savers as well. And they fit like a glove. All too often however I find that there is no custom cover that exactly fits.

I tried to find custom covers for the Yamaha 01v and the MicroKorg, but couldn’t find any. My current solution for this is to buy flexible transparent foil and have it cut to a little more than the surface area of the device. It can attract dust, but at least the dust does not get in the equipment. It also looks quite professional and is easy to pull over the surface and slip away again.

For me this beats ill fitting cloth covers and other half baked solutions, like putting it in a box. The best alternative could be to buy thick sheets of perspex and glue a custom cover. There are shops that support you in building your own perspex cover. It will however never be as sophisticated as Decksaver covers, with extra space for knobs and bends in the device. If you’re on a budget, at least put a sheet of transparent foil over your equipment and make it last longer.

Perfect for small venues?

For a while now I have been starting up my live show. After five years of building a repertoire, I feel the next step is playing it live. I have been lucky to have had my “real pop star moment” with my previous band. A CD recording contract and live touring abroad. Now I am back to step one with my own music project.

Starting up, the most important for me is to record all practice sessions and to record all tryouts. For this purpose I have invested in multitrack recording stuff. It might just be that there is a gem in these recordings that needs exploring and investing in. This is what I learned in the previous band. Recoding, recording, recording… Learning, exploring, improving….

Multitrack live recording is easier than ever. It used to be only Tascam with analog 4 track tape recording, but now its digital 8, 12 or 16 track recording with computers, or Zoom or more exotic brands. CD quality or studio quality even. For now I focused on Zoom, because they make really affordable devices. I am not scared of using computers, but for me now it needs to be one single reliable device. Not another chain of devices with a computer at the end.

Zoom R16
Zoom R16

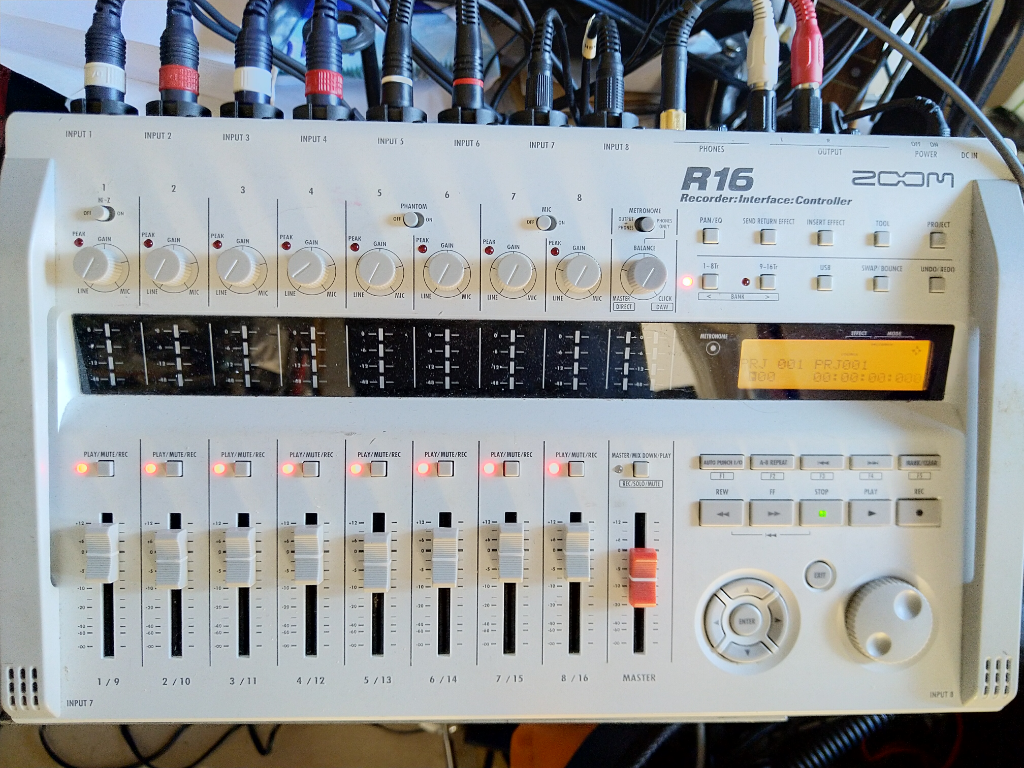
So I tried the Zoom R16 first. This is a true 16 track recorder. It has the shape of a mixer, but it is actually only a multitrack recorder. It can record 8 channels at once, but has a limitation for the SD card at 32GB. My problem with it was the sound quality as a mixer, that makes it difficult to make sure that the recordings are Ok. Also it tempts you to use it as a live mixer, but it does not have adequate send/return/monitoring chain at all.

Enter the Zoom LiveTrak L-12. The sound quality of the mixer is immediately a lot better. It can record 12 channels at once. It also accepts larger SD cards and record at higher bit rates then CD quality. Unfortunately, the send/return and single effect chain is still a bit meagre. You do have a compressor per channel, but when you use it, its recorded compressed as well. This might not be what you want. The monitoring chain is a different story. Its amazing. Four, or even if you really need it a fifth monitoring channel if you separate it from the master mix.

All in all, this cannot be your live mixer for all purposes. Just because of the limitations of the send/return and single effect and the compression with the penalty of also recording it. However it is probably exactly the mixer that you’ll find in any commercial practice room. So just replace it with this one and you could have a multitrack recording of all your practice sessions. Awesome! Now if you hit a gem, you can mix it down to a demo later.

Can it be your mixer for live venues? Absolutely! Connect some active speakers and you’re live. Unless you need more send/returns and effects live of course, then you need to bring a real live mixer. The challenge will then be to connect separate tracks of that mixer to the multitrack recorder. Hopefully, that live mixer has at least enough monitor channels or busses. Otherwise you’re stuck with a recording that does not give you enough options to remix the live recording.

Now in practice, how does it work when using the LiveTrak as a multitrack recording mixer? First of, as a mixer it will remember all your mix and recording settings as part of something that Zoom calls a Project. It will save it all on the SD card when you switch off and on. You will need to make sure that you do switch off and on again on the device, not just pull the power plug. When you switch projects then you can save different mix and recording settings per project.

Like an advanced digital mixer all fader settings are saved. But because it does not have motorized faders, a led shows the stored fader settings and such. When you hit that point of the fader again, you can change the value and save that again. This applies to all mixer settings in general. To extend on this you can save 10 different scenes per Project.

Zoom Export to USB
Zoom Export to USB

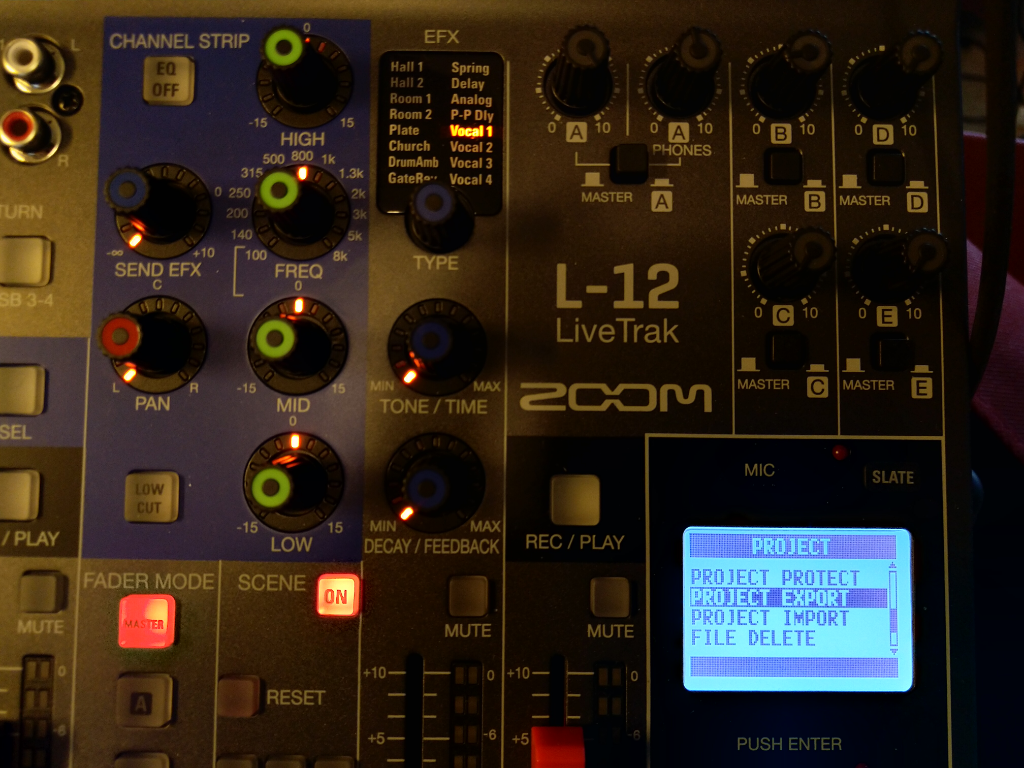
This is nice, but you cannot from the menu simply clone a project. There is a trick however, if you switch to USB host mode you can save and restore projects on a USB stick. The trick here is to save and restore an existing Project to a new name. This way you can start recording to a new Project with settings from an existing Project.

So there you have it. This is how I use this now and I know what it can do for me. I think it is great as a practice room mixer and for small venues. Please check the Zoom site or review sites to read more about all other modes and features of the LiveTrak. I don’t use any of the other modes, so I have no experience with any of the other features. It might work for your specific purposes as well.

Do you need a digital mixer in your home studio?

This is something that has puzzled me for some time. Do I actually need a digital mixing desk in my home studio? Well, technically no. Modern audio interfaces have a mixer on-board. So if you need 8 inputs, you could just make sure that you have an audio interface with 8 inputs. Starting at around 200 euros. Going up all the way to 3000 euro’s if you can or want to spend it for top quality. Now there are several reasons for me opting for a digital mixing desk and it all comes down to flexibility.

What you don’t want is a chain of devices that add noise on every recording. So an analog desk connected to your digital audio interface is probably a bad idea. Unless it is a very high quality analog desk with a unique sound. Something that would set you back the price of a new car. So lets try to stay in the digital domain for a better price/quality ratio.

One of the reasons to eye the higher priced segment of audio interfaces is the option of a direct cue mix. A singer, or solo musician is usually best recorded dry if you don’t have the luxury of working in a room with a nice sound or at least a quiet room. On the other hand lots of singers like to have monitoring with a bit of ‘room’ on it. A bit of reverb or even echo. When you can at least make a cue mix with just a touch of some effects on it, it can make the difference.

Now lets have the best of both worlds and flexibility. I chose the Focusrite Scarlett 18/8 2nd gen. It has 16 inputs, 8 analog and 8 digital and 6 analog outputs. Additionally it has stereo S/PDIF digital in/out. hence the total of 18 in and 8 outputs. Now connect the digital mixing desk to the ADAT 8 digital inputs of the Scarlett audio interface and there you have it: 16 inputs and enough cue mix options to accommodate recording of a complete band.

Ok, I was lucky to get my hands on a classic Yamaha 01V with ADAT interface, but I think it is still possible to get your hands on it or something equivalent for around 500 euros. Add to that about 300 euro’s for the Focusrite and there you have it: an affordable and also flexible setup that can accommodate any home studio recording session.

Connecting the Logitech Craft knob to Ableton Live

Just in, the gadget of the month: the Logitech Craft. I was looking out for some more control over the mixing process and of course there are many controllers. When you already have an Ableton Push what more do you need? Well actually there is a thing about me and Push. I cannot use it blindly, so I always have to look at either the screen, or the controls, or the display. When mixing in the Ableton Live arrangement view it gets worse. Mouse, keyboard, screen, Push… It is at its best in Session View.

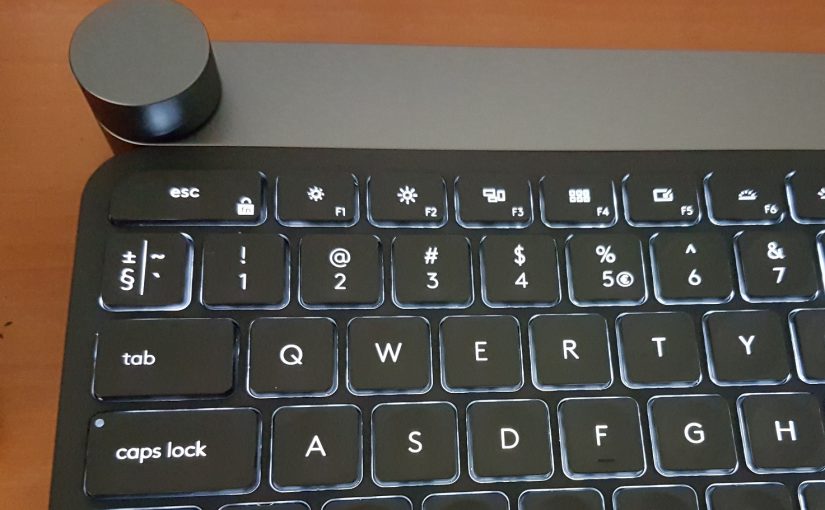
There were two things I was looking for. A high quality ‘chicklet’ keyboard like on my new Lenovo and it has an extra: A Knob. A dial that is touch sensitive and clickable to perform specific actions in any part of any program that has focus on your desktop. I am quite sure that your regular keyboard and a Microsoft Dial controller wil also make up good combo, but I chose the Craft to replace my old and clunky keyboard with media controls.

Unpacking and installing was the easy part. The previous keyboard was also a Logitech and it used the same Unified remote. Switch on and off and the keyboard was connected. Then a disappointment! No profile for Ableton Live. With a profile the keyboard recognizes the program its in and it immediately adds some shortcuts to the knob to control. For instance in a browser you can select a tab with the knob. In Photoshop you can zoom. In Lightroom you can change the exposure, or so I’m told. Standard functionality in other applications is controlling the volume of the PC and clicking it will pause/play music.

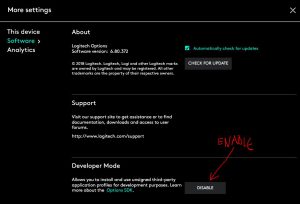
So there I was staring at Ableton, without being able to use the knob. I started diving into the settings, and there i found the Development Mode. Click it and you will need to also enable sending stats to Logitech. Tough but there is no escape.

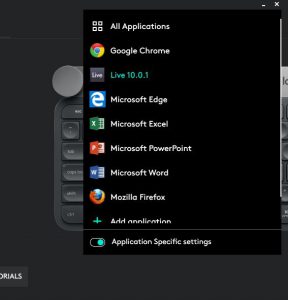
From there you can select more programs to control with the knob and yes, Ableton Live is there!

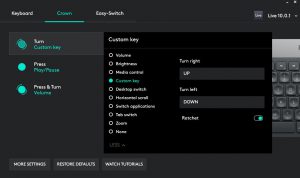
And lo and behold, assigning up and down buttons allows you to control Ableton Live mixing with the knob. A new world opens up, where you can look at the screen. Listen to the mix and control a setting in Ableton Live with the knob. This was what I was looking for, more control and a better keyboard for the daily typing chores. Yay!