Simple home recording vocals

I have been in and out of the biggest and very small studio’s, but by no means my home setup can match any of the studio’s i have had the honor to work in. Its a PC, headsets, monitors, an audio interface and a microphone essentially. Yes, there also other gear, but i could work without it. Specifically for working with vocals, there is not much more that you would need.

Hardware and software

I have invested in a better microphone. A nice condensor with tube preamp from sE. The audio interface is one of the Focusrite Scarlett models. The headsets are from Sony and Sennheiser, not too expensive. Bought for acceptable audio quality and wearing comfort. The monitor speakers are a pair of very basic Behringer types. You can’t mix on headphones alone. The PC is a bit on the weak side, but 64 bits and 16GB of memory with SSD. The whole setup as i have it should set you back around 1500 euro’s.

Then there’s software. I use Ableton and that is on its own enough to turn this hardware into a studio. I have invested in plugins for all kinds of purposes, but again they are not needed. Another 100 euro’s and you are in the music business.

Setup

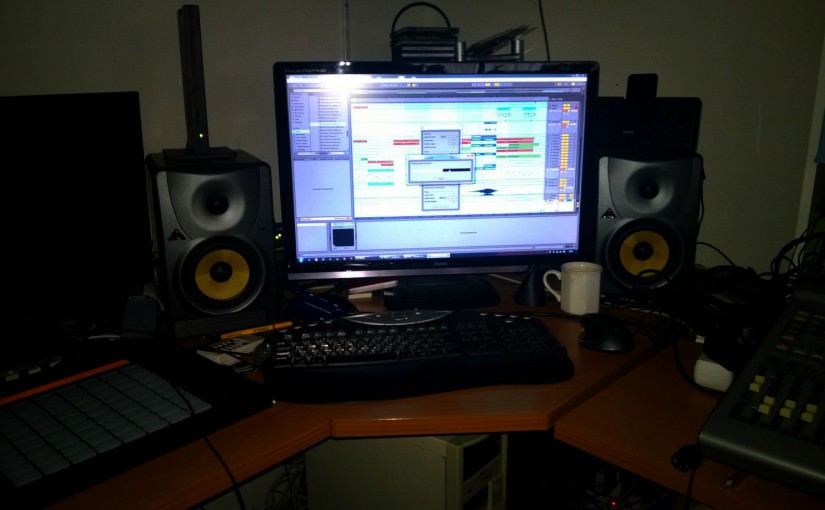
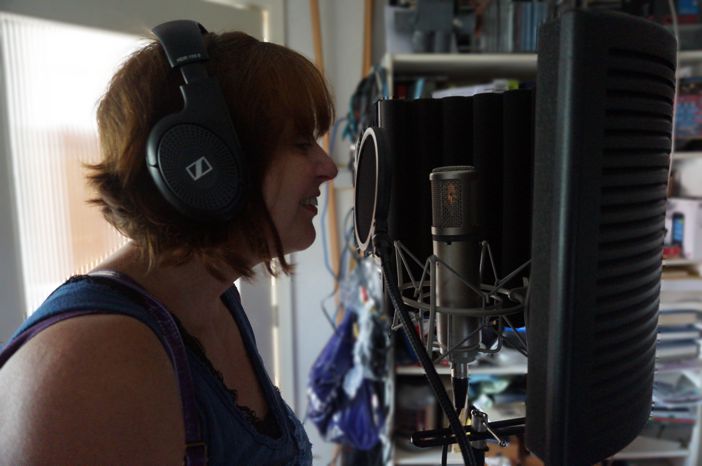
Then there is no separate recording room or mixing room, when i record vocals it is all in the same small room in the attic. Call it a mess, stuffed with musical instruments and a PC. To compensate for the noise that the PC will make and the poor room acoustics I put the microphone inside a nice sE recording filter and behind a plop filter. The setup looks like this.

Heddy recording
Heddy recording

The actual noise from the PC is getting through, but is low enough to be taken out by a basic gate. When recording i make sure that the levels reach halfway from 0db in Ableton, which would be around -18 db. This leaves enough headroom and allows the noise floor to be gated out in my case.

Recording

As you can see, the trick to not using a separate recording room is the use of a headset. For the first recording sessions i was very nervous, so i put a lot of effort in setting up a separate routing in Ableton to allow for a real headset mix. With  Cue Out to another output. In practice now i just throw the Master Out into two headsets. One for me and one for the performer. Of course the monitor speakers are switched off while recording.

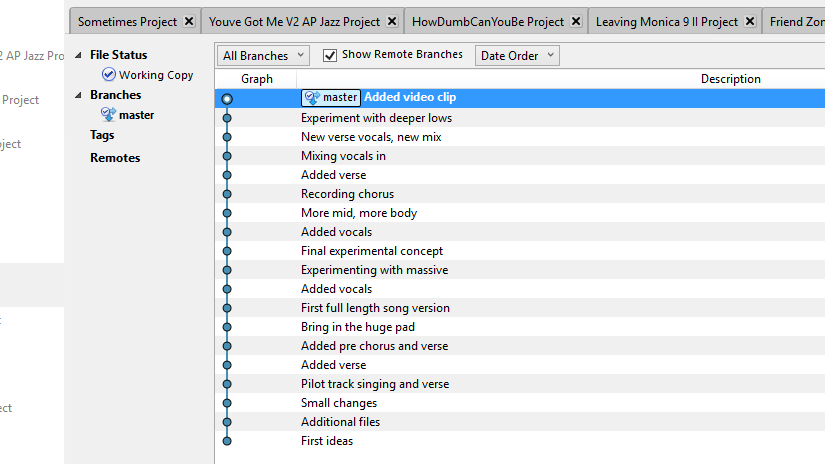
Personally i work with a complete arrangement, before adding vocals. This means in Ableton i will be recording in the Arrangement view. Recording in the Session view is maybe more your thing. It depends on your workflow. Just one thing, whatever way you work, make sure you know your DAW. There is nothing more frustrating then wasting the time of your singer with finding stuff out and messing up. Recording should be swift and when you have “flow” it should not be interrupted needlessly.

This also applies to the hardware of course. Messing with cables and mixer routing is a waste of everybody’s time. Know your software. Know your hardware. Need another take? Bang, start recording. Is the recording okay, but could maybe done better? Save this track. Record another. Compare. Play back. Which is better? Go back to the first recording? Okay no problem. One line went great, the next not so great? Keep the first line and only record the next line. Punch in, punch out recording. Practice this before inviting your guest performer. It makes the difference.

Tricks

Try to listen carefully while recording. Strange plops or noises? Are the words right? Did you get all parts recorded? As a rule, don’t immediately start mixing during or straight after recording. Rest your ears and have a listen again, the next day. Then start mixing or discover that you need another recording session. It happens.

And okay i admit, i also cheat a little, specifically with my own vocals. I use Melodyne from Celemony (autotune) and Nectar from Izotope (vocal processing). Two tools to get great sound with small means. It also allows for doubling voices for multiple layers of vocals and it saves a lot of studio time. Please make sure your performer agrees on you cheating.

Keep track of versions of your Ableton projects with Git

This is by no means very new, but it might give you some practical hands-on for working with Git and Ableton. I am also aware that you can really integrate more with filters and helpers and all other kinds of tricks, but this article shows you that you can start with versioning your musical work by simple means.

What is Git

Git is about versioning. Keeping versions of your song while it is progressing to its final state. One of the most annoying things that can happen is losing the last best version of your song because of some mishap. DAWs can crash and then when you recover, what if you end up with crap? Aargh! You can accidentally delete stuff and later notice that some vital sound or effect got lost. How to get it back? Is Undo failing you? You did make backups or…?

A backup will bring you one version back, unless you are the kind of person that saves every version with a date/time stamp. And then what do these dates say? Is the Friday version better than the Saturday version?

My solution is to use Git. Git is software that allows versioning at a file level. It saves every file change in a specific folder, or sub folder, in a special internal store, together with a comment that explains what the purpose of the file changes was. Git is at its best with text files, but it can also handle binary files out of the box. Its purpose is grander than just versioning files in folders. It supports team collaboration on versions and its functionality goes well beyond my daily use for music.

How to use Git

The way i use Git is fairly basic. At the end of a session working with Ableton on one song or a set of songs i close down Ableton. Then i let Git take a snapshot of the folder that holds the project. Git can be instructed very specifically on the files to include in this snapshot and which files to leave out. Git calls this snapshot a commit. More or that later. Then i add a comment to this commit, like “Frozen Epica for better performance in the mix”. Ever since i started using this versioning of songs it has saved me many times from losing the “latest greatest” mix.

Git versioning

If you dive in to articles about Git, you will find that working with it is actually very technical, daunting even. For that purpose i use a shell around Git that makes it graphical and easy to use, SourceTree. It is free and can be installed in its most basic form with Git embedded. You do need to register.

Committing projects to your repositories

If you have it up and running you can start adding your projects to Git by creating new repositories for them. Click Clone/New and Create new Repository. Add the folder where your files are, give your repository a name and you are in business. Scanning the folder for files can take time and you might find that a list shows up with lots and lots of files. Maybe you only want to keep track of your “.als” file?

If you want to filter only essential files in the Ableton folders it is best to add a text file named “.gitignore” file in the root folder. My .gitignore file contains the following text:

# Rendered music #
##################
/*.wav
*.asd
*.sfk
/*.mp3
AbletonTmp-*

This leaves out temporary Ableton files and all rendered music files in the root of the folder. At this point Git will only check which files should be committed as part of the snapshot of your song. These files will be marked unstaged, at the bottom of the screen.

Git staging

Click the checkbox left to “Unstaged files” and the files will be moved to the box with staged files. This can also be reversed and set up to stage only individual files. Every staged set of files can then be committed with a comment in the “File Status” tab.

Git commit

If you made it to here, then you have made your first steps in to versioning. Congratulations! You can now go a version back by double clicking any commit in the list. Like what you hear, but not sure if this is going to be final? Make a branch and work on that branch to see if it gets you there. Or you go back to the original version and explore that. The main version is always on a branch named “master”.

Backup your versions

But does this also make a backup of your files? Yes and no. You will find that files will be stored into a special hidden file structure in the same folder (named .git). Are you happy with this as a backup? Well i’m not. If you lose your PC or entire drive you lose it all. Git or no Git. What i do is that i make a backup of all project folders, this also nicely saves the hidden .git file structure and also all versions of all songs. Nice eh?

If you want you can even commit your project changes to a cloud service that supports Git. One option is Github, this is only free if you publish your projects to the whole world. There are cloud storage options that understand Git and allow free and private service, but then you put your trust in a cloud service like Bitbucket. Its up to you. I keep a simple backup with copies of the files in my projects folder on separate disks.

Ups and downs

There is one downside. Ableton does not play nice and needs to be closed, every time you want to commit the latest changes. Also if you want to go back to another version of the song. Tough, but it still works for me. Want to give it a try? Keep me posted!