Streaming live with OBS Studio

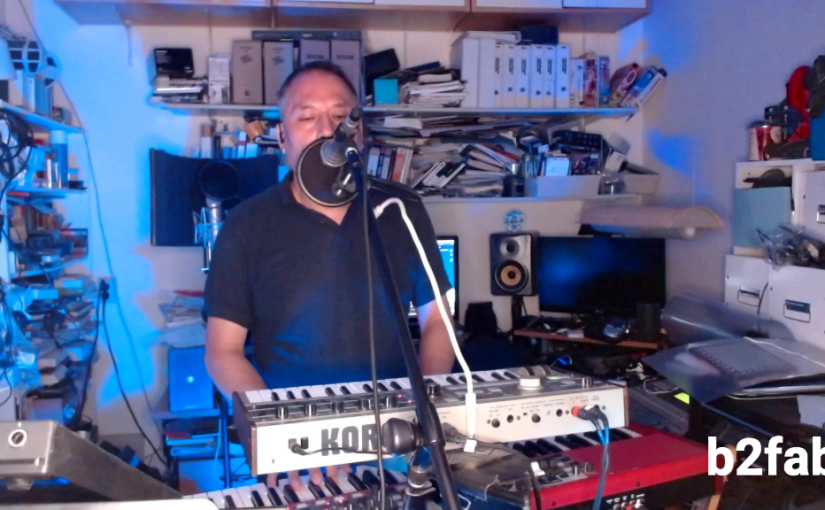
Okay, like everybody else i started streaming too. I had a planned live show, but live shows will not be possible for at least another half year. Every evening my social timelines start buzzing with live streams and all the big artists have also started to stream live. No place for me with my newly created and sometimes shaky solo live performance to make a stand? After some discussions with friends i decided to make make the jump.

But how to go about it? If you already have experience with live streaming, you can skip this entire article. This is here just for the record so to say. After some looking around I came to this setup:

OBS Studio with ASIO plugin
Restream.io for casting to multiple streaming platforms
Logitech C920 webcam
Ring light
– Ayra ComPar 2 stage light see this article

OBS is surprisingly simple to set up. It has its quirks. Sometimes it does not recognize the camera, but some fiddling with settings does the trick. You define a scene by adding video and audio sources. Every time you switch from scene to scene it adds a nice cross fade to make the transition smooth. You can switch the cross fade feature off of course.
OBS Main scene setup

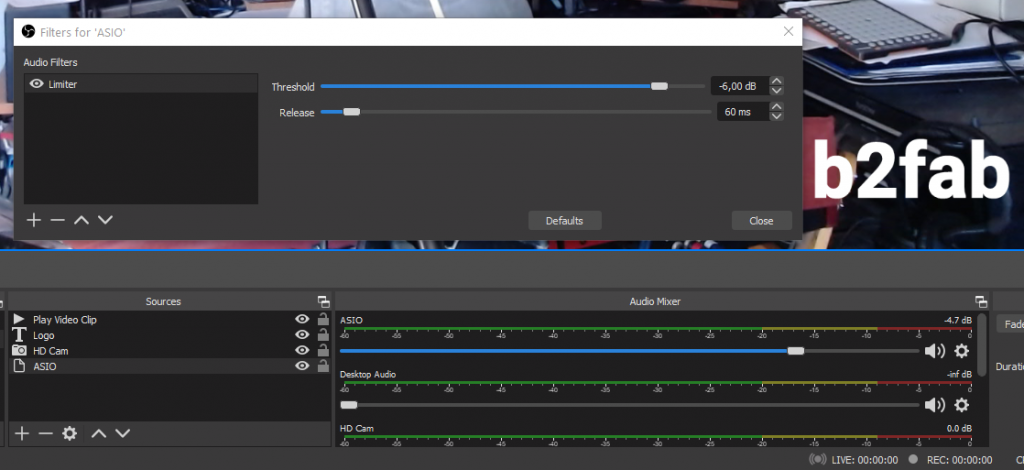
I only use one scene. The video clip is there to promote any YouTube video clip. It plays in a corner and disappears when it has played out. The logo is just “b2fab” somewhere in a corner. The HD cam is the C920 and the ASIO source is routed from my live mixer to the audio interface on the PC. I setup a limiter at -6db on the ASIO audio as a filter to make sure i don’t get distortion over any audio peaks.

I also had to choose my platform. From the start i wanted also to stream live on Facebook and Instagram. Instagram however kind of limits access to live streaming to only phones. There is software to stream from a PC, but then you have to set it up again for every session and you need to switch off two-factor authentication. For me one bridge too far for now.

I chose Restream.io as a single platform to set up for streaming from OBS. It then allows to stream to multiple platforms and bundle all the chats from the different platforms into a single session. For Facebook pages however, you need a paid subscription tier. For now I selected the free options YouTube, Twitch and Periscope. YouTube because it is easy to access for my older audience. Twitch because it seemed quite fun and i also like gaming. Periscope because it connects to Twitter.

If the live show takes shape i might step into streaming from my Facebook page. Another plan is to try the iRig Stream solution and start making separate live streams on Instagram. With high quality audio from the live mixer. I will surely blog about it if i start working with it.

For now it all works. Restream.io allows me to drop a widget on my site. Its a bit basic and only comes alive when i am live, so i have to add relevant information to it to make it interesting. If you want to drop in and join my live musings check my YouTube, Twitch and Periscope channels or my site at around 21:00 CEST.
Controlling a light show for a small solo set

I’m back on the track of my own small solo live set. The first experiment was running a video stream that would run along with the show. But now there is a new twist: The Corona virus came and there will be no live set the coming months. All public shows have been cancelled for about half a year. My first live show has been pushed to November from June. The only alternative is live streaming.

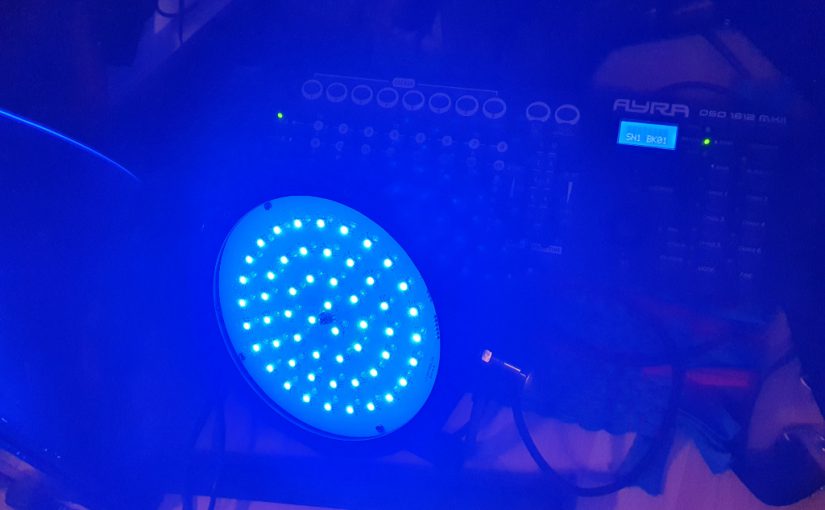
Just before the lockdown to combat the spread of the Corona virus I had bought a stage light. Just one to at least have a blue wash on stage to set a kind of moonlight mood. This was the Ayra ComPar 2. A simple LED stage light, with an IR remote and plenty of flexibility be more than just a blue stage wash.

But while staying at home and after browsing through some online articles it dawned on me: you can simply control stage lights as part of your Ableton Live set. I use Ableton Live sets to run my stage show and believe it or not I use color coding for each different song to quickly browse through all the songs without having to look up the names.

The colors match the moods of the song, so my simple idea was to use this color code to match the color of the wash on stage. A red wash for a deeply felt love song. A green wash for a song about nature. A purple wash for an up tempo hot song etc.

But why put all this effort in a stage light when there will not be a stage for months to play on? Up to then I had been a bit weary of immediately jumping to live streaming instead of playing gigs. All the bigger artists now stream live. Every night on my socials there are at least a dozen artists performing live. I’m just starting out, so what can I bring to the table?

After discussing this with a close group of musicians and my music coach it became obvious. Why not start streaming live? It’ll be fun, even if nobody watches it. I can invite friends and just have fun together. And also because I had nothing else to do I jumped in to make this stage light idea work. It would change color with the song. Not on stage, but in the attic. The attic with my home studio as my online stage.

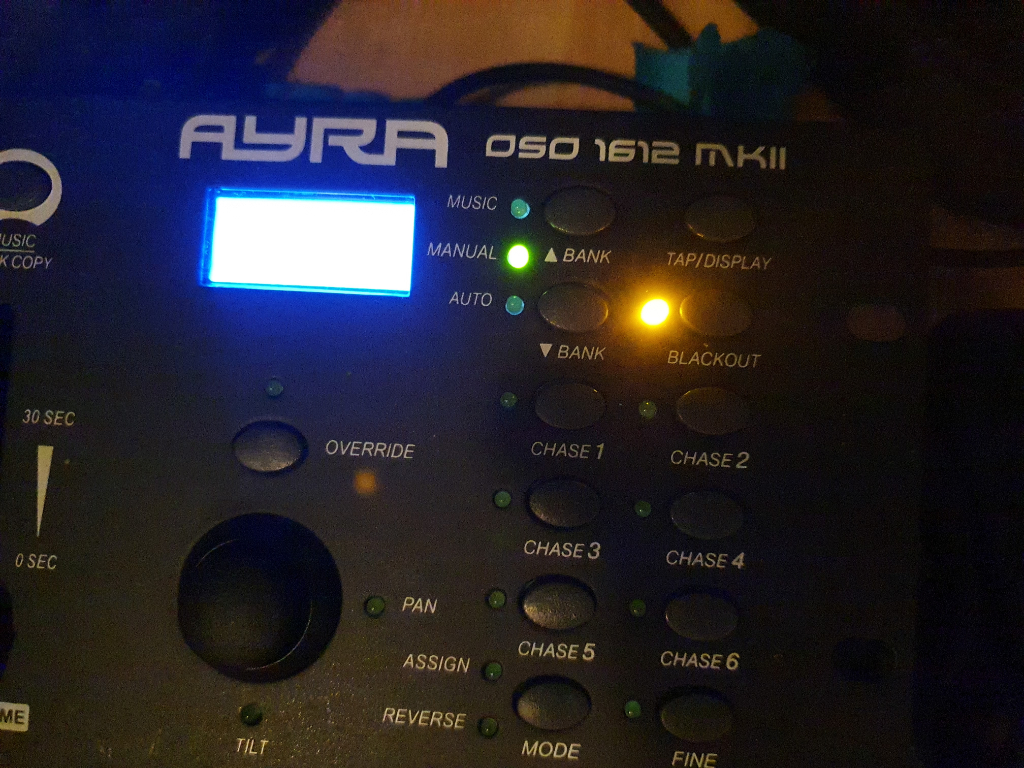
One of the intriguing functions of the ComPar 2 is the ability to connect a XLR cable with DMX signal to control it. After diving into it and in lockdown there was a lot of time to dive into anything I found out that there are also DMX light controllers that support MIDI. From the same company I got the Ayra OSO 1612 DMX Scanmaster controller. Very friendly priced i think.

Blacked out by default

The DMX light controller simply accepts MIDI note data and maps that to programmable scenes. The controller can be connected to a chain of lights and a scene can set each light correspondingly. You can have flashing lights in a scene or movement from stage lights that can move. With 240 scenes you can probably make an interesting progression of lights for several songs, but I simply have a red, green, purple and blue scene for each song.

The controller I chose has a default setting where it blacks out all lights when starting up and that is not a bad thing at all. The only thing I must remember is to switch off the black out when playing live. That is the only attention it needs and from there everything is now running on rails. The live streaming shows allow me to test stuff out, but I’m now pretty happy with this setup.

Bad ground. When the noise is killing you…

Ok, maybe you don’t know this song, Bad Ground, from a controversial band Type O Negative. If you do know it it’ll bring a smile to your face. But if you hear it in your headphones or from your speakers, you won’t be smiling. The 50-60 Herz buzz or maybe even digital noise that ruins your listening pleasure and maybe even your recordings.

This is something I feel I need to discuss, because earlier I wrote about impedance. Like the previous article, you may be an experienced sound engineer or pro musician. In that case please skip this article. This is for the home studio creatives that just can’t keep the noise from creeping into the system. By the way you can find plenty of articles on the subject. This one just compounds it all into one.

In any case I was helping out building a home studio and when connecting a second display to the laptop there it was: bad ground. A digital fizz from the HDMI cable and a hum from the bad ground. The active speakers amplified the noise sounds coming from the signal in the unbalanced cables from the audio interface. Simple jack cables.

Ah you should say. There you have it. Unbalanced cables work by shielding a single signal wire with a mesh that wraps around it. This mesh wiring should be grounded. The shield mesh then prevents electromagnetic interference from the outside reaching the signal cable. This all goes wrong if not every device in the chain is solidly grounded along the same wire more than half a meter into the earth.

This bad ground can just be floating, catching interference from all noise sources around it. Or it can be that one part of the chain is grounded differently and the signal difference of the shielding interferes with the signal. Do you have the option to bring a solid ground in your studio setup? Please start there. In other cases there is only one other solution and that is to accept the bad ground and the interference of other signals.

Does that mean accepting the noise? No of course not. The answer to noise in the studio and on stage has always been the use of balanced cables. In balanced cables there is also the shielding mesh of a ground cable, but inside there are two twisted cables. A hot and a cold one. Usually using XLR connectors instead of the jacks. Although XLR cables can also be used unbalanced.

This time the difference between hot and cold is used as the signal. This time the effect of interference on the signal is much less, because it evens out on the twisted pair. This can only mean that you should always use balanced cables when possible.

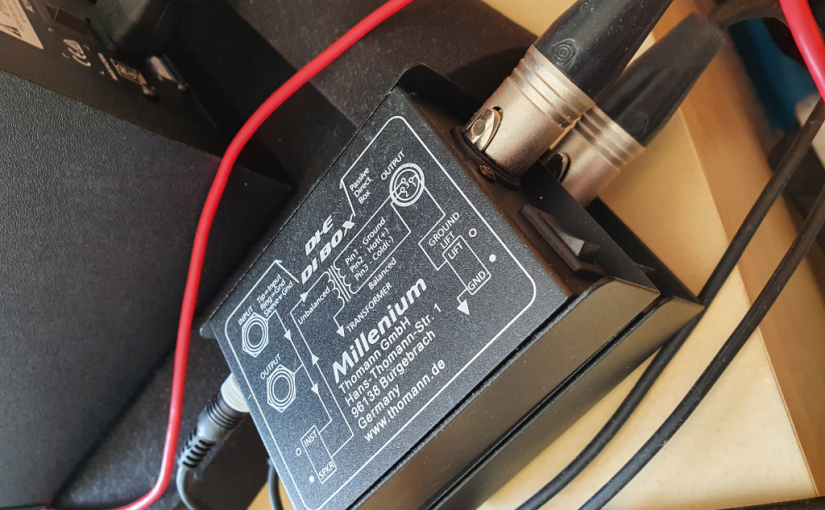
Now if only it was that simple… Some audio interfaces only have unbalanced outputs. Instruments usually have only unbalanced outputs. what should you do with these signals to prevent bad ground? This is where you need DI’s. Direct Input devices, pick up the unbalanced signal from a jack connector and output a balanced signal to an XLR connector.

Inside the DI you will find a transformer that picks up the signal and passes it to the hot and cold wires of the XLR. But transformers are coils wrapped around the same core. the signal energy is passed from one coil to the other. This means signal loss and a coil does have a frequency response that is not 100% flat. In other words, the signal is lower in energy at the other side and can have slightly less low and high frequencies.

Passive DI’s just use the transformer and give you signal loss and a slight effect on the signal quality. Active DI’s can compensate for the signal and signal quality loss, but need a power source to make the additional electronics work. Even worse, cheaper active DI’s can add noise to the signal from the electronics. A more expensive passive DI can sound better than a cheap active DI.

In the end for my noise problem I found an affordable passive DI that sounds great. The studio setup was inexpensive and simple and there was therefore no noticeable degradation of the sound. You might also want to try this Millenium DI-E. DI’s can sound muffled, but the transformer can also add warmth to the signal. Some very expensive pre-amps for vocals and guitars use transformers to add warmth.

So there you have it. May you kill the noise…