You need a 4K display, but…

The start of this year is already well on it’s way and I wanted to start it right with an upgrade to the studio. As you know I am into making music, but also video content that goes with the music. In the end video clips, but I like to think more about it as “visuals for the music”. A way to tell the story of the music again, but different. Working with 4K content is quite normal for me now, even though the end result might simply be an HD 1920×1080 YouTube video, or even a 1080×1080 Instagram post. In the end 4K can really make the difference and will also affect the quality of your lower resolution end result.

A 4K display has now become a no-brainer. I invested in a 32 inch ergonomic screen with good, but not high-end, color reproduction. The LG Ergo 32UN88A also fitted nicely on my desk. Immediately after connecting the screen to both my studio PC and a Thunderbolt laptop dock the problems started. Blackouts. Every minute or so the screen would just blackout on both devices. Both should be able to drive a 4K screen, but nonetheless it seemed to fail. Maybe you immediately know what happened, but I was stuped.

My fault was that I was just too new to 4K upgrades like this. So I had to find out the hard way that there is more to hooking up a higher end display like this. Yes, there are limits to driving a 4K screen. One part of the chain is the video output, but the other is the cabling. I had to learn the hard way now that HDMI cables have specifications. Up to now I only had a 1920×1440 to drive maximum and that turned out to be easy. I had to run to the shop and buy new cables. Cables with specs that could meet 3840×2160 and 60Hz.

After connecting that only the laptop dock kept flickering and I had to turn down the refresh rate to 30Hz. A dock like this is not the same as a video card. I do have a Thunderbolt external video card, but I only want to start that up when playing games. It makes quite some noise and is not suited for studio use. So just as I found out in live streaming that not any PC USB bus can drive multiple HD cameras, using 4K displays is a good way to tax any connected PC or device and the cabling. So if you are thinking about upgrading your studio workhorse, be prepared!

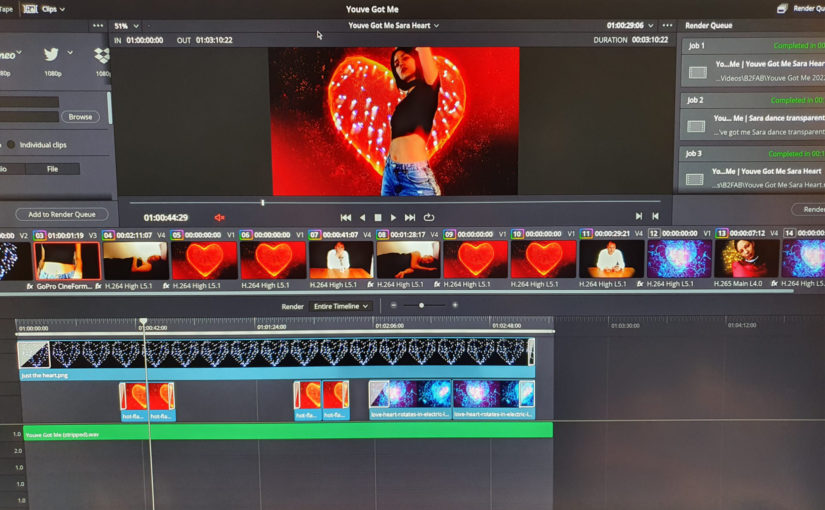
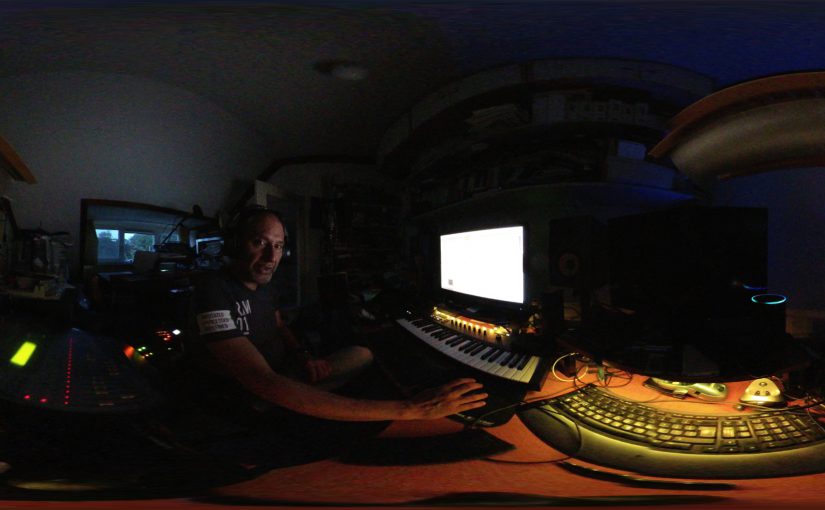
Another thing might be that the picture I shot above is from editing video in Blackmagic DaVinci Resolve Studio. The moment I started Resolve for the first time on a 4K screen the UI was microscopic small! It was completely useable, but totally not how I expected to work with Resolve. After some googling I found out that in order to see the normal layout on a 4K screen, you need to make the following changes to your system environment variables:

QT_AUTO_SCREEN_SCALE_FACTOR: 1
QT_DEVICE_PIXEL_RATIO: 1

There is a good chance you already have a 4K display, or maybe even multiple. If you don’t and want to upgrade you may be warned now that it might just not be a simple and light upgrade.

Using Davinci Resolve the right way

For more than a year now I have embraced Blackmagic Davinci Resolve as my go to video editor. Slowly and gradually I found out how to do a bit of color grading. Its an art form that I do not claim to have mastered, but I know what happens if I turn the dials and it really brings consistency in a video. This then in turn helps to tell a story without distractions. The video editing itself, I just took for granted and I found a way that works in the Edit page of Resolve.

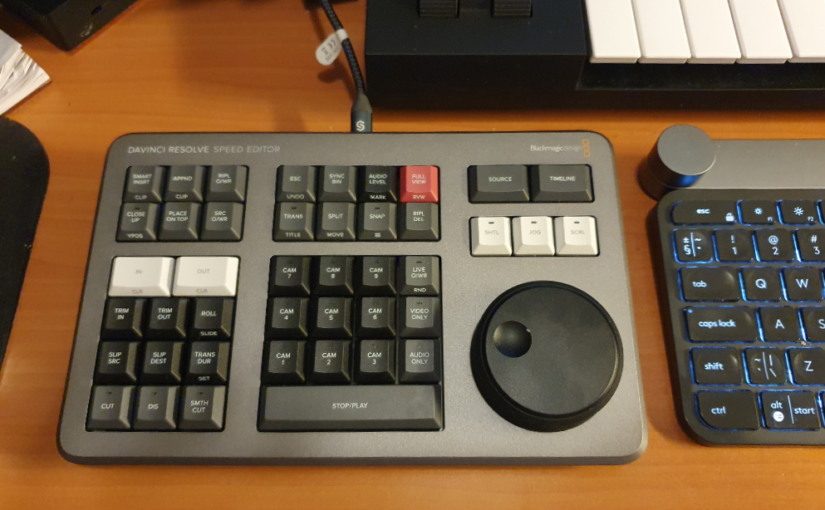
After a year it became clear that it would be also necessary to dive into the full Davinci Resolve Studio product and I found out that the right way to do this would be to buy the Davinci Resolve Speed Editor that comes free with a license. I thought it was a just a keyboard with shortcuts to help you navigate the editing process faster. How wrong could I have been?

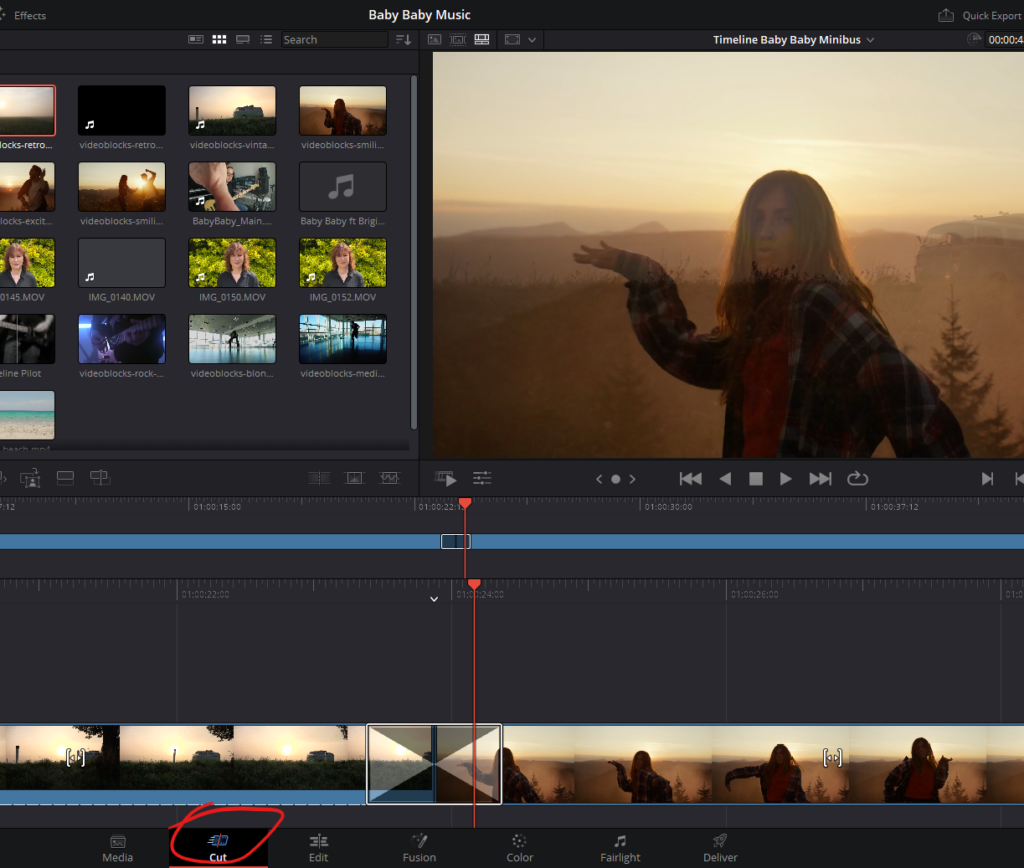
This keyboard showed me that I had mistakenly skipped one step in the editing process. The process of sorting and selecting source material and trimming it to fill the timeline. It All Happens In The Cut Page. This was the page I always skipped over, because I thought it was just intended to cut stuff. Sorry, you knew this maybe all along. I had to learn because I bought the license and the keyboard came with it for free.

Davinci Resolve Cut Page

This changes everything. The Cut page is the start of the editing process. The Edit page is only for finetuning the main work done in the Cut page. The Speed Editor keyboard makes the start of the editing process a breeze. The complete edit above was done without touching the mouse or another keyboard. I can tell you, you need this keyboard even though you thought you didn’t. I’m bummed that I found this out late. For now I am just happy that I found the right way to use Davinci Resolve.

Swapping faces in video with Deepfake

This is my first adventure with Deepfake technology. This blog is intended to show you how to get you started. In short its actually a technology that has a very dark side where it seems to be possible to make photo’s that show faces of people in videos or photo’s they’ve never appeared in by swapping faces. It can be done very fast and usually very unconvincingly by some apps on your phone.

The full blown and latest software can actually let politicians or your neighbor do and say crazy things very realistically and this way can corrupt your believe of what is truth or fake. Very scary. It also has a very creative side. Why can’t you be a superhero in a movie? I experimented with this creative side.

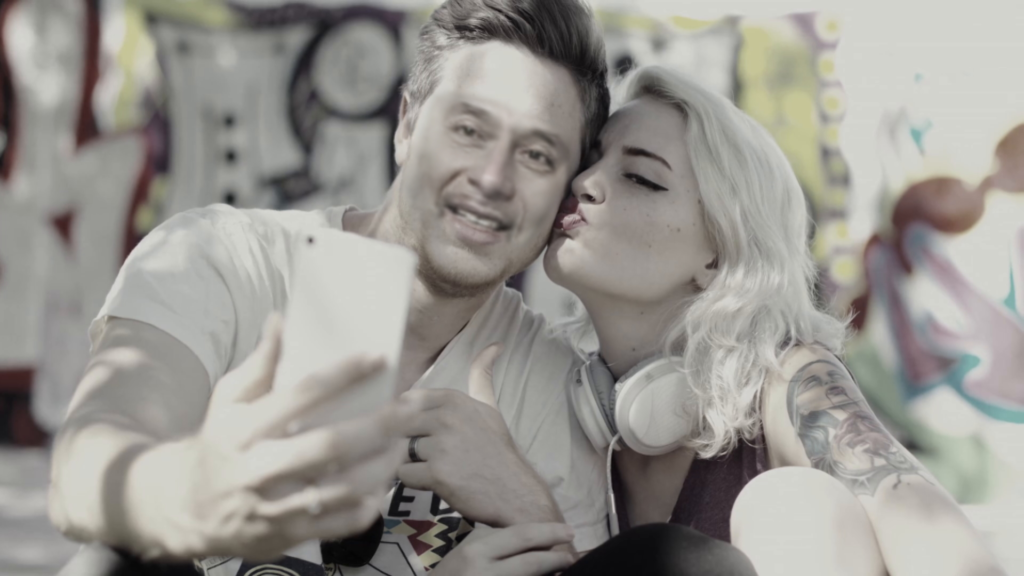
A new song for me is a new story to tell. Then a second way to tell the story is with a video clip and I like to tinker around with new ideas for video clips. Most musicians leave it at just a pretty cover picture and dump it on YouTube, but I like to experiment with video. There is a new song that is in the making now and I already found beautiful footage with a girl and a boy. The first step I take is to make a pilot with the footage and ask people if they like the concept of the clip.

Then I bumped into someone very creative on Instagram and when I showed the video it triggered some crazy new ideas. Why not make the story stronger with flashbacks? And there I thought why not swap myself in those flashbacks? The idea to use Deepfake technology was born. But how to get going with Deepfake?

Tools

First investigations led to two different tools: DeepfaceLab and Faceswap. There are many more tools, but in essence its probably all the same. Extraction tools to find faces in pictures. A machine learning engine like Tensorflow to train a model to swap two faces and converter tools to generate the final video. For you machine learning may be magic, but I already knew it from earlier explorations. Simply said its possible to mimic the pattern recognizing (read: face and voice recognizing here) that we humans are so good at.

Machine learning

Machine learning in the form that we have now in Tensorflow requires at least somewhere in the range of 1000 examples of something to recognize and the correct response to output when something is recognized. By feeding this into the machine learning engine it uses it can be trained to output a picture with a face replaced when recognizing the original face. To be able to make a reliable replacement the original and replacement data have to be formatted and lined up to make automated replacement possible. One aspect of the machine learning process is that it benefits a lot by GPU processing i.e. a powerful video card in your PC. This is important because current training mechanisms need around a million training cycles.

Faceswap software
Faceswap software

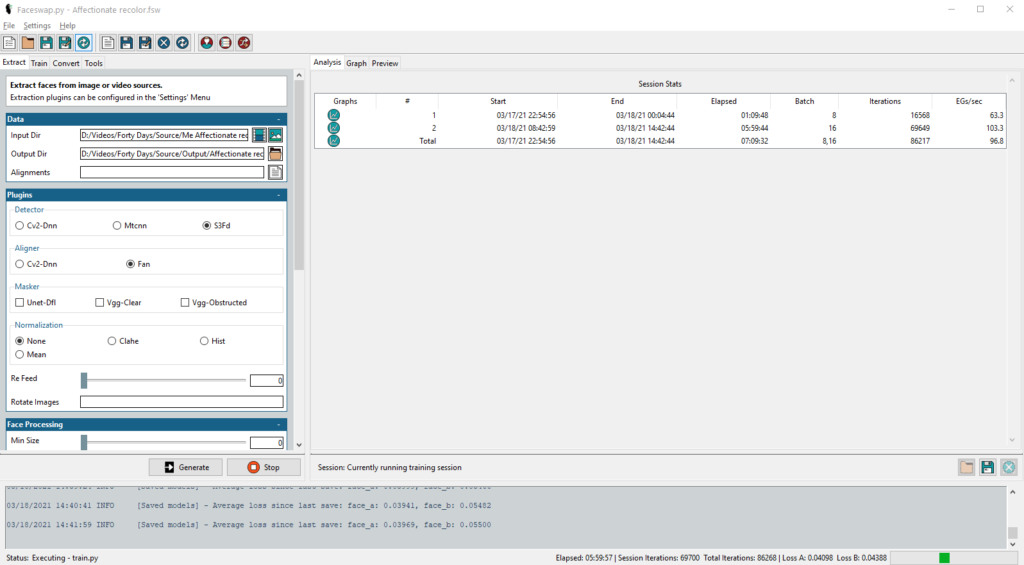
I chose Faceswap, because for DeepfaceLab it was harder to get all the runtimes. Faceswap has a simple setup tool and nice graphic user interface. The technology is complex but maybe I can help you getting started. By the time you read this there are probably many other good tools, but the idea remains the same. The Faceswap setup first installs a Conda Python library tool. Then all the technology gets loaded and a nice UI can be launched. There is one more step you need to do. You need to find out which GPU tooling you can use to accelerate machine learning. For a NVidia graphics card you will need to have CUDA installed.

Step 1: Extraction

The first step is actually getting suitable material to work with. The machine learning process needs lots of input and desired output in the form of images. At least around 1000 is a good start. This could mean 40 seconds of video at 25 fps, but 10 minutes of video will work even better of course. You can expect the best results if these match up as closely as possible. Even to the point of lighting, beards, glasses etc. If you know the target to do the face swap on you should find source material that matches as close as possible

Then its extraction time. This means already applying machine learning to find faces in the input and then extract these as separate images. These images contain only the faces, straightened up and formatted to get them ready to be used for the face swap training process. You need to extract faces from both the target and source video. For every face image the extraction process also records where the extracted image is found and how to crop and rotate the face to place it back. These are stored in Alignment files.

After extraction you need to single out only the faces that you’re interested in in case there are multiple faces in either source or target. From that point you can go to the next step, but the quality of the end result depends very much on the extraction process. Check the extracted images and check them again. Weed out all images that the learning process should not use. Then regenerate the associated Alignment files. Faceswap has a separate tool for this.

Step 2: Training

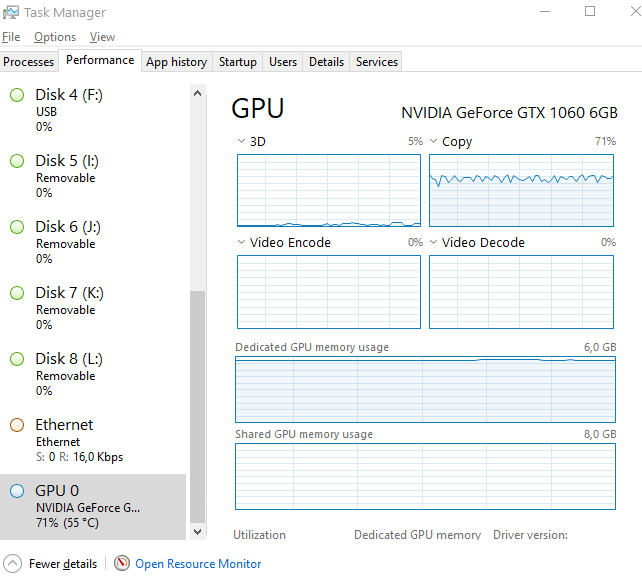
By passing in the locations of the target (A) and source (B) images and Alignment files you are ready for the meat of the face swap process, the machine learning training. Default settings dictate that training should involve 1.000.000 cycles of matching faces in target images to be replaced by faces in the source images. By default for all machine learning the software hopes that you have a powerful video card. In my case I have an NVidia card and CUDA and this works by default. If you don’t have a video card you can work without one. I found it slows the process down by a factor 7. My GPU went from 35% usage to 70% usage.

Deepfake GPU usage
Deepfake GPU usage

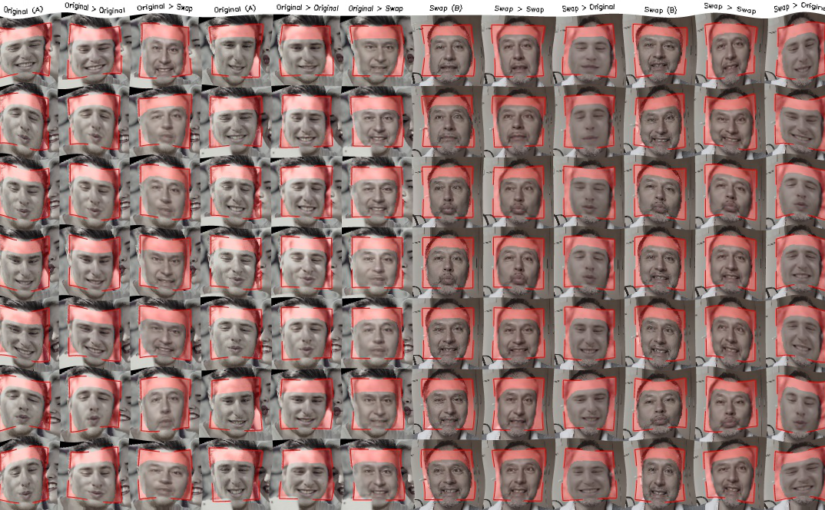
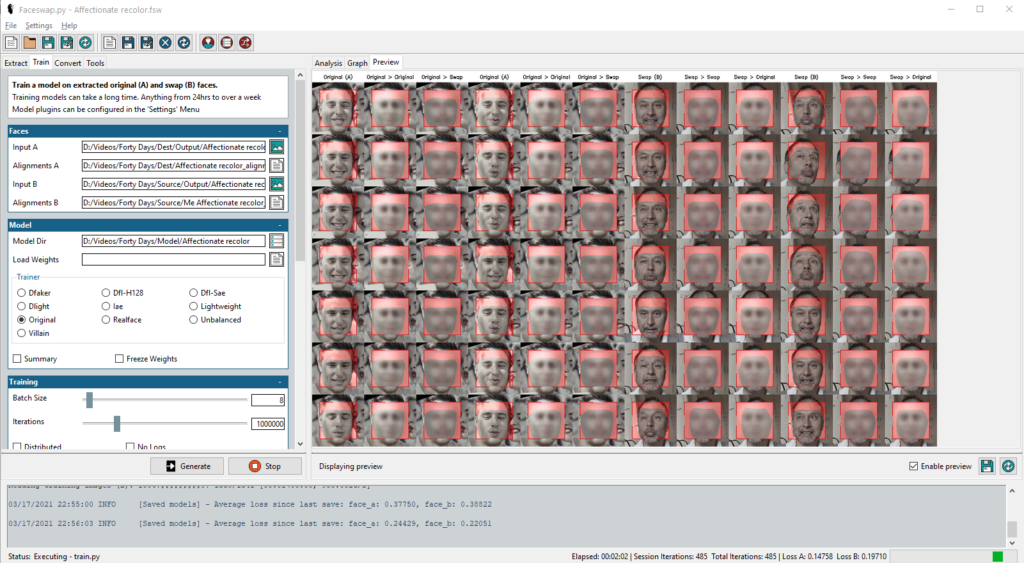
In my experiments I had material that took around 8 hours to train 100.000 times, so it would take 80 hours to train 1.000.000 times. Multiply that times 7 and you know its a good idea to have a powerful video card in your PC. During training you can see previews of the swap process and indicators for the quality of the swaps. These indicators should show improvement and the previews should reflect that. Note that the previews show face swaps vice versa. So even at this point you can switch source and target.

Training process with previews

I saw indicators going up and down again, so at some point I thought that it was a good time to stop training. I quickly found out that the training results, the models, where absolutely useless. Bad matches and bad quality. At that point I went back to fixing the extractions again and rerunning the training. Much simpler, if the previews show fuzziness of the swap, the final result will also be fuzzy. So keeping track of the previews gives you a good idea of the quality of the final result. The nice thing about Faceswap is that it allows you to save an entire project. This makes it easier to go back and forth in the process.

Step 3: Converting

This is the fun part. The training result, the model, will be used to swap the faces in the target video. Faceswap generates the output video in the form of a folder with the image sequences. You will need a tool to convert this to a video. The built-in tool to convert images to video didn’t work for me. I used stop motion functionality from Corel VideoStudio. If the end results disappoints, its time to retrace steps in extraction or training. Converting is not as CPU/GPU intensive as training. You can at any point stop the training and try conversion out. Then when you start training again it builds on the last saved state of the model. If the model is crap, delete it and start over.

Deepfake sample (video DanielDash)

Here is a snip of the first fuzzy results. The final end result is not yet ready. Mind you, the song for the video clip is not yet ready. I will share the results here if it is all done. I hope now this is start for you to try this technology out now for your video’s! Please note that along the way there are many configuration options and alternative extraction and training models to choose from. Experimenting is time consuming, but worth it.

One more thing. Don’t use it to bend the truth. Use it artistically.

Why not a cartoon video?

So this is what one of the interviewers said when I visited the local radio station here: “why not a cartoon video?” It was a passing remark when going over my video channel after the radio interview. Its something that this person, working with lots of creatives at the art academy in Den Haag, can easily say. But what if you’re just this guy in the attic? How to make a cartoon video? Not easy. This is how I got close to the result I was looking for with my video release for Perfect (Extended Remix).

A go to place is of course Fiverr. Here you can find animation artists and have your cartoon video in no time. There are actually animation sites that allow you to make your own animated video with stock figures and objects and I tried it. The first results where promising, but you need to go on a payed subscription to have maximum freedom. Even then you’ll find its mostly targeted towards business animations and infographics. A fun video clip animation is still hard to make. If you want you can try it: Animaker.

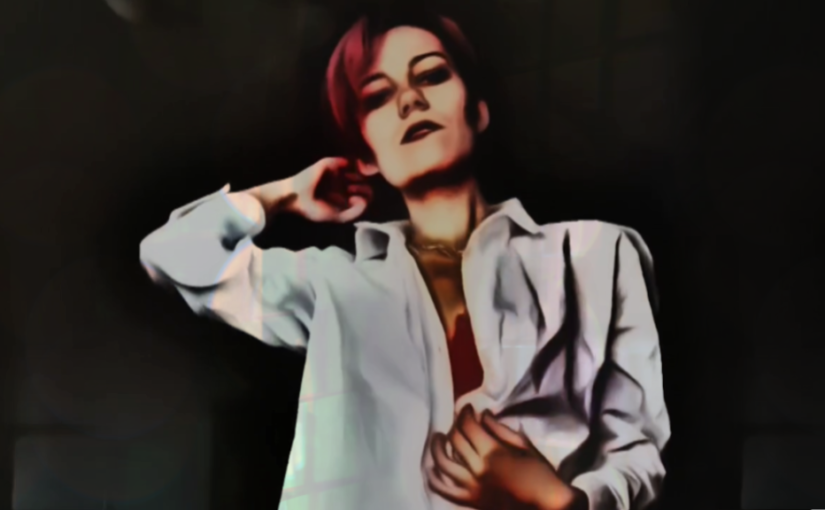
Eventually I stumbled upon this Video Cartoonizer. Its not free, but it seemed like it could do some pretty amazing stuff with “cartoonizing” existing video. You can see parts of the original video material here. Its quite funky and in many ways old fashioned software. It takes agonizing days to process video recordings like this, but the end result was quite amazing. Model Sara was also pretty pleased with the result. So there you have it. My first “cartoon” video.

OBS: With Green Screen

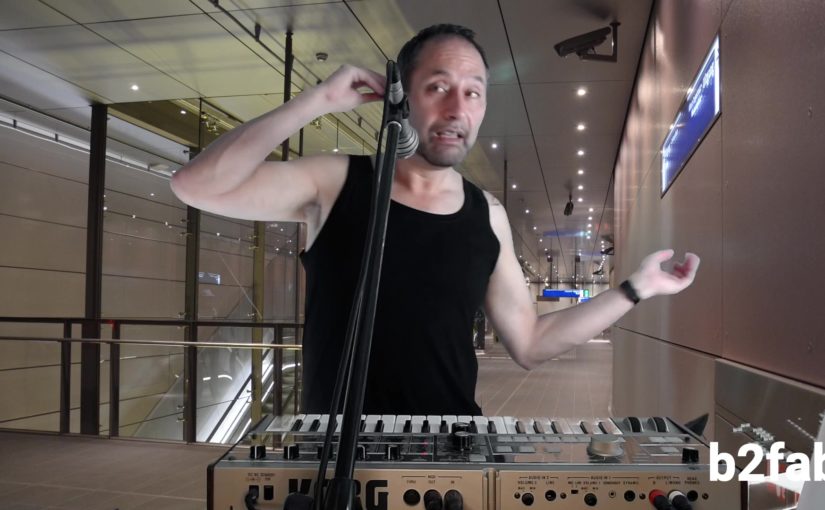
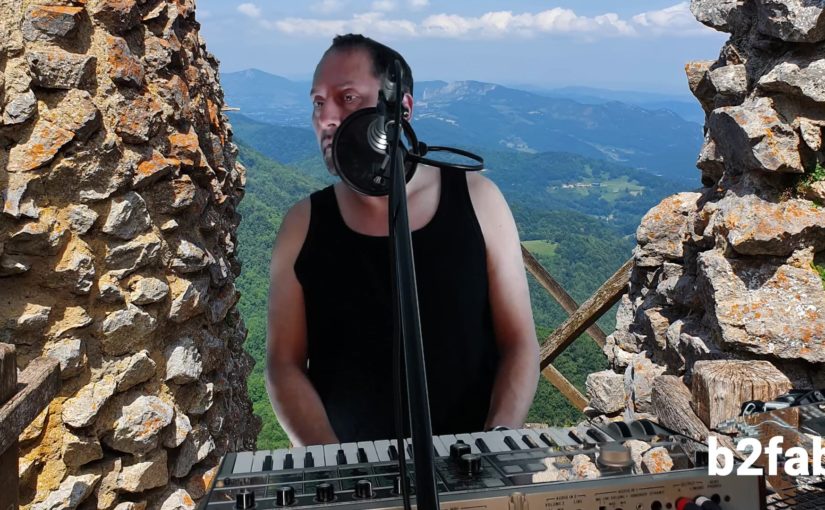
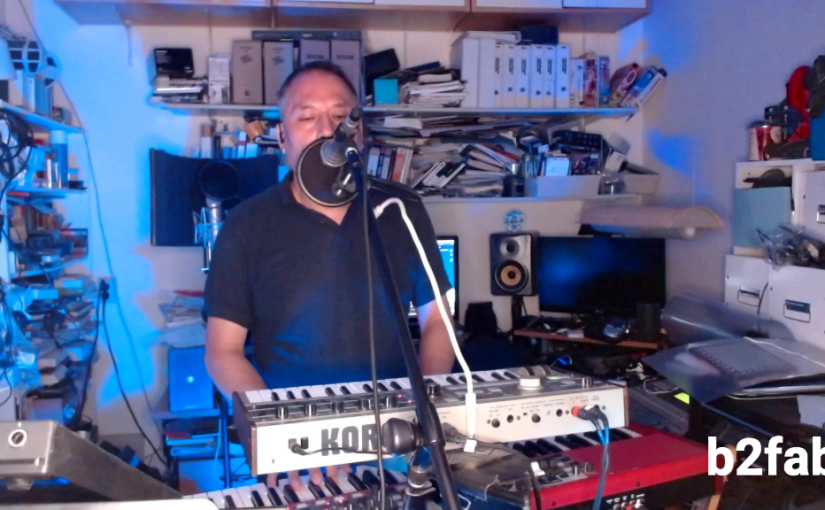
If you have seen my recent live streams, you will have noticed that I ‘travel around’ these days while live streaming. I’ve started to use the Green Screen effect. With OBS Studio its so dead simple that you can start using it with a few clicks in your OBS Studio scenes. Of course there are also some caveats I want to address. The main picture for this post shows you what it can look like. It may not be super realistic, but it is eye catching.

So what do you need to get this going? A Green Screen is the first item you need. It does not have to be green. It can be blue or blue-green, but it should not match skin color or something you wear. It should cover most of the background, so it will need to be at least 2 meter by 1.6 meter, which is kind of a standard size you can find in shops. It should be smooth and solid. Creases and folds can result in folds in the backdrop, but some rippling is OK.

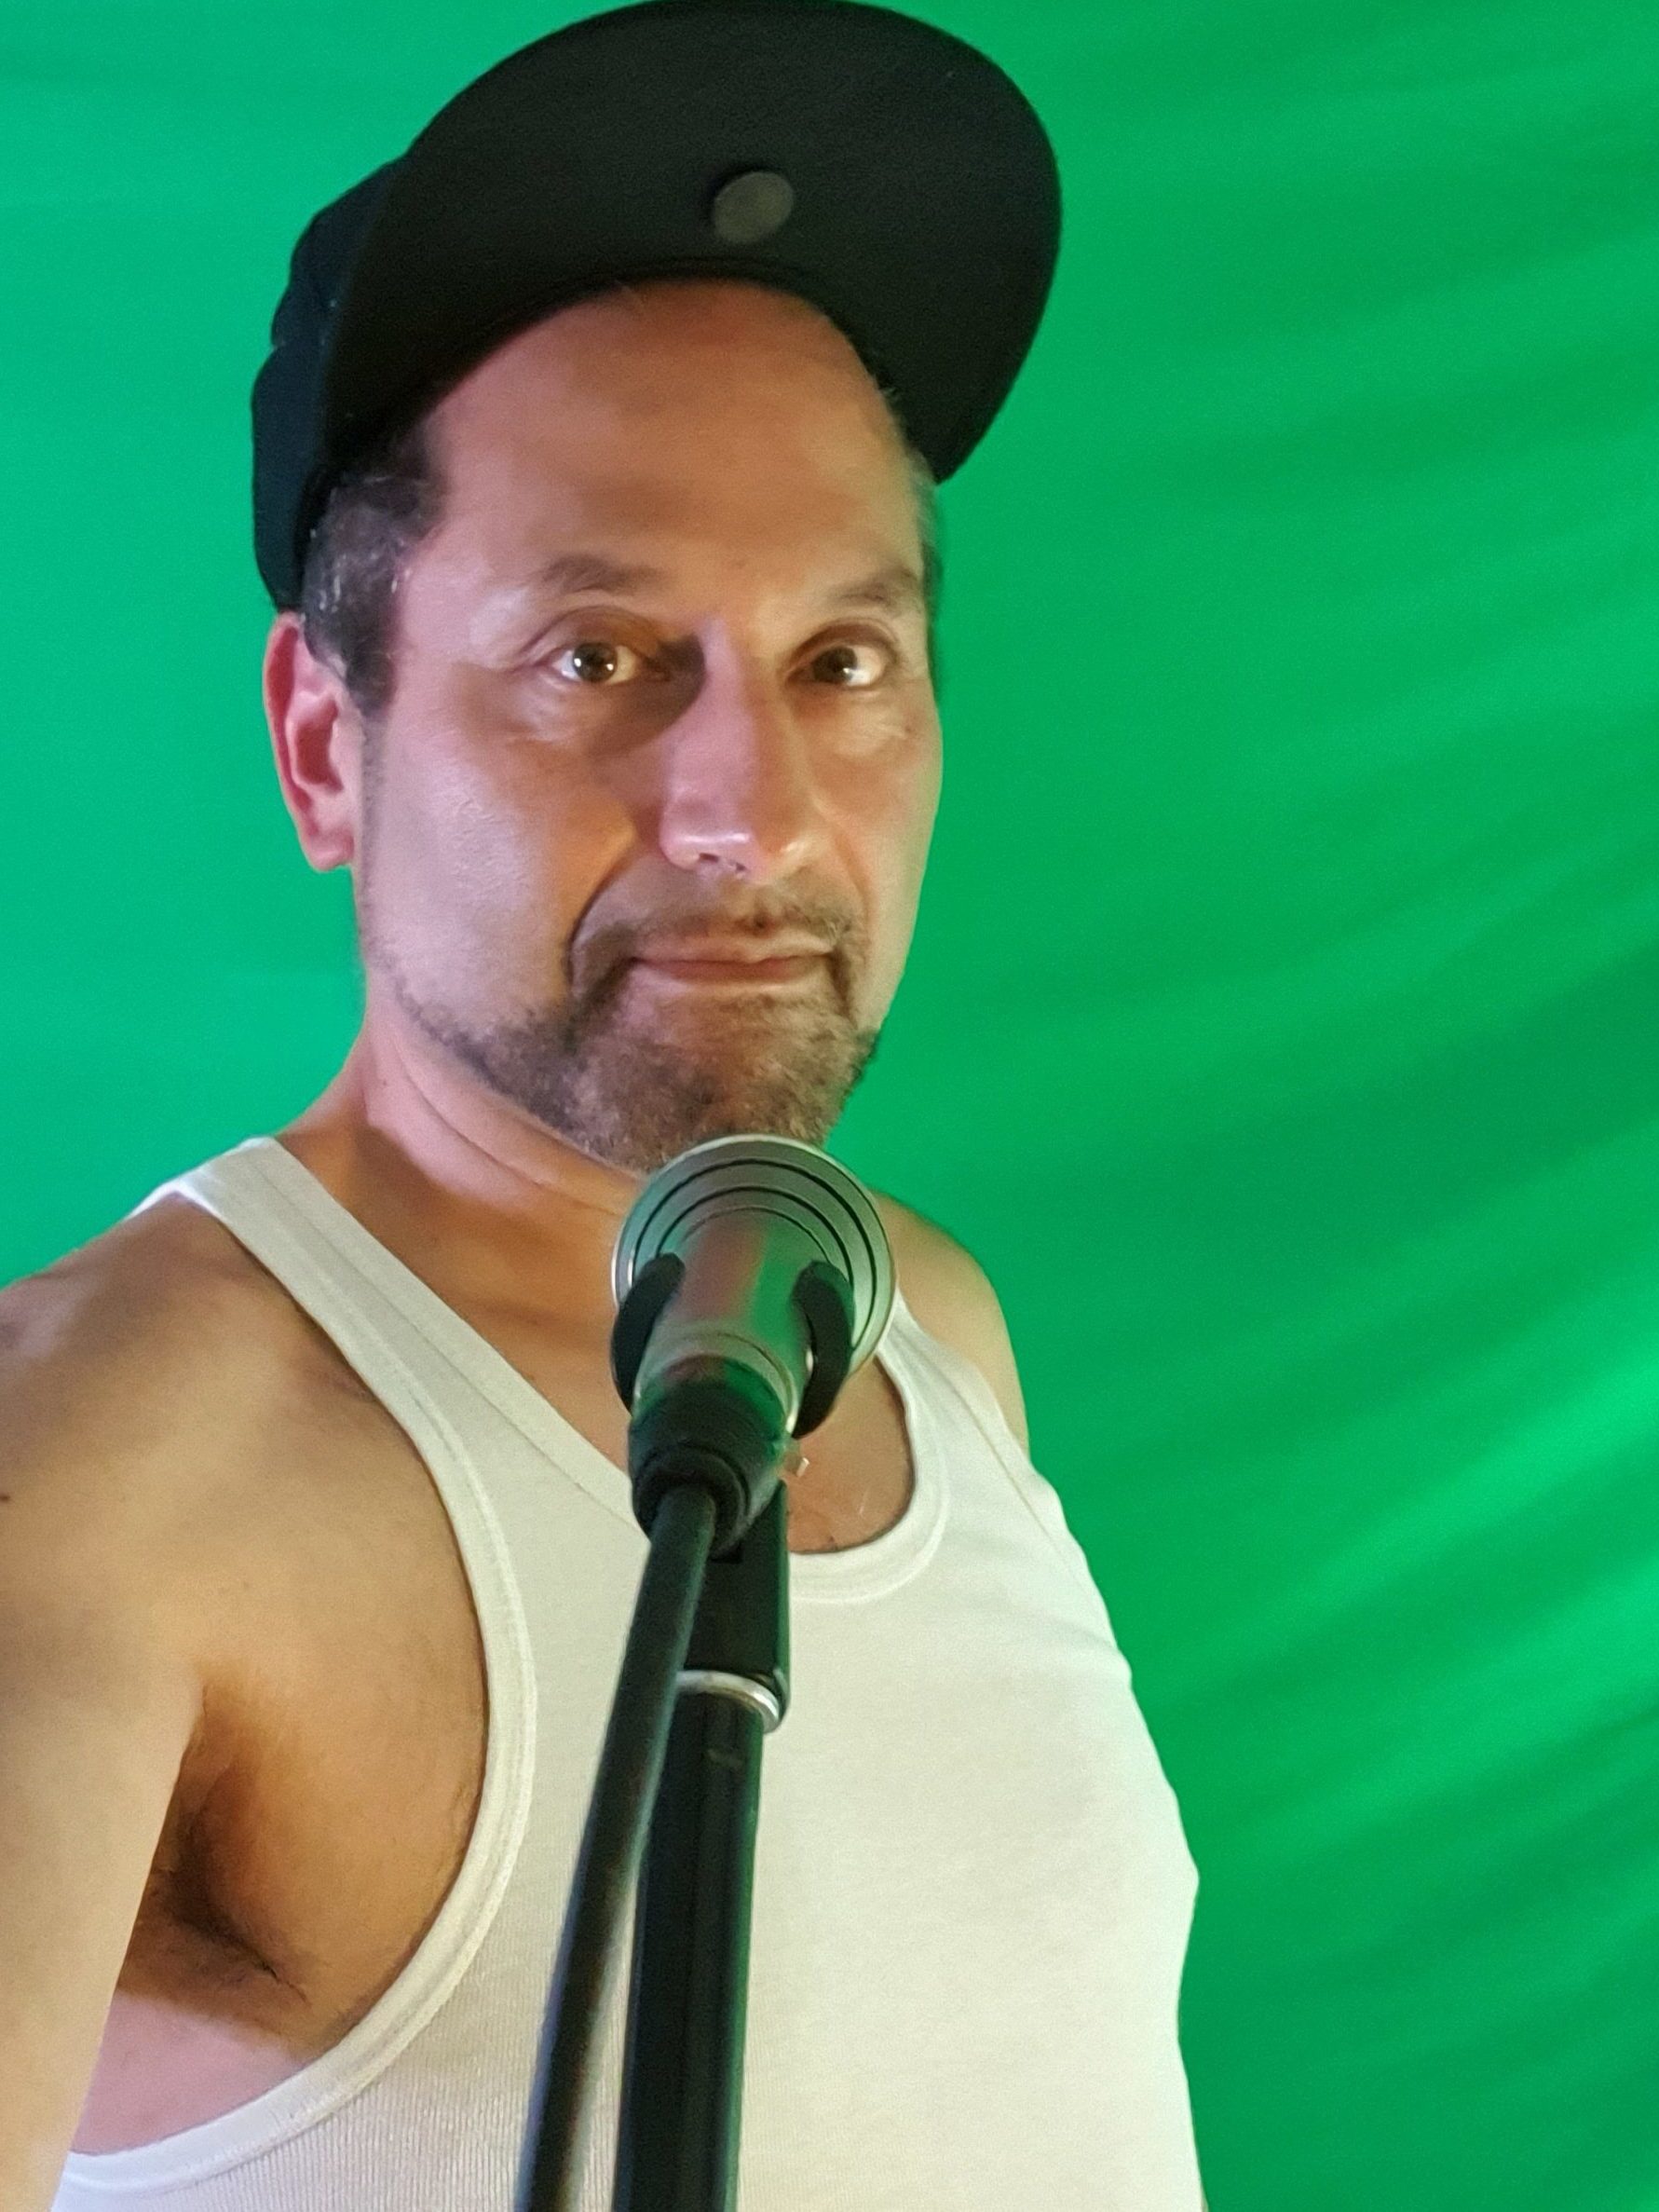
Green Screen selfie
Green Screen selfie

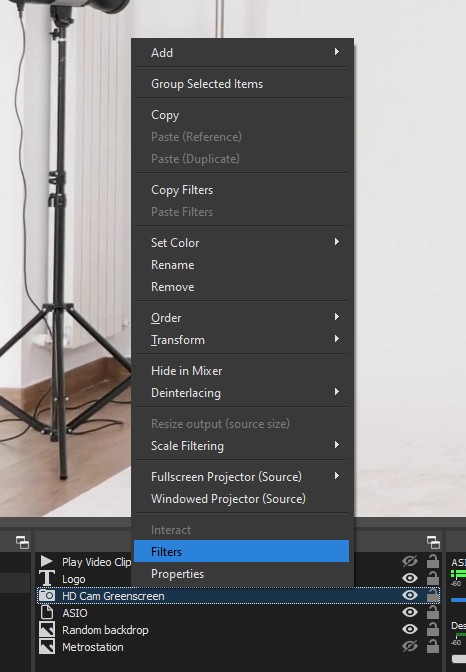
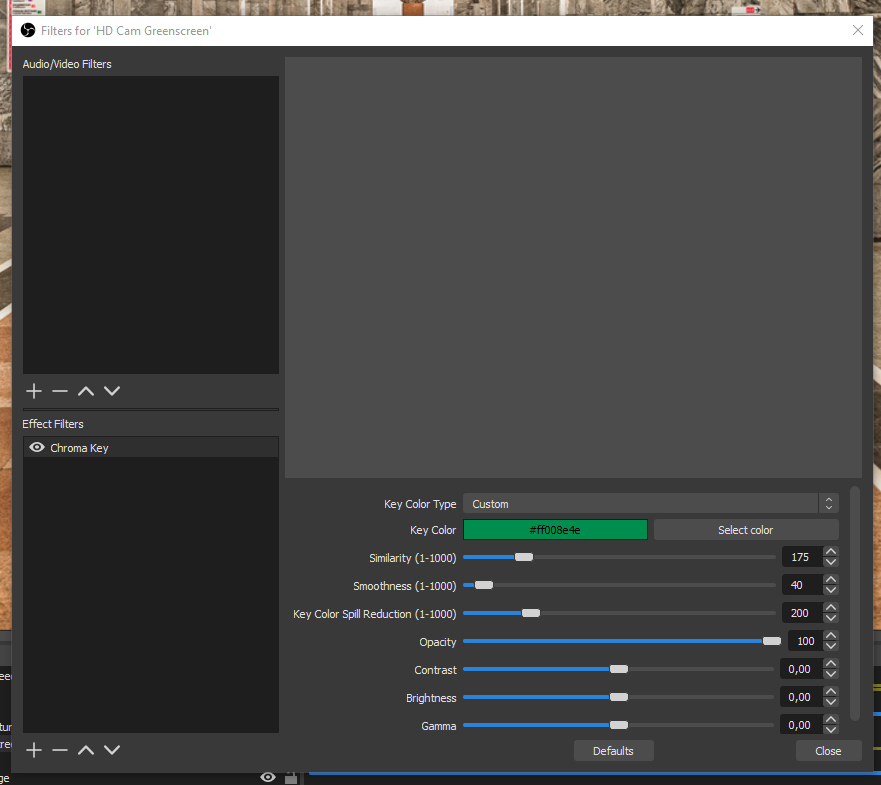
Then you need to set up OBS Studio. Its as simple as right-clicking your camera in the scene and selecting the Filters properties. In the dialog add the Chroma Key filter and select the color of your green screen. Then slide Similarity from somewhere around 100-250 to get a good picture. Everything outside the color range will become black. Then add a backdrop image (or video!) somewhere below the camera in the the scene list and you will have your Green Screen effect.

OBS Camera Filter
OBS Camera Filters
OPBS Chroma Key Filter settings

The first caveat I bumped into was that I set it up during daytime and it kind of worked, but then I found I stream in at night time and then you need light. In fact it turned out that 2 photo studio lights came in handy. When you use at least 2 studio lights they also cancel out shadows through folds and creases in the green screen. It does however bleed a little onto you as a subject, so you will be strangely highlighted as well. This is something you can also see in my first Amsterdam subway picture. Because of the uneven lighting in subways it does not really show. Not every picture is suitable as a backdrop. Photos with people or animals don’t work, because you expect them to move.

The second effect you see is that instruments with reflective surfaces also reflect the green screen. This will result in the background shining through reflecting surfaces. My take is that its a minor distraction, so I accept some shining through of the backdrop. Its also possible that some parts of your room don’t fit well with the Green Screen, doorways or cupboards. In that case you can choose to crop the camera in the scene by dragging the sides of the camera in the scene with the Alt-key (or Apple key) down. The cropped camera borders, will be replaced by the backdrop.

OBS: Live streaming with good audio quality

In a previous post I mentioned that I use OBS Studio for my live streaming and a little bit about how. It shows that I use an ASIO plugin for audio in the OBS Studio post, but why is it needed? For me in the live stream I want to recreate the studio quality sound, but with a live touch. After all, why listen to a live stream when could just as well listen to the album or single in your favorite streaming app? Lets first see where the ASIO plugin comes into play.

Live Streaming Setup

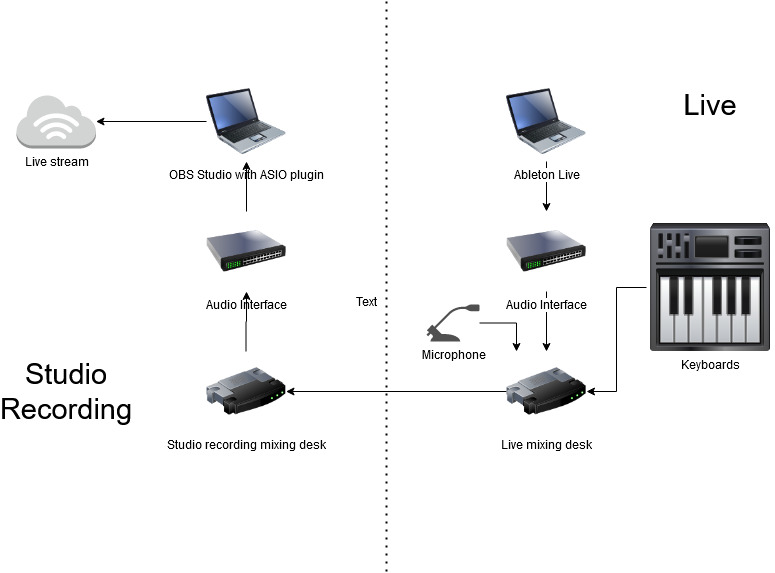
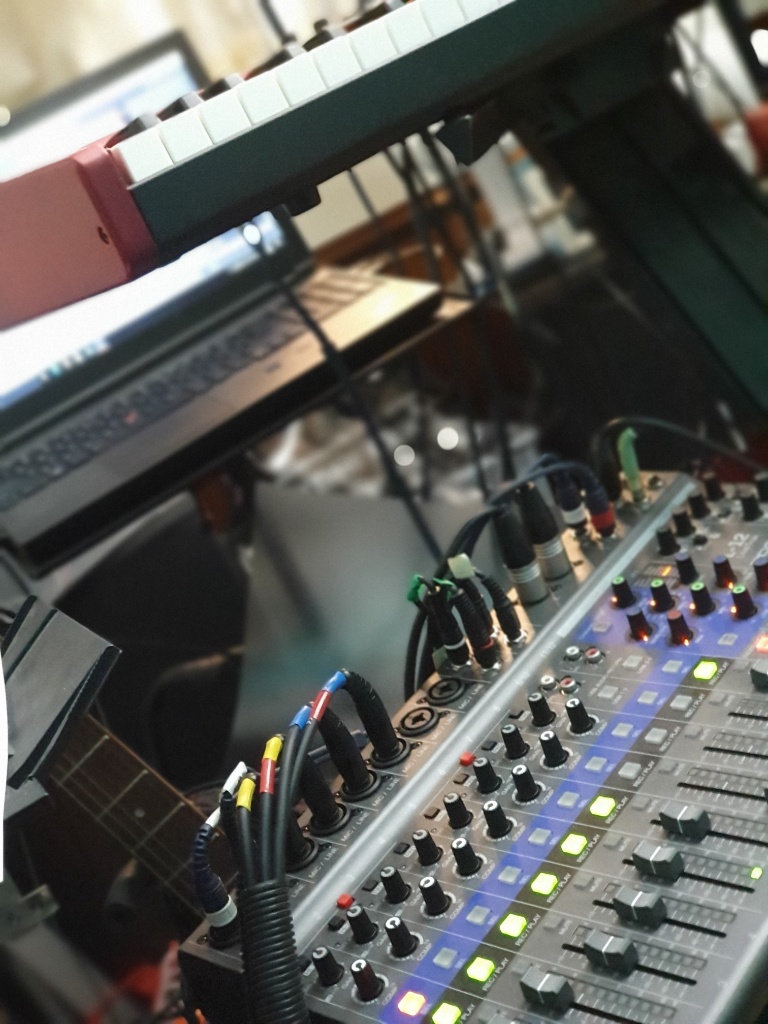
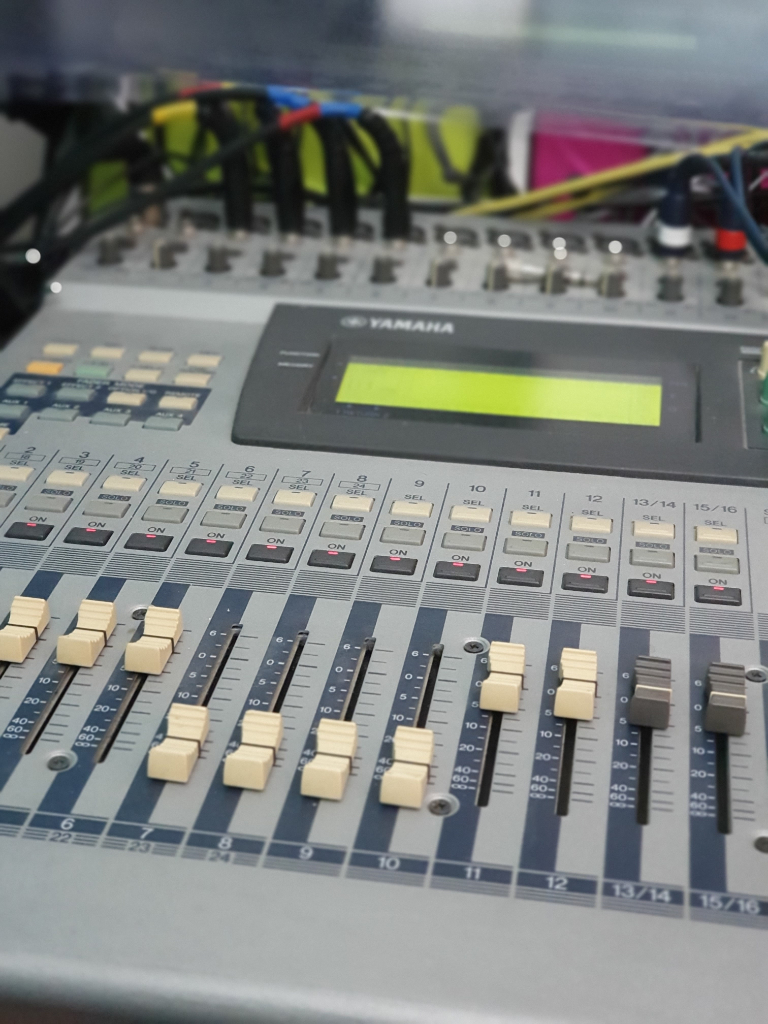
My setup in the studio is divided in two parts. One part is dedicated to studio producing and recording, with a Focusrite Scarlett 18i8, a digital Yamaha mixing desk and a MIDI master keyboard. For recording I use Ableton Live. The other part is the live setup, with (again) Ableton Live, another Focusrite Scarlett 18i8, a Clavia Nord, Micro Korg and the Zoom L12 mixing desk. The live setup will directly connect to the PA with a stereo output. Both sides run on separate PCs (laptops).

Home Studio Live Side

For OBS Studio and the live streaming setup, I chose to use PC on the studio recording side. Its directly connected to the Internet (cabled) and can easily handle streaming when it doesn’t have to run studio work. I play the live stream on the set dedicated to playing live and i use the live side stereo PA audio out to connect it to the studio side to do the live streaming. This means the live side if the setup is exactly as I would use it live.

Home Studio Recording Side

It all starts with the stereo output on the Zoom L12 mixing desk, that normally connects to the PA. On the mixing desk there is vocal processing and some compression on all channels to make it sound good in live situations. To get this into the live stream as audio I connect the stereo output to an input of the Yamaha mixing desk. This is then routed to a special channel in the studio side audio interface. This channel is never used in studio work.

Of course it could be that your live setup simpler then mine. Maybe only a guitar and and a microphone. But the essential part for me is this that you probably have some way to get these audio outputs to a (stereo) PA. If you don’t have a mixing panel yourself and you usually plug in to the mixing desk at the venue, this is the time to consider your own live mixing desk for streaming live. With vocal effects and the effects that you want to have on your instruments. Maybe even some compression to get more power out of the audio and make it sound more live.

But lets look at where the ASIO plugin comes into play. The ASIO plugin takes the input of the special live channel from the Yamaha mixing desk using the studio side audio interface and that becomes the audio of the stream. Because I have full control over the vocal effects on the live side, i can just use a dry mic to address the stream chat and announce songs. Then switch on delay and reverb when singing. Just like when I play live, without the need for a technician even.

Playing a live stream is different from playing live, because it has a different dynamic. In a live stream its OK to babble and chat minutes on end, this is probably not a good idea live. I find however when it comes to the audio, it helps to start out with a PA ready output signal. Similar to the audio you would send to the PA in a real live show. Also it helps to have full hands on control over your live audio mix to prevent you having to dive into hairy OBS controls while streaming live. Lastly, for me its also important that streaming live is no different from a playing live at a venue in that you can break the mix, miss notes, mix up lyrics and that you feel the same nerves while playing.

Streaming live with OBS Studio

Okay, like everybody else i started streaming too. I had a planned live show, but live shows will not be possible for at least another half year. Every evening my social timelines start buzzing with live streams and all the big artists have also started to stream live. No place for me with my newly created and sometimes shaky solo live performance to make a stand? After some discussions with friends i decided to make make the jump.

But how to go about it? If you already have experience with live streaming, you can skip this entire article. This is here just for the record so to say. After some looking around I came to this setup:

OBS Studio with ASIO plugin
Restream.io for casting to multiple streaming platforms
Logitech C920 webcam
Ring light
– Ayra ComPar 2 stage light see this article

OBS is surprisingly simple to set up. It has its quirks. Sometimes it does not recognize the camera, but some fiddling with settings does the trick. You define a scene by adding video and audio sources. Every time you switch from scene to scene it adds a nice cross fade to make the transition smooth. You can switch the cross fade feature off of course.

OBS Main scene setup

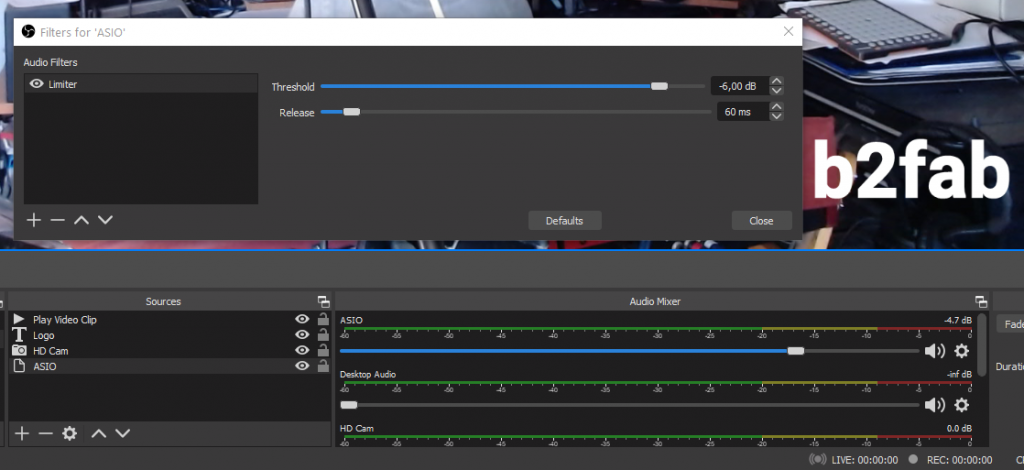
I only use one scene. The video clip is there to promote any YouTube video clip. It plays in a corner and disappears when it has played out. The logo is just “b2fab” somewhere in a corner. The HD cam is the C920 and the ASIO source is routed from my live mixer to the audio interface on the PC. I setup a limiter at -6db on the ASIO audio as a filter to make sure i don’t get distortion over any audio peaks.

I also had to choose my platform. From the start i wanted also to stream live on Facebook and Instagram. Instagram however kind of limits access to live streaming to only phones. There is software to stream from a PC, but then you have to set it up again for every session and you need to switch off two-factor authentication. For me one bridge too far for now.

I chose Restream.io as a single platform to set up for streaming from OBS. It then allows to stream to multiple platforms and bundle all the chats from the different platforms into a single session. For Facebook pages however, you need a paid subscription tier. For now I selected the free options YouTube, Twitch and Periscope. YouTube because it is easy to access for my older audience. Twitch because it seemed quite fun and i also like gaming. Periscope because it connects to Twitter.

If the live show takes shape i might step into streaming from my Facebook page. Another plan is to try the iRig Stream solution and start making separate live streams on Instagram. With high quality audio from the live mixer. I will surely blog about it if i start working with it.

For now it all works. Restream.io allows me to drop a widget on my site. Its a bit basic and only comes alive when i am live, so i have to add relevant information to it to make it interesting. If you want to drop in and join my live musings check my YouTube, Twitch and Periscope channels or my site at around 21:00 CEST.

A first attempt at an automatic VJ mix on stage

For some time now I am looking for a way to add video to my Ableton Live performance. In this article I am experimenting with VideoRemix Pro from MixVibes. There are many people with a similar quest so it seems and equally as many solutions. Most solutions (Resolume, Modul8) revolve around the Apple MacOS. Since I am not in the Apple ecosystem, these are not available to me. Some quite elaborate solutions use many components that all are glued together. Sometimes with MIDI, sometimes with plugins.

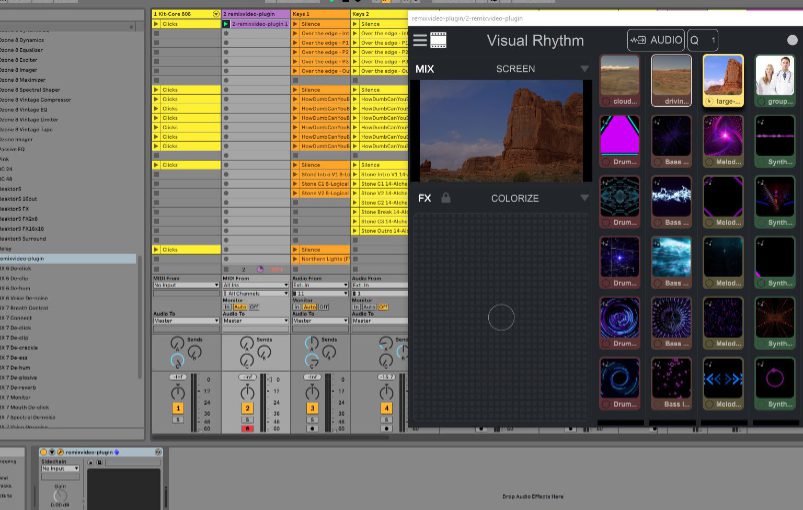
As a first attempt am looking for a simple single piece of software that can run inside Ableton Live for a PC. Enter VideoRemix Pro. You need to have the Pro version to run it inside Ableton Live as a plugin. When you look at the instruction video, you can see that it runs in Session mode. Which is how I use Ableton Live live. Looking at this it seems simple enough, but there is a learning curve.

This learning curve is not helped by obvious glitches and problems when using the software. I had quite a battle installing it and getting it to run as a plugin inside Live. The first problem was Live crashing when dropping the plugin on a MIDI track. Which is how you are supposed to use it. My first reaction was to ask for a refund, but after a reboot and some experimenting I got it to work. The secret for me was to make sure that VideoRemix does not use the Windows Default audio. Once I switched to the ASIO audio option that Live also uses, the plugin stopped crashing.

VideoRemix Pro runs in desktop mode as well as plugin mode, but not at the same time. The desktop mode seems solid enough, but even there I have run into glitches. This had to do mostly with customizing the Novation LaunchPad Mini that I wanted to use to control the video. The LaunchPad Mini had been just lying around as a backup for the Ableton Push that I mainly use. It is however not supported by default. The makers of the software prefer you using the full Launchpad Mk2, which has more control options of course.

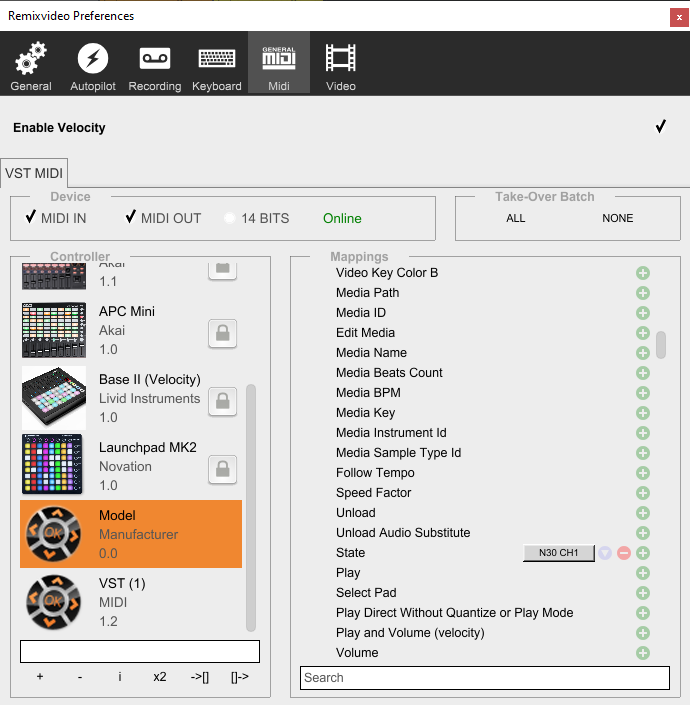
This means that in order to use it, you have to define a custom control mapping for the software. This seems easy enough, since you have a MIDI learn mode in the software. It took some learning for me to use it. In short, hover over the element in VideoRemix you want to control. Then click or turn the midi knob to link it. Press it again to see if the mapping worked. After this you will see a custom mapping in the list of midi devices in the preferences, which you could then rename.

A new custom MIDI mapping in the VideoRemix Midi Preferences

Then moving over to Ableton Live and running it as a plugin (remember: not at the same time), you will find this same list. Confusing enough there is a VST MIDI device there, but in my case that did not respond to any attempt to control the video. If you switch over to your custom mapping that you created in the desktop mode, things start moving. Now you can record your video sequence.

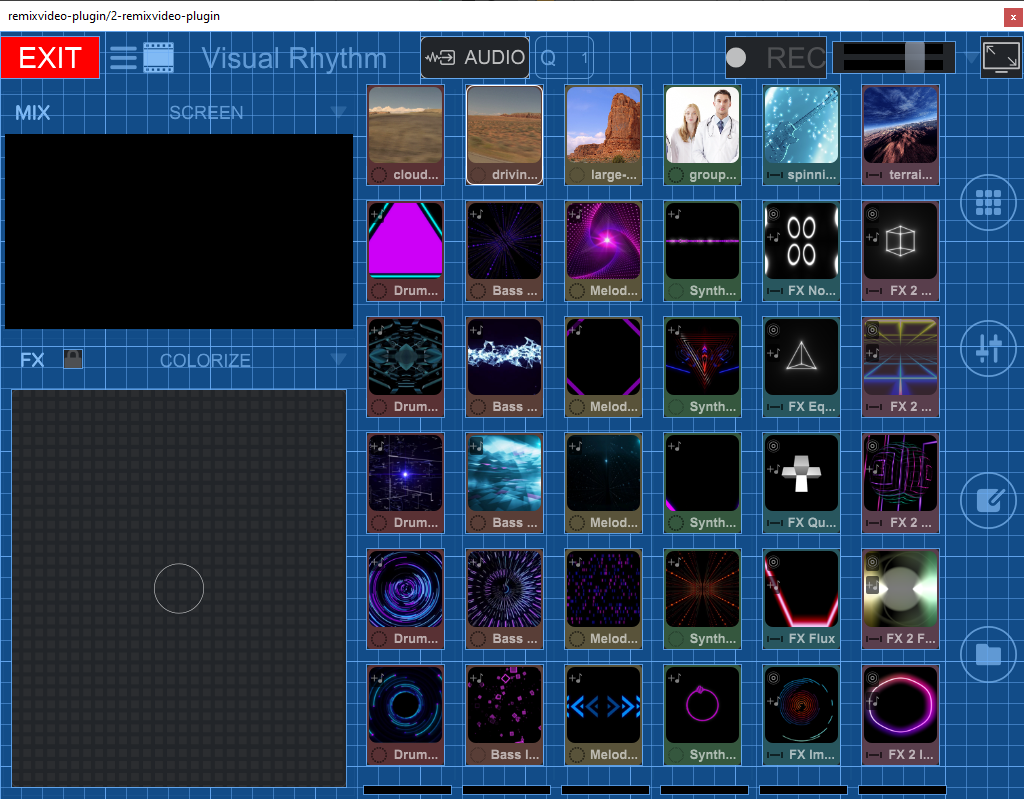
Creating or recording a video sequence is based on the 6×6 grid of buttons in VideoRemix. This means that you are limited to 36 clips that you can launch. One clip can run for 100 seconds. Hit a clip to start it. Hit it again to stop it. By default running clips is column oriented. You cannot start more clips running on the same column. One clip on the same column will stop a clip on another row. You can start an entire row with a single command. You can start an entire column, but only if you enable all clips playing in a grid of course.

If you want a more complex mix of clips with more than a few clips per song and more then a dozen of songs, you’re probably out of luck with 36 slots. It seems you have to simplify your VJ mix if you are using this software standalone. For now it will have to do for me.

The VideoRemix Clip Grid

The effects (FX) section is quite elaborate. You can control it as well as all the faders, through MIDI. The moment you hit full screen on the top right you will see your VJ mix full screen. Hopefully on the right video output, but I will have to look into that yet. The default set of clips also loops sound and this sound can be mixed, so you can also have sound effects playing as part of your performance.

This is my first attempt at working with video as part of a Live based performance. After quite a battle to get it working, it is now seems actually possible to have a video running as part of a Session mode sequence, like there is a real VJ at work. I am still quite worried about the overall stability of the setup and I need to get to grips with the quirks of the software.

If you have experience with this or other software setups, please comment below!

Why you should start using a 360 camera

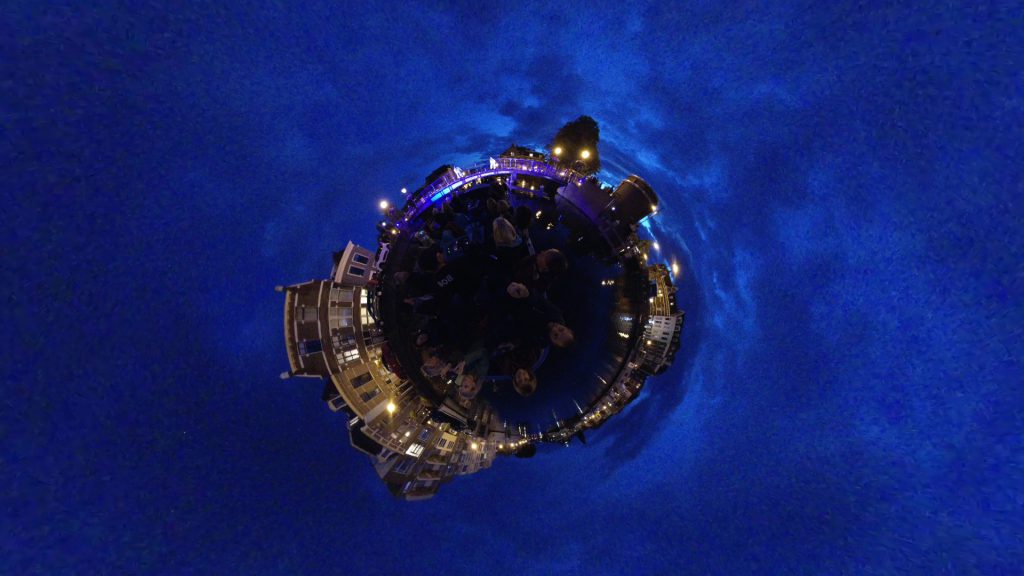
Already four years ago I started using a 360 camera. At that time I wanted to create those videoclips where you are really in the set and I wanted viewers to experience the video. The video quality was then an issue and for me it still is, unless you have a solid budget to spend. At the 3.000 euro price point video quality is no longer a big issue. At the lower end however, things have improved slightly. I have now invested in an Insta360 ONE X at a fraction of that price, 400 euro. What has persuaded me to invest in this camera if the quality is only slightly better?

First off, it comes with software that allows you to take your full 360 degree recording and cut out a flat rectangle that looks like you recorded it with a normal camera. Where is the advantage in that? It is actually intended to allow you use it as an action camera and then in the video editing cut out, pan and zoom into any action around you. You can see samples of this in the product page. What use is that to me as a musician, you might ask. Well, how about filming a whole gig from several points and cutting, panning and zooming into all the action on stage and in the crowd? Also the software has some really captivating special effects like speeding up, turning the 360 view into a ball, fish eye etc.

Secondly, it has rock-solid stabilization, because it uses gyroscopes to record all movements. This also ensures that the recording is perfectly horizontal, even when recording at an angle. You will find that if there is too much movement in your recording, most viewers will become sea sick really fast. A smooth recording and stable recording makes the difference. I can now confidently record while walking. Also freaky is that if you use a selfie stick to hold the camera, the software will remove the stick. It will appear as if the camera is hovering above you.

Schemerstad
Schemerstad

Thirdly, it actually matters that the quality of the recordings is at least slightly better than that of the first generation of 360 cameras. The performance in low light is dramatically better and the 25% increase in pixels of camera’s in the same price range does make a difference. Am I completely happy? No of course not. I can really and wholeheartedly recommend the ONE X at the lower price tier. It has made some impossible recordings possible and I will keep using 360 as part of my video recording to capture the action and experiences.

So this is why you too (as a musician) should start using a 360 camera. Not because you want people to experience VR, but to capture everything and decide how to use the recording later. On stage and everywhere the action happens.

Editing a music video for IGTV

From lying down to upright

Instagram took everyone by surprise by introducing the new upright video format IGTV video channel for all users. Shooting a video was obviously a horizontally oriented wide screen experience, matching the orientation of TVs and cinema. Instagram stories however were always vertically oriented to match the way you naturally hold your phone. IGTV nicely cultivates that. Some people always record vertically and that footage is then hard to show on TV, YouTube and such. Now you have a new outlet for that, enter IGTV.

If you have your material for your music video already recorded in upright position then you are so ready to edit it for IGTV! What I can see however is that not many existing recordings were ready for IGTV, so many decided to just clip off some footage from the left and right to keep the middle bit. The worst ones cut off parts of the titling so you can clearly see that its not the right IGTV stuff. As a viewer you feel cheated, because obviously you’re missing parts of the video.

But what if you have already recorded a video clip to be shown on YouTube and its in the landscape format? How to reuse that recording to make something that looks right on IGTV? What are the technicalities of the new IGTV video format?

Tunnel vision

The first step for me with the landscape clip for the Just a Game video, was to render it without the titling. All titling that does not fit the vertical format. The format to go for is HD, but then with reversed horizontal and vertical resolutions. So 1080×1920. With lengthy music video clips, you will find that upright portrait HD results in files that are too big in size. There is a size limit for regular video uploads, a maximum 10 minutes length and 650MB. The error messages from IGTV are not at all revealing unfortunately. A clip of 4 minutes length or more however, can easily go over 650MB. Then you will have to consider HDReady 720×1280.

IGTV Pan and Zoom
IGTV Pan and Zoom

If you removed the titling because of the landscape format, now is the time to redo the titling for the vertical format to show the viewer that you have intended this clip to be in IGTV format. After that, all you will have to do is to use pan and zoom to cut out the upright sections of the clip that really show the user all the action in the clip. This way you don’t have to give away that the clip recording was not intended for IGTV. As always I am using Corel VideoStudio for the simple work and its capable of rendering the required output for IGTV. Now its time to upload! Tell me about your experiences!