Please note: starting with version 10.0.5, support for the A40 keyboard is integrated in Ableton live. If you use a new version of Ableton Live please read this article.
I was looking out for a MIDI controller and control surface for Ableton Live. The Komplete Kontrol S series and comparable Novation controllers were strong contenders, but then came the news of the new Komplete Kontrol A series. This caught my eye, because the pricing of these was well below that of the S series. Previously I switched out my old faithful but battered Korg Triton workstation for a Nord Electro 6D. The Nord is absolutely the right keyboard for my purposes, but I already knew I would miss the pitch bend and modulation controllers. The Push is perfect control surface, but there is some flow missing when you really want to play on the keyboard and interact with the sounds.
Enter the Komplete Kontrol A49. I first tried the controller at the Amsterdam Dance Event and there I noticed that some things were not working right. The person that demonstrated the device there said that it needed some firmware updates. This was some weeks before the official release. After the official release I ordered it and started working with it. Immediately it showed the same limitations in controlling even the Komplete Kontrol application that comes with it. Selecting a sound works fine. You can browse instruments in the Komplete Kontrol application with a ‘prelisten’ sample for every sample by just clicking, turning and nudging the Browse button as a joystick. All other buttons and knobs remained dead.
An update!
Then after a week an update to Komplete Kontrol rolled out and a firmware update for the A49 controller. Only after that the knobs came to life as macro controllers within the Komplete Kontrol application. Then the next step came where I installed the keyboard on my desk to work as the main controller for writing songs within Ableton.
Ableton can use ready made scripted or compiled templates to allow MIDI controllers to work as control surfaces. Sure enough when you dig into the documentation of the A series MIDI controllers, you will find reference to copying the right scripts into the Ableton system folders. Essentially you need to copy over scripts from a Host Integration/Ableton folder to Ableton program data control surface script directories. This allows the control surface scripts to appear in the Preferences popup of Ableton under the Link MIDI tab. Once the script is selected, the A49 should not only be able to control instruments and play them, but it should also be able to control Ableton itself. Also the transport controls, like Play/Record etc.
Do not follow the instructions!
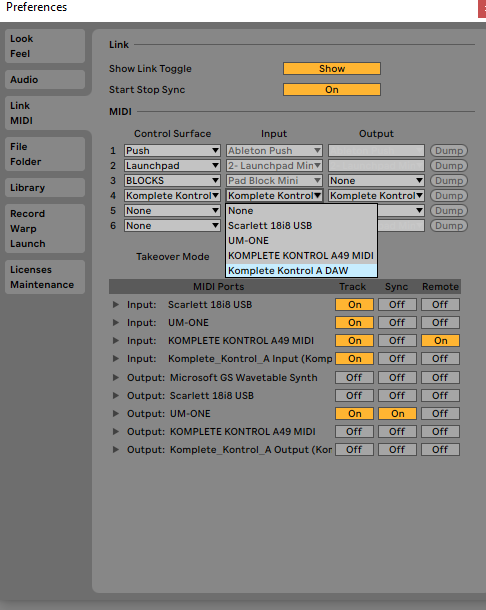
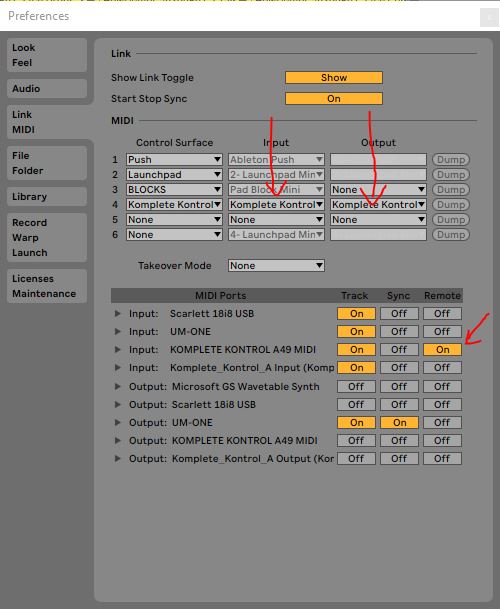
However, that’s where it all breaks down. When following the instructions you will end up with just the MIDI template on the controller. The transport controls remain dead. Fortunately when browsing several forums, I found that the instructions are wrong. Probably copied and pasted from the S series. The essence is that you have to ignore the part where it says that you don’t need to specify templates for the Input and Output settings of the control surface scripts. Setting these to the Komplete Control A DAW options magically enables the transport controls. From then on you have to manually switch back to the MIDI controller template by using SHIFT – Plug In/Midi. Don’t forget to also enable the Remote settings for the Komplete Kontrol MIDI ports and you will have it all.
The instructions from Native Instruments will also give you a Kontakt instrument rack that maps controller inputs to Kontakt instrument macro’s and now you are completely in control (or Kontrol hahaha). By all means it is not that easy to get to all the good stuff, but at least its there. This is now my workflow:
- Want to browse Kontakt instruments? Start the Komplete Kontrol application and use the Browse option to quickly browse instruments. Also the sounds from others then Native Instruments can be browsed I noticed. I am using Spitfire eDNA Earth and Epica for instance.
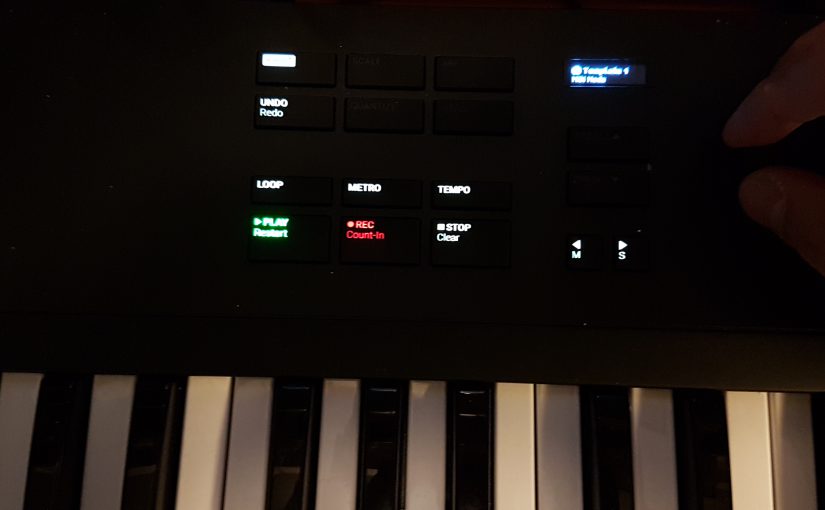
- Want to start recording in Ableton? Use the Track/Instance transport controls. Even including the loop , metronome and tempo tap options. The controller knobs control the mixer levels of the Session channels.
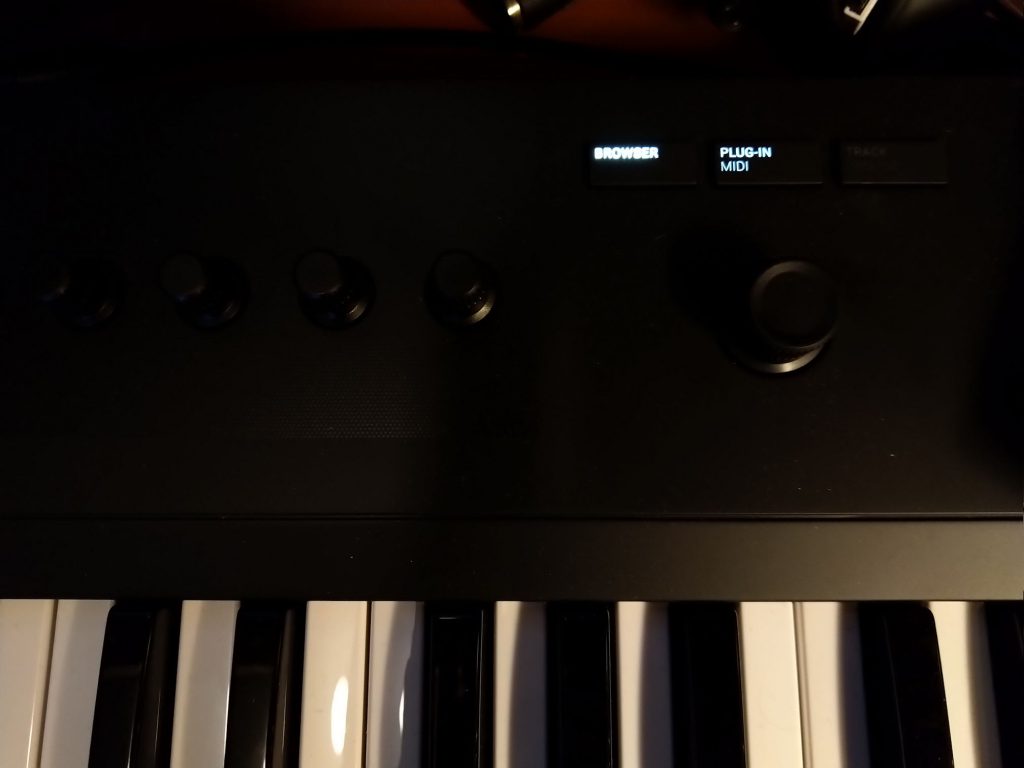
- Want to play and control instruments? Press SHIFT Plug-In/MIDI and make sure you have MIDI mapping to the controls. Make sure you have the knob controls mapped to macros in your instrument. You may need the Kontact instrument rack for that.
The verdict? Its not very intuitive and it takes some getting used to, but all in all you get a very playable semi weighted MIDI controller and a controller surface that really can give you the basic controls that replace the keyboard and the mouse. A nice touch is the touch sensitivity of the knobs. The tiny display informs you of the current function of a knob if you only touch it.
Thanks for sharing your experience with the Kontrol A49 🙂
I just got my first NI Hardware: Komplete Kontrol M32.
And i am diving deep into the possibilties of Hard and Software.
So far I can control Ableton now with M32.
But i am not sure if it’s all good what i see:
It seems one have to “hard map” the knobs via midi to vst-Instruments?
I expected the “blue hand mode” and auto mapping feature to the knobs. Perhaps there is a solution…
Digging deeper and deeper ….
Hi, sorry for the late response. Somehow I missed all comments for a month, but you need to use the Komplete Control vst plugin to gain control over your NI instruments. This will immediately map macro controls to the knobs. I will try to write an update to explain.
You can just add an user script really easy to create and then magic blue hand under control. Takes 5 minutes to do.
Check this out
https://youtu.be/i6-PR5FrnJA
Nice one Eddy. Much easier then having to add the instrument every time. Fortunately stuff gets better and better supported over time.