When there is an opportunity to practice singing I take it and is there a better place to sing than in the car? Probably not. Technically its the wrong position for your body to sing, but somehow singing along in the car just sounds better. It is probably the closed area and the close in mix with the sound system that makes it work. The question is then, because practicing and recording go hand in hand: can I also record in the car?
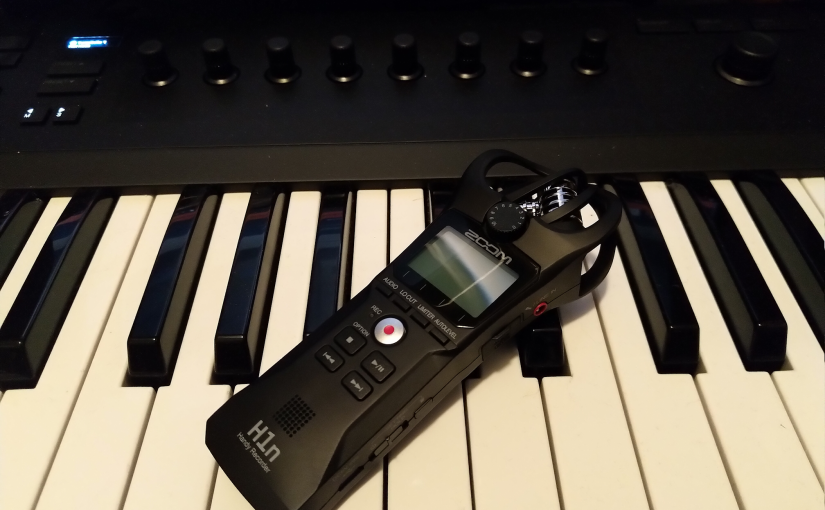
To that end I’ve tried the voice recorder of my phone and to say it bluntly: that doesn’t work. Only car sounds, no music. Fortunately I found something that does work. The Zoom H1n recorder. Now I can practice singing and at the end of the journey hear if I am on the right track and which songs need more work. Also, its a great way to experiment with new ideas along an otherwise boring trip from A to B.
The Digital Signal Processing (DSP) of modern voice recorders is not tuned to music recording. Probably anything that works as a voice recorder simply does not work for singing in a car. You need to have a broader frequency range otherwise the car sounds will just take over. On top of that you need something that can be operated while driving, so it has to be a one button start/stop operation and the recording device must really be mounted securely.
Enter the Zoom H1n. It has a camera mount, so any camera stand that can be used in the car will hold it. Then its one button to start and one button to stop. You can even feel your way through the operations so there is no need to take your eyes of the road. All the other editions of the Zoom portable recorder range will probably also do the job, but not at the price point of the H1n. Did you know you can also use it as an ASIO device? Other brands might also offer the same experience, but you should check the mounts and the capabilities for recording music.
Instagram took everyone by surprise by introducing the new upright video format IGTV video channel for all users. Shooting a video was obviously a horizontally oriented wide screen experience, matching the orientation of TVs and cinema. Instagram stories however were always vertically oriented to match the way you naturally hold your phone. IGTV nicely cultivates that. Some people always record vertically and that footage is then hard to show on TV, YouTube and such. Now you have a new outlet for that, enter IGTV.
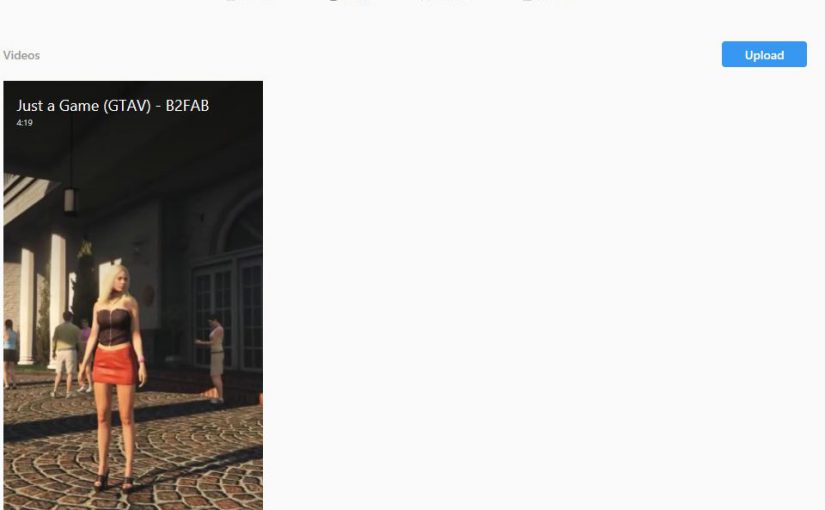
If you have your material for your music video already recorded in upright position then you are so ready to edit it for IGTV! What I can see however is that not many existing recordings were ready for IGTV, so many decided to just clip off some footage from the left and right to keep the middle bit. The worst ones cut off parts of the titling so you can clearly see that its not the right IGTV stuff. As a viewer you feel cheated, because obviously you’re missing parts of the video.
But what if you have already recorded a video clip to be shown on YouTube and its in the landscape format? How to reuse that recording to make something that looks right on IGTV? What are the technicalities of the new IGTV video format?
Tunnel vision
The first step for me with the landscape clip for the Just a Game video, was to render it without the titling. All titling that does not fit the vertical format. The format to go for is HD, but then with reversed horizontal and vertical resolutions. So 1080×1920. With lengthy music video clips, you will find that upright portrait HD results in files that are too big in size. There is a size limit for regular video uploads, a maximum 10 minutes length and 650MB. The error messages from IGTV are not at all revealing unfortunately. A clip of 4 minutes length or more however, can easily go over 650MB. Then you will have to consider HDReady 720×1280.
IGTV Pan and Zoom
If you removed the titling because of the landscape format, now is the time to redo the titling for the vertical format to show the viewer that you have intended this clip to be in IGTV format. After that, all you will have to do is to use pan and zoom to cut out the upright sections of the clip that really show the user all the action in the clip. This way you don’t have to give away that the clip recording was not intended for IGTV. As always I am using Corel VideoStudio for the simple work and its capable of rendering the required output for IGTV. Now its time to upload! Tell me about your experiences!
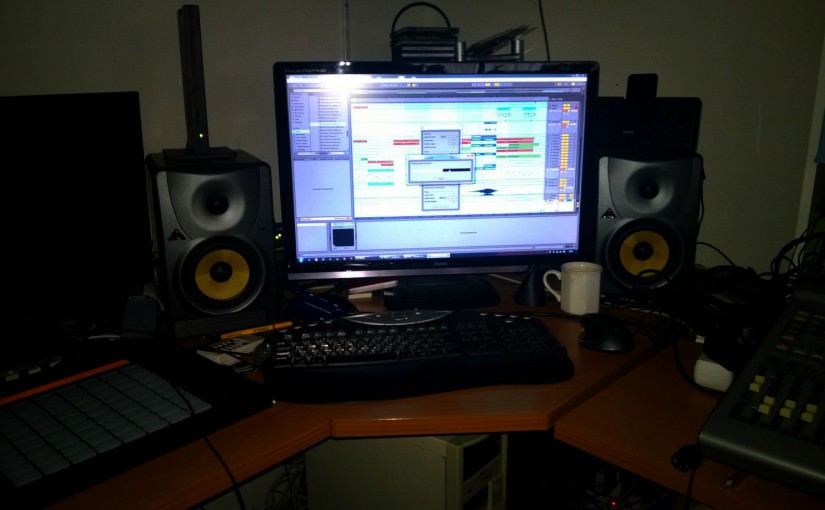
I have been in and out of the biggest and very small studio’s, but by no means my home setup can match any of the studio’s i have had the honor to work in. Its a PC, headsets, monitors, an audio interface and a microphone essentially. Yes, there also other gear, but i could work without it. Specifically for working with vocals, there is not much more that you would need.
Hardware and software
I have invested in a better microphone. A nice condensor with tube preamp from sE. The audio interface is one of the Focusrite Scarlett models. The headsets are from Sony and Sennheiser, not too expensive. Bought for acceptable audio quality and wearing comfort. The monitor speakers are a pair of very basic Behringer types. You can’t mix on headphones alone. The PC is a bit on the weak side, but 64 bits and 16GB of memory with SSD. The whole setup as i have it should set you back around 1500 euro’s.
Then there’s software. I use Ableton and that is on its own enough to turn this hardware into a studio. I have invested in plugins for all kinds of purposes, but again they are not needed. Another 100 euro’s and you are in the music business.
Setup
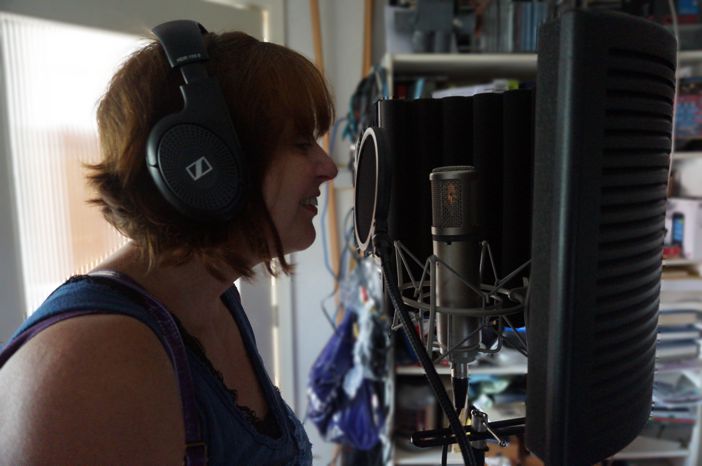
Then there is no separate recording room or mixing room, when i record vocals it is all in the same small room in the attic. Call it a mess, stuffed with musical instruments and a PC. To compensate for the noise that the PC will make and the poor room acoustics I put the microphone inside a nice sE recording filter and behind a plop filter. The setup looks like this.
Heddy recording
The actual noise from the PC is getting through, but is low enough to be taken out by a basic gate. When recording i make sure that the levels reach halfway from 0db in Ableton, which would be around -18 db. This leaves enough headroom and allows the noise floor to be gated out in my case.
Recording
As you can see, the trick to not using a separate recording room is the use of a headset. For the first recording sessions i was very nervous, so i put a lot of effort in setting up a separate routing in Ableton to allow for a real headset mix. With Cue Out to another output. In practice now i just throw the Master Out into two headsets. One for me and one for the performer. Of course the monitor speakers are switched off while recording.
Personally i work with a complete arrangement, before adding vocals. This means in Ableton i will be recording in the Arrangement view. Recording in the Session view is maybe more your thing. It depends on your workflow. Just one thing, whatever way you work, make sure you know your DAW. There is nothing more frustrating then wasting the time of your singer with finding stuff out and messing up. Recording should be swift and when you have “flow” it should not be interrupted needlessly.
This also applies to the hardware of course. Messing with cables and mixer routing is a waste of everybody’s time. Know your software. Know your hardware. Need another take? Bang, start recording. Is the recording okay, but could maybe done better? Save this track. Record another. Compare. Play back. Which is better? Go back to the first recording? Okay no problem. One line went great, the next not so great? Keep the first line and only record the next line. Punch in, punch out recording. Practice this before inviting your guest performer. It makes the difference.
Tricks
Try to listen carefully while recording. Strange plops or noises? Are the words right? Did you get all parts recorded? As a rule, don’t immediately start mixing during or straight after recording. Rest your ears and have a listen again, the next day. Then start mixing or discover that you need another recording session. It happens.
And okay i admit, i also cheat a little, specifically with my own vocals. I use Melodyne from Celemony (autotune) and Nectar from Izotope (vocal processing). Two tools to get great sound with small means. It also allows for doubling voices for multiple layers of vocals and it saves a lot of studio time. Please make sure your performer agrees on you cheating.
I use cookies on this website to see statistics and make sure that you can find your way. By clicking “Accept”, you consent to the use of cookies for only this.
I will never sell your personal information. I'm in it for the music!
This website uses cookies to improve your experience while you navigate through the website. Out of these, the cookies that are categorized as necessary are stored on your browser as they are essential for the working of basic functionalities of the website. We also use third-party cookies that help us analyze and understand how you use this website. These cookies will be stored in your browser only with your consent. You also have the option to opt-out of these cookies. But opting out of some of these cookies may affect your browsing experience.
Necessary cookies are absolutely essential for the website to function properly. These cookies ensure basic functionalities and security features of the website, anonymously.
Cookie
Duration
Description
cookielawinfo-checkbox-analytics
11 months
This cookie is set by GDPR Cookie Consent plugin. The cookie is used to store the user consent for the cookies in the category "Analytics".
cookielawinfo-checkbox-functional
11 months
The cookie is set by GDPR cookie consent to record the user consent for the cookies in the category "Functional".
cookielawinfo-checkbox-necessary
11 months
This cookie is set by GDPR Cookie Consent plugin. The cookies is used to store the user consent for the cookies in the category "Necessary".
cookielawinfo-checkbox-others
11 months
This cookie is set by GDPR Cookie Consent plugin. The cookie is used to store the user consent for the cookies in the category "Other.
cookielawinfo-checkbox-performance
11 months
This cookie is set by GDPR Cookie Consent plugin. The cookie is used to store the user consent for the cookies in the category "Performance".
viewed_cookie_policy
11 months
The cookie is set by the GDPR Cookie Consent plugin and is used to store whether or not user has consented to the use of cookies. It does not store any personal data.
Functional cookies help to perform certain functionalities like sharing the content of the website on social media platforms, collect feedbacks, and other third-party features.
Performance cookies are used to understand and analyze the key performance indexes of the website which helps in delivering a better user experience for the visitors.
Analytical cookies are used to understand how visitors interact with the website. These cookies help provide information on metrics the number of visitors, bounce rate, traffic source, etc.
Advertisement cookies are used to provide visitors with relevant ads and marketing campaigns. These cookies track visitors across websites and collect information to provide customized ads.