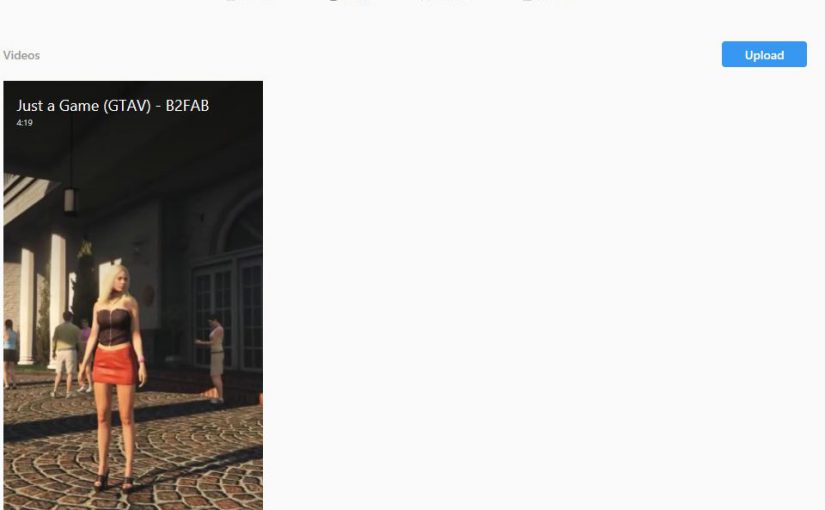
Instagram took everyone by surprise by introducing the new upright video format IGTV video channel for all users. Shooting a video was obviously a horizontally oriented wide screen experience, matching the orientation of TVs and cinema. Instagram stories however were always vertically oriented to match the way you naturally hold your phone. IGTV nicely cultivates that. Some people always record vertically and that footage is then hard to show on TV, YouTube and such. Now you have a new outlet for that, enter IGTV.
If you have your material for your music video already recorded in upright position then you are so ready to edit it for IGTV! What I can see however is that not many existing recordings were ready for IGTV, so many decided to just clip off some footage from the left and right to keep the middle bit. The worst ones cut off parts of the titling so you can clearly see that its not the right IGTV stuff. As a viewer you feel cheated, because obviously you’re missing parts of the video.
But what if you have already recorded a video clip to be shown on YouTube and its in the landscape format? How to reuse that recording to make something that looks right on IGTV? What are the technicalities of the new IGTV video format?
Tunnel vision
The first step for me with the landscape clip for the Just a Game video, was to render it without the titling. All titling that does not fit the vertical format. The format to go for is HD, but then with reversed horizontal and vertical resolutions. So 1080×1920. With lengthy music video clips, you will find that upright portrait HD results in files that are too big in size. There is a size limit for regular video uploads, a maximum 10 minutes length and 650MB. The error messages from IGTV are not at all revealing unfortunately. A clip of 4 minutes length or more however, can easily go over 650MB. Then you will have to consider HDReady 720×1280.
IGTV Pan and Zoom
If you removed the titling because of the landscape format, now is the time to redo the titling for the vertical format to show the viewer that you have intended this clip to be in IGTV format. After that, all you will have to do is to use pan and zoom to cut out the upright sections of the clip that really show the user all the action in the clip. This way you don’t have to give away that the clip recording was not intended for IGTV. As always I am using Corel VideoStudio for the simple work and its capable of rendering the required output for IGTV. Now its time to upload! Tell me about your experiences!
Telling stories through songs. When there is no story I have no drive. Sometimes I actively scout for interesting stories. A sequence of words. A thought. Serendipity. Usually a picture forms in my head that shapes the story and that is when I start thinking about a clip. Last year this was very strong when Sam came to work on Memories. Its actually one of the first songs that I posted on SoundCloud, but Sam shaped it, rewrote the lyrics and sang it in the attic.
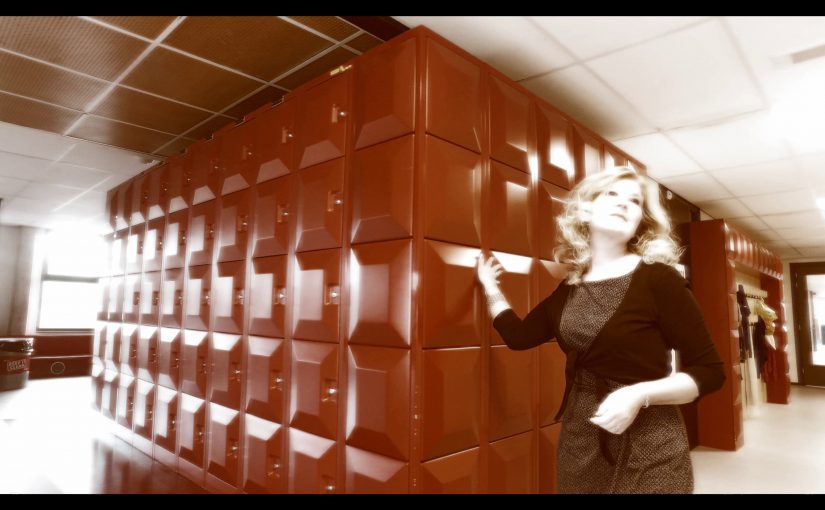
The original song was inspired by a school reunion. A magic event that reshaped my past, because most of what I remembered actually was wrong or incomplete. It seemed apt to make a video clip for it that somehow would take you back to school and down memory lane. But, how shape this image?
Usually I try to cast the original singer and maybe let him or her sing at least a few lines in the clip. I got into contact with the head of my old school, not far from Leiden, in Sassenheim. He arranged the possibility to shoot a video in the school. First everything seemed fine, but then came the terrible news that Sam could no longer take part in the project. No conflict, but personal problems. Disaster. Sam recovered, but still could not take part in the project. However, she agreed that I could use a stand in. She took part in the final result from the sideline.
A clip needs a story!
The first thing I try to do is write down the story of the clip, but in this form. A form that works for me:
The premise: the initial state of affairs that drives the plot. In this case: Coming back to your old school to look around and remember all the fun and nice memories of your school years after a school reunion.
Scenes: all the images I have in my head. The locations. The video shots. How to shoot the video, moving the camera or on a tripod.
All necessary props and assistance needed for every scene
This way I can answer all questions that people involved usually have. How long do you need to shoot in the school? Which locations? What to wear? Earlier I would just take my camera and go, but I found that when you start filming that its nice to come prepared. Also, it really helped a lot that I already knew the school and made an extra visit to fill in some details.
Ingrid in school
In this case Ingrid saved the whole project. She agreed to be the stand in for this clip and she is such a graceful and beautiful lady. Throughout shooting she remained strong and focussed. Even when we somehow seemed to be locked up in school by the cleaning ladies.
We have stuff…
A short word on equipment. I have invested in a Panasonic system camera that is capable of shooting 4K. It has image stabilization, but when shooting a shot while moving I now insist on using a gimball. When movement is not smooth its just not right, or it has to be a special effect. For shooting while moving I use the DJI Osmo that has a 4K camera attached. Earlier I found out that insufficient lighting can ruin recordings, so I also invested in special 1000W video lights. I always try to reuse the recordings in the form of making-ofs. For this shoot I also brought the VR 360 camera and an action camera to shoot the recording setups while recording. Makes sense? I hope so.
Why 4K? I have found that when the starting material is 4K, a resulting HD movie is of higher quality than a movie shot with HD equipment. Its the pixel interpolation that somehow results in a sharper image. Also, if the end result is a 4K edited movie, it is also ready for the foreseeable future of video. And if the end result somehow has imperfections, it is possible to cut out the best bits while keeping a HD quality result. Also 4K has overall better quality. No more jaggies much less moire. The only thing that I have saved on for now is framerate. My budget unfortunately does not allow me to shoot 4K at more than 25 frames a second. For now it will have to do.
…but how to use it
What I try to do is to set up all equipment manually. This is extra hassle and extra risky, but what I try to avoid is to have all equipment think for itself. These camera’s all have auto-everything settings. These settings make smart decisions to make sure the subject(s) that you film are well lighted and in focus. However, when filming I find that a camera may suddenly shift to new settings for the best lighting and focus in the middle of a recording. This will make it more difficult in the final video production to choose the correct color tones and lighting. Shifting focus in the middle of a recording will probably make the recording useless. So everything is set to manual, focus and lighting will be fixed.
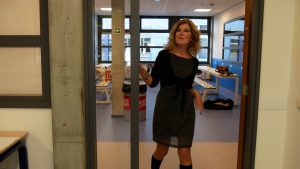
In the school setting the use of my video lights with a fixed color tone makes sure that the prevailing color tone of the recordings is also fixed. For the final video production I chose to give the whole clip a warm summer tone. Even when the clip was shot on a cold and cloudy autumn afternoon.
And there is more
For this clip I also made sure that Eline from Beauty & Visagie could be there. While recording I am already juggling all the equipment and video shooting. Eline made sure that Ingrid looked her best and remained stunningly beautiful throughout the whole afternoon. She also checked clothing and made sure that colors did not clash and that contrasts were in check. Walter also assisted, supported Ingrid, guarded stuff while we were running around and made sure we had power.
During recording I continuously play the music from the clip to make sure that the ‘rhythm’ of all movements matches. It also helps making sure that the mood is correct. Even though the final production might not be very pro. This way at least it will have the right flow and mood to match the music.
Also I always make sure that everyone in the clip is aware that it will be put on YouTube and made public. For these occasions I always carry paper release forms that people can sign to agree to ‘be in the movie’. For the people directly involved I just ask, but for strangers it might be best to let them sign a form.
As always: this is just the way I try to work and this is a reminder to self. Maybe it helps you.
If you want to support me making higher quality VR 360 video clips, please click here:
In the previous post showed you how i currently currently record VR 360 video. The Gear 360 does not output large video files (typically 100 MB). On the whole these files can be processed on any laptop or PC easily. The bit rate is not as extreme as the 4K output of professional camera’s. The GB files from these camera’s can bring a lower spec PC to its knees immediately. Expect this also with balls of GoPro camera’s. You shouldn’t have problems with Gear 360 video.
You can process these files with any video editing software, as long as you only use cross fades or other basic transitions. Slow motion or any speed effects will be ok. Even some special effects will apply, like vignette effects. These will blur or darken parts of the 360 video and that can work out quite ok. Coloring effects are also fine of course. One of the effects that does not apply is anti shake, because that will snip the edges of the video and thereby breaks the stitching of full 360 video. Actually technically anti shake could be done by rolling in and out parts of the video on opposing sides. I didn’t find any effect that can do that yet.
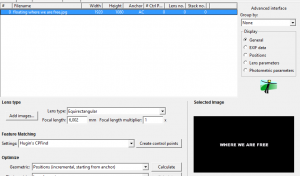
Now, titling and logos. If you want any titling you will either have to accept that it will be curved in strange ways, or you will need software that can apply the necessary curving to mix in the titling at the right viewing distance and angle. You can try to do this using Hugin. You can find instructions on how to create images that can be blended into your VR 360 video for logo’s and titling. Hugin 360 title
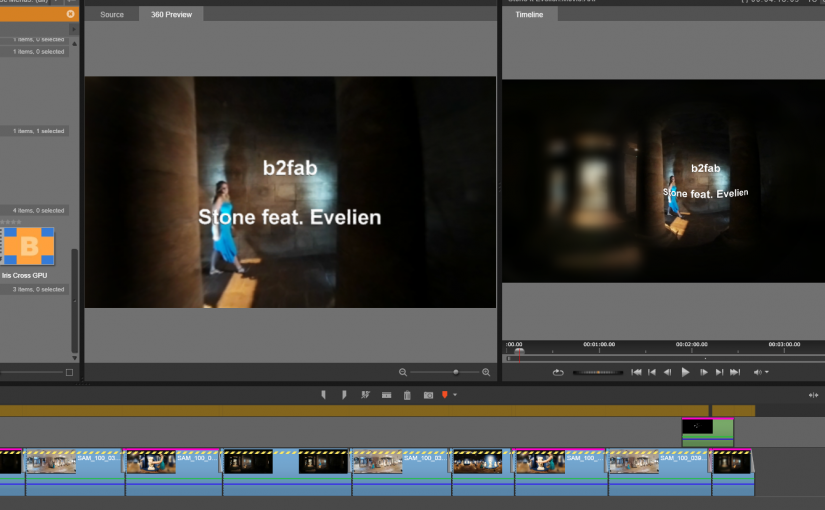
So now you’ve got mixing of different shots covered and titling and thus your basic needs. But is this enough for you? The remaining problem is that you can only see the final result after finishing editing, rendering and outputting to your VR device. This makes editing a chore. Fortunately, VR 360 is catching on and there is software that allows you to edit in a real 360 way. Even on a classic flat PC monitor.
Enter Pinnacle Systems Studio 20 Ultimate. The first affordable editing software for VR 360 movies. Now you get a 360 preview window and a way to place 2D content, like logo’s and titling, in the 360 space and preview the result immediately. This also means that you can mix in flat 2D video as part of your 360 video. You still need to be aware which effects and transitions apply in the VR world, but at least you can see the results without first rendering it and move it to the viewer. I am quite sure that more video editors will support VR 360 video. For now your starting point can be Studio 20 Ultimate, or just keep it basic and simple. The end result is worth the effort!
I use cookies on this website to see statistics and make sure that you can find your way. By clicking “Accept”, you consent to the use of cookies for only this.
I will never sell your personal information. I'm in it for the music!
This website uses cookies to improve your experience while you navigate through the website. Out of these, the cookies that are categorized as necessary are stored on your browser as they are essential for the working of basic functionalities of the website. We also use third-party cookies that help us analyze and understand how you use this website. These cookies will be stored in your browser only with your consent. You also have the option to opt-out of these cookies. But opting out of some of these cookies may affect your browsing experience.
Necessary cookies are absolutely essential for the website to function properly. These cookies ensure basic functionalities and security features of the website, anonymously.
Cookie
Duration
Description
cookielawinfo-checkbox-analytics
11 months
This cookie is set by GDPR Cookie Consent plugin. The cookie is used to store the user consent for the cookies in the category "Analytics".
cookielawinfo-checkbox-functional
11 months
The cookie is set by GDPR cookie consent to record the user consent for the cookies in the category "Functional".
cookielawinfo-checkbox-necessary
11 months
This cookie is set by GDPR Cookie Consent plugin. The cookies is used to store the user consent for the cookies in the category "Necessary".
cookielawinfo-checkbox-others
11 months
This cookie is set by GDPR Cookie Consent plugin. The cookie is used to store the user consent for the cookies in the category "Other.
cookielawinfo-checkbox-performance
11 months
This cookie is set by GDPR Cookie Consent plugin. The cookie is used to store the user consent for the cookies in the category "Performance".
viewed_cookie_policy
11 months
The cookie is set by the GDPR Cookie Consent plugin and is used to store whether or not user has consented to the use of cookies. It does not store any personal data.
Functional cookies help to perform certain functionalities like sharing the content of the website on social media platforms, collect feedbacks, and other third-party features.
Performance cookies are used to understand and analyze the key performance indexes of the website which helps in delivering a better user experience for the visitors.
Analytical cookies are used to understand how visitors interact with the website. These cookies help provide information on metrics the number of visitors, bounce rate, traffic source, etc.
Advertisement cookies are used to provide visitors with relevant ads and marketing campaigns. These cookies track visitors across websites and collect information to provide customized ads.