Instagram live stream from a phone with good audio quality

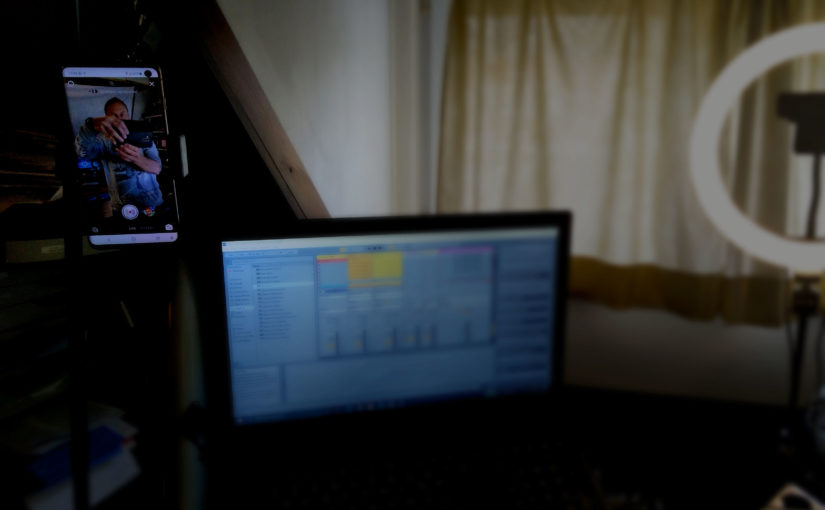
The first platform I looked at when starting to stream live was Instagram. Straight from the start it was obvious that Instagram wants you to use a phone. It needs to be upright and there is no out-of-the-box streaming solution for connecting streaming software from a PC. There are some software packages that allow you to stream from your PC to Instagram, like YellowDuck. These always need to jump through some hoops like authentication. I didn’t want to go there.

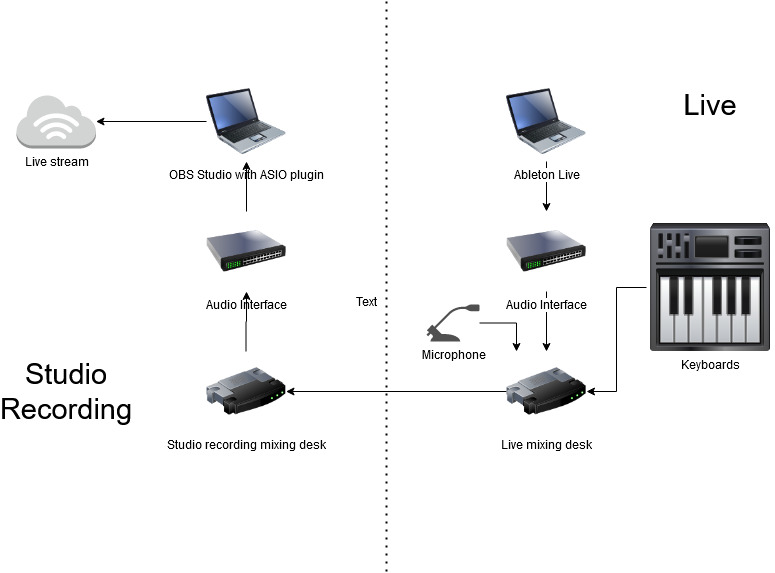
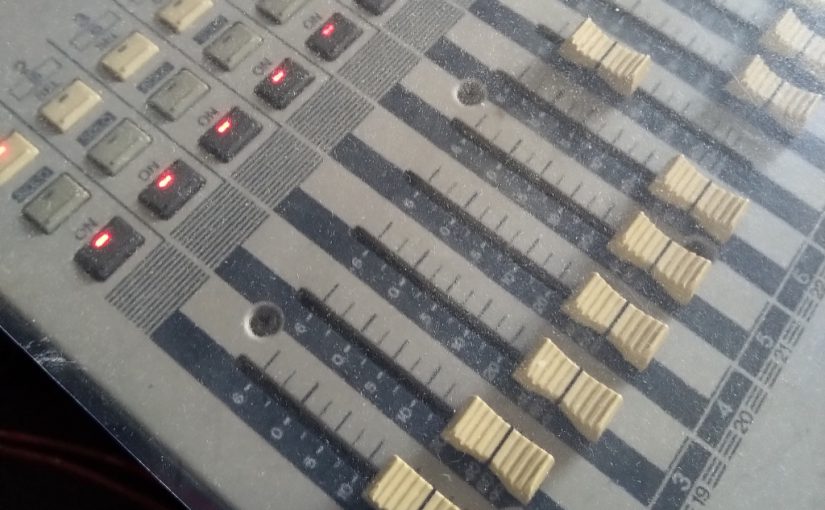
OK. Streaming from your phone seems to be the way for Instagram. In a previous post I explained that I want a good live audio quality. When live streaming, my starting point is the output from the mixing desk that I would connect to the PA when playing live in real life, if you know what i mean. So I feed the output of the live mixing desk directly into to the PC that streams to YouTube etc. Now for me the question is how to feed this into your phone. It could be very ‘live’ to use the microphone of the phone, but I could only see it lead to a noisy and garbled live show.

Fortunately, there are several ways to feed audio into your phone. Just like feeding the audio to a live streaming PC. Isn’t it amazing how phones have become kind of like the modern ultra portable PC? The bad news is that this time your cheap budget phone probably won’t cut it. You either need an iPhone or an Android phone above mid-range.

For an iPhone you can find plenty audio to lightning cables. If you want a bit more control you can use most of these iRig devices in the interface product section. Some of these have 2 inputs so they can act as some kind of live mixer for maybe a guitar and a microphone. For Android the situation is slightly more complex. You can check if your phone supports access to the audio by means of the USB C plug, or you can check if your phone supports OTG on its USB plug. If OTG is supported again most of the iRig devices will work like a charm.

Zoom H1n as an audio interface

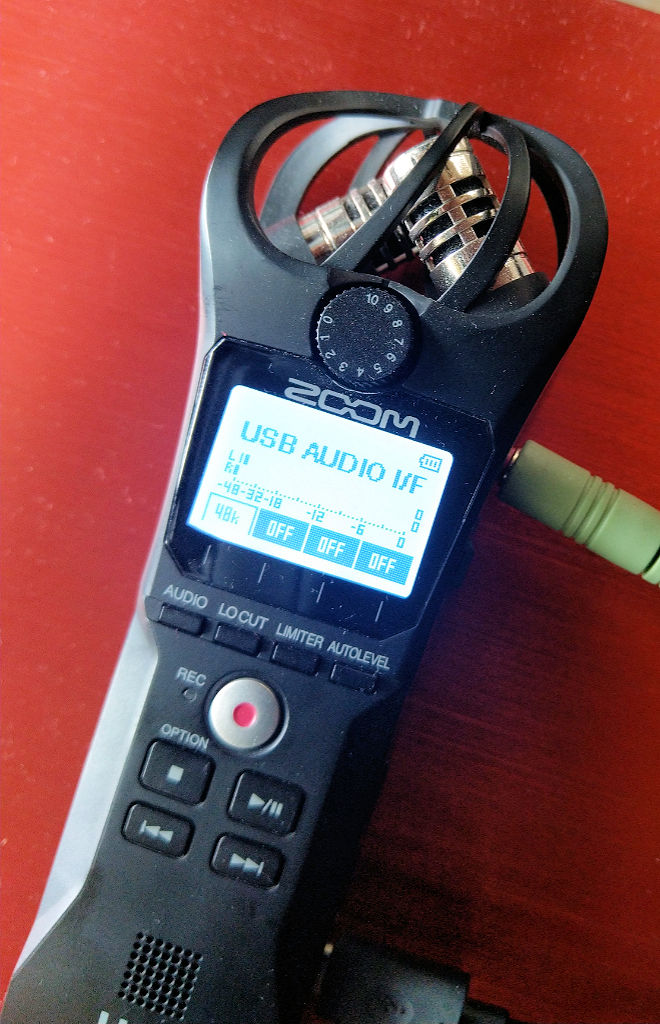
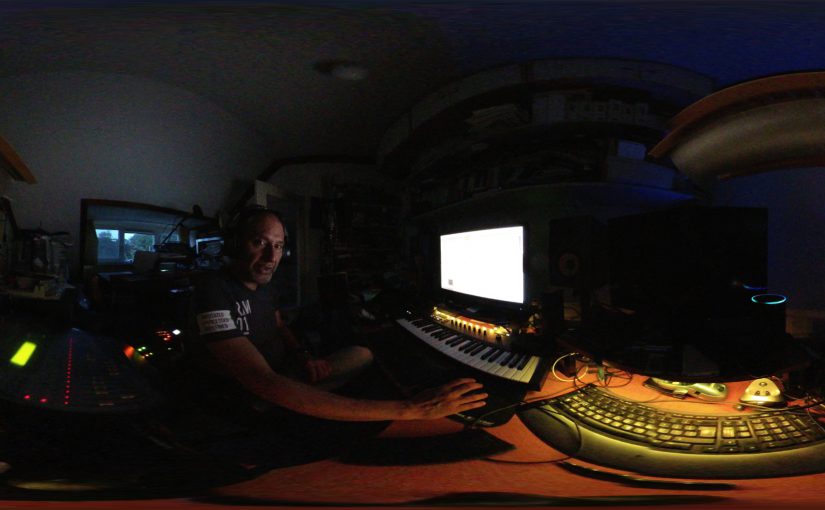
In my case the Samsung Galaxy S10 supports OTG. So the first thing I did was lookup all the iRig devices to see which one was most suitable. Then I came across the Zoom U-22 and U-24 devices. There I remembered that my Zoom H1n is actually also an audio interface. Then I tested if the Samsung Galaxy S10 recognized my Zoom H1n as an audio interface and boom! Instant success! No need to buy anything new. Then I got carried away, because my live mixer is also from Zoom and I connected my live mixing desk as an audio interface, but that didn’t work unfortunately. The phone crashed.

Instagram live streaming setup

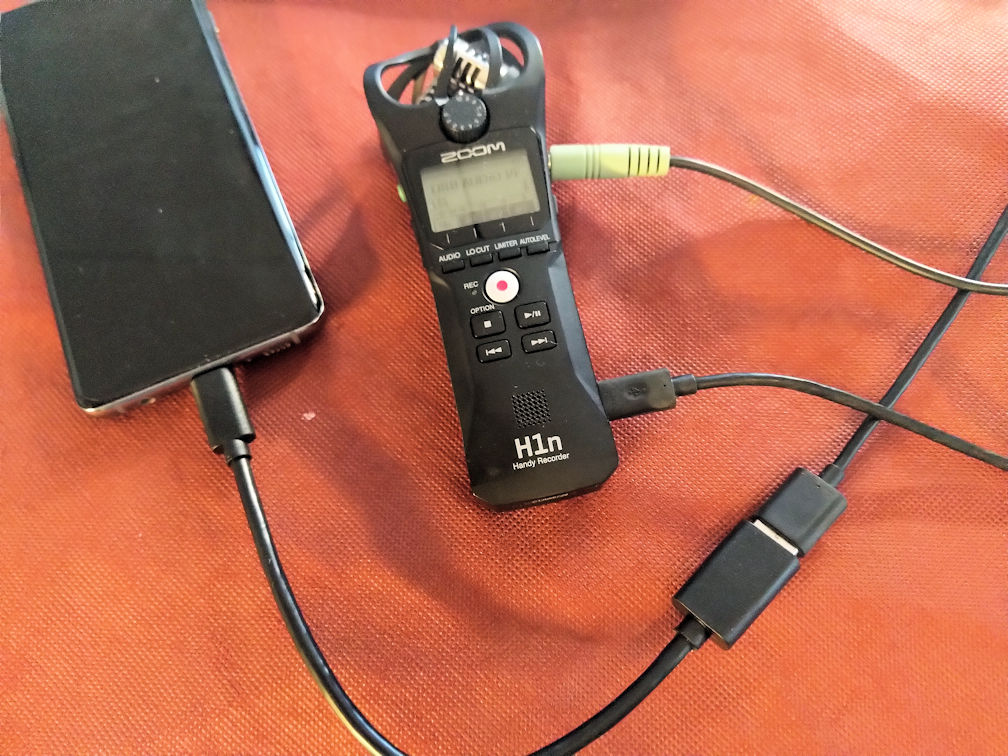
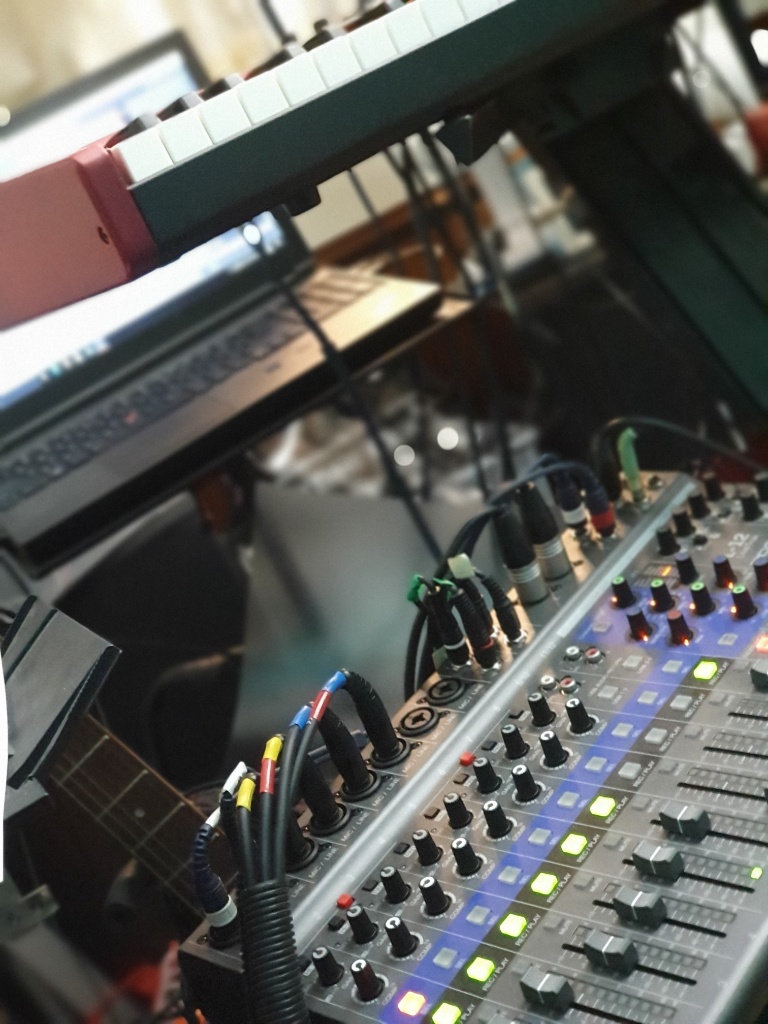
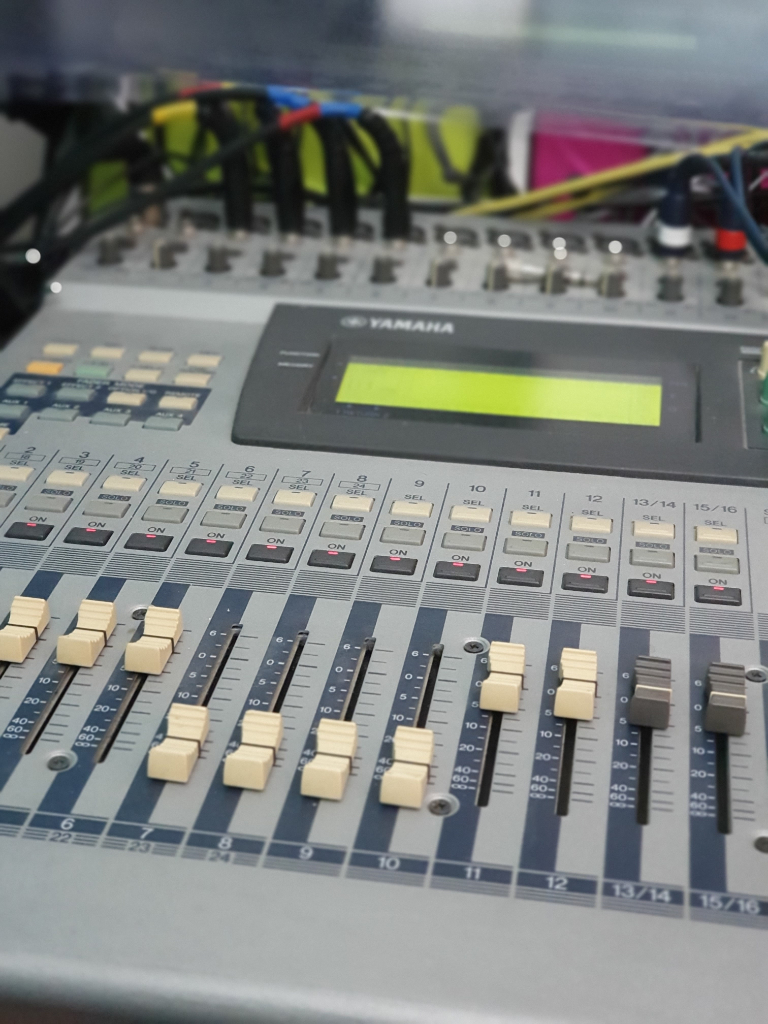
So this was the setup for my first Instagram live stream. A special OTG cable connects the USB port of the Zoom H1N with the phone. The Zoom H1n line in is connected to the mix output of the Zoom L-12 LiveTrak mixer. The first results were very promising. Unfortunately I could hear a quite audible hiss. It should tune the signal flow between the live mixer and the audio input. It could also be that the quality of the Zoom H1n as an audio interface is inadequate. Another downside is that you have to rely on the Zoom H1n batteries and/or your phone batteries. Maybe not a good idea if you want to do a live stream marathon. For my purposes now its OK. I hope you can now too join the flood of Instagram live streamers!

OBS: Live streaming with good audio quality

In a previous post I mentioned that I use OBS Studio for my live streaming and a little bit about how. It shows that I use an ASIO plugin for audio in the OBS Studio post, but why is it needed? For me in the live stream I want to recreate the studio quality sound, but with a live touch. After all, why listen to a live stream when could just as well listen to the album or single in your favorite streaming app? Lets first see where the ASIO plugin comes into play.

Live Streaming Setup

My setup in the studio is divided in two parts. One part is dedicated to studio producing and recording, with a Focusrite Scarlett 18i8, a digital Yamaha mixing desk and a MIDI master keyboard. For recording I use Ableton Live. The other part is the live setup, with (again) Ableton Live, another Focusrite Scarlett 18i8, a Clavia Nord, Micro Korg and the Zoom L12 mixing desk. The live setup will directly connect to the PA with a stereo output. Both sides run on separate PCs (laptops).

Home Studio Live Side

For OBS Studio and the live streaming setup, I chose to use PC on the studio recording side. Its directly connected to the Internet (cabled) and can easily handle streaming when it doesn’t have to run studio work. I play the live stream on the set dedicated to playing live and i use the live side stereo PA audio out to connect it to the studio side to do the live streaming. This means the live side if the setup is exactly as I would use it live.

Home Studio Recording Side

It all starts with the stereo output on the Zoom L12 mixing desk, that normally connects to the PA. On the mixing desk there is vocal processing and some compression on all channels to make it sound good in live situations. To get this into the live stream as audio I connect the stereo output to an input of the Yamaha mixing desk. This is then routed to a special channel in the studio side audio interface. This channel is never used in studio work.

Of course it could be that your live setup simpler then mine. Maybe only a guitar and and a microphone. But the essential part for me is this that you probably have some way to get these audio outputs to a (stereo) PA. If you don’t have a mixing panel yourself and you usually plug in to the mixing desk at the venue, this is the time to consider your own live mixing desk for streaming live. With vocal effects and the effects that you want to have on your instruments. Maybe even some compression to get more power out of the audio and make it sound more live.

But lets look at where the ASIO plugin comes into play. The ASIO plugin takes the input of the special live channel from the Yamaha mixing desk using the studio side audio interface and that becomes the audio of the stream. Because I have full control over the vocal effects on the live side, i can just use a dry mic to address the stream chat and announce songs. Then switch on delay and reverb when singing. Just like when I play live, without the need for a technician even.

Playing a live stream is different from playing live, because it has a different dynamic. In a live stream its OK to babble and chat minutes on end, this is probably not a good idea live. I find however when it comes to the audio, it helps to start out with a PA ready output signal. Similar to the audio you would send to the PA in a real live show. Also it helps to have full hands on control over your live audio mix to prevent you having to dive into hairy OBS controls while streaming live. Lastly, for me its also important that streaming live is no different from a playing live at a venue in that you can break the mix, miss notes, mix up lyrics and that you feel the same nerves while playing.

Streaming live with OBS Studio

Okay, like everybody else i started streaming too. I had a planned live show, but live shows will not be possible for at least another half year. Every evening my social timelines start buzzing with live streams and all the big artists have also started to stream live. No place for me with my newly created and sometimes shaky solo live performance to make a stand? After some discussions with friends i decided to make make the jump.

But how to go about it? If you already have experience with live streaming, you can skip this entire article. This is here just for the record so to say. After some looking around I came to this setup:

OBS Studio with ASIO plugin
Restream.io for casting to multiple streaming platforms
Logitech C920 webcam
Ring light
– Ayra ComPar 2 stage light see this article

OBS is surprisingly simple to set up. It has its quirks. Sometimes it does not recognize the camera, but some fiddling with settings does the trick. You define a scene by adding video and audio sources. Every time you switch from scene to scene it adds a nice cross fade to make the transition smooth. You can switch the cross fade feature off of course.

OBS Main scene setup

I only use one scene. The video clip is there to promote any YouTube video clip. It plays in a corner and disappears when it has played out. The logo is just “b2fab” somewhere in a corner. The HD cam is the C920 and the ASIO source is routed from my live mixer to the audio interface on the PC. I setup a limiter at -6db on the ASIO audio as a filter to make sure i don’t get distortion over any audio peaks.

I also had to choose my platform. From the start i wanted also to stream live on Facebook and Instagram. Instagram however kind of limits access to live streaming to only phones. There is software to stream from a PC, but then you have to set it up again for every session and you need to switch off two-factor authentication. For me one bridge too far for now.

I chose Restream.io as a single platform to set up for streaming from OBS. It then allows to stream to multiple platforms and bundle all the chats from the different platforms into a single session. For Facebook pages however, you need a paid subscription tier. For now I selected the free options YouTube, Twitch and Periscope. YouTube because it is easy to access for my older audience. Twitch because it seemed quite fun and i also like gaming. Periscope because it connects to Twitter.

If the live show takes shape i might step into streaming from my Facebook page. Another plan is to try the iRig Stream solution and start making separate live streams on Instagram. With high quality audio from the live mixer. I will surely blog about it if i start working with it.

For now it all works. Restream.io allows me to drop a widget on my site. Its a bit basic and only comes alive when i am live, so i have to add relevant information to it to make it interesting. If you want to drop in and join my live musings check my YouTube, Twitch and Periscope channels or my site at around 21:00 CEST.

Controlling a light show for a small solo set

I’m back on the track of my own small solo live set. The first experiment was running a video stream that would run along with the show. But now there is a new twist: The Corona virus came and there will be no live set the coming months. All public shows have been cancelled for about half a year. My first live show has been pushed to November from June. The only alternative is live streaming.

Just before the lockdown to combat the spread of the Corona virus I had bought a stage light. Just one to at least have a blue wash on stage to set a kind of moonlight mood. This was the Ayra ComPar 2. A simple LED stage light, with an IR remote and plenty of flexibility be more than just a blue stage wash.

But while staying at home and after browsing through some online articles it dawned on me: you can simply control stage lights as part of your Ableton Live set. I use Ableton Live sets to run my stage show and believe it or not I use color coding for each different song to quickly browse through all the songs without having to look up the names.

The colors match the moods of the song, so my simple idea was to use this color code to match the color of the wash on stage. A red wash for a deeply felt love song. A green wash for a song about nature. A purple wash for an up tempo hot song etc.

But why put all this effort in a stage light when there will not be a stage for months to play on? Up to then I had been a bit weary of immediately jumping to live streaming instead of playing gigs. All the bigger artists now stream live. Every night on my socials there are at least a dozen artists performing live. I’m just starting out, so what can I bring to the table?

After discussing this with a close group of musicians and my music coach it became obvious. Why not start streaming live? It’ll be fun, even if nobody watches it. I can invite friends and just have fun together. And also because I had nothing else to do I jumped in to make this stage light idea work. It would change color with the song. Not on stage, but in the attic. The attic with my home studio as my online stage.

One of the intriguing functions of the ComPar 2 is the ability to connect a XLR cable with DMX signal to control it. After diving into it and in lockdown there was a lot of time to dive into anything I found out that there are also DMX light controllers that support MIDI. From the same company I got the Ayra OSO 1612 DMX Scanmaster controller. Very friendly priced i think.

Blacked out by default

The DMX light controller simply accepts MIDI note data and maps that to programmable scenes. The controller can be connected to a chain of lights and a scene can set each light correspondingly. You can have flashing lights in a scene or movement from stage lights that can move. With 240 scenes you can probably make an interesting progression of lights for several songs, but I simply have a red, green, purple and blue scene for each song.

The controller I chose has a default setting where it blacks out all lights when starting up and that is not a bad thing at all. The only thing I must remember is to switch off the black out when playing live. That is the only attention it needs and from there everything is now running on rails. The live streaming shows allow me to test stuff out, but I’m now pretty happy with this setup.

Bad ground. When the noise is killing you…

Ok, maybe you don’t know this song, Bad Ground, from a controversial band Type O Negative. If you do know it it’ll bring a smile to your face. But if you hear it in your headphones or from your speakers, you won’t be smiling. The 50-60 Herz buzz or maybe even digital noise that ruins your listening pleasure and maybe even your recordings.

This is something I feel I need to discuss, because earlier I wrote about impedance. Like the previous article, you may be an experienced sound engineer or pro musician. In that case please skip this article. This is for the home studio creatives that just can’t keep the noise from creeping into the system. By the way you can find plenty of articles on the subject. This one just compounds it all into one.

In any case I was helping out building a home studio and when connecting a second display to the laptop there it was: bad ground. A digital fizz from the HDMI cable and a hum from the bad ground. The active speakers amplified the noise sounds coming from the signal in the unbalanced cables from the audio interface. Simple jack cables.

Ah you should say. There you have it. Unbalanced cables work by shielding a single signal wire with a mesh that wraps around it. This mesh wiring should be grounded. The shield mesh then prevents electromagnetic interference from the outside reaching the signal cable. This all goes wrong if not every device in the chain is solidly grounded along the same wire more than half a meter into the earth.

This bad ground can just be floating, catching interference from all noise sources around it. Or it can be that one part of the chain is grounded differently and the signal difference of the shielding interferes with the signal. Do you have the option to bring a solid ground in your studio setup? Please start there. In other cases there is only one other solution and that is to accept the bad ground and the interference of other signals.

Does that mean accepting the noise? No of course not. The answer to noise in the studio and on stage has always been the use of balanced cables. In balanced cables there is also the shielding mesh of a ground cable, but inside there are two twisted cables. A hot and a cold one. Usually using XLR connectors instead of the jacks. Although XLR cables can also be used unbalanced.

This time the difference between hot and cold is used as the signal. This time the effect of interference on the signal is much less, because it evens out on the twisted pair. This can only mean that you should always use balanced cables when possible.

Now if only it was that simple… Some audio interfaces only have unbalanced outputs. Instruments usually have only unbalanced outputs. what should you do with these signals to prevent bad ground? This is where you need DI’s. Direct Input devices, pick up the unbalanced signal from a jack connector and output a balanced signal to an XLR connector.

Inside the DI you will find a transformer that picks up the signal and passes it to the hot and cold wires of the XLR. But transformers are coils wrapped around the same core. the signal energy is passed from one coil to the other. This means signal loss and a coil does have a frequency response that is not 100% flat. In other words, the signal is lower in energy at the other side and can have slightly less low and high frequencies.

Passive DI’s just use the transformer and give you signal loss and a slight effect on the signal quality. Active DI’s can compensate for the signal and signal quality loss, but need a power source to make the additional electronics work. Even worse, cheaper active DI’s can add noise to the signal from the electronics. A more expensive passive DI can sound better than a cheap active DI.

In the end for my noise problem I found an affordable passive DI that sounds great. The studio setup was inexpensive and simple and there was therefore no noticeable degradation of the sound. You might also want to try this Millenium DI-E. DI’s can sound muffled, but the transformer can also add warmth to the signal. Some very expensive pre-amps for vocals and guitars use transformers to add warmth.

So there you have it. May you kill the noise…

When you need a patchbay

You might already have seen this on my socials. A nice photo of a new box stacked alongside my MIDI patchbay. Lately studio life got more complicated. I have 2 mixing tables. One for working in the studio and one for practicing live gigs. I found myself plugging instruments in and out of these mixing tables. Also, the studio mixing table, a Yamaha 01v, is getting old and some switches now already noticeably start making noise. For me this was the sign to start saving the desk and considering a patch panel.

You can spend any amount on a good one, but for my modest home studio purposes I chose the Behringer Ultrapatch Pro PX3000. With 48 channels it is well beyond my need to patch 6 channels across 12 inputs. But hey, who knows what will happen in the future. And it doesn’t break the bank at around 80 euros.

Plugging the instruments across the inputs of two tables now won’t wear down the inputs on the more expensive mixing desks any more. There is even be an option to use the patchbay in half-normal mode. In this mode I can make a setup to send the instruments to both inputs at the same time. Then you have to factor in the impedance of both mixing desks against the line outs of the instruments, but to my calculations it might just work.

Its the impedance, stupid!

This is a short story about something that you take for granted in this high-tech age. That you can connect anything to anything and that it just works. This time I tripped over something that did not work and it reminded me harshly that there are classic electrical laws to take in to account: impedance matching. Even more embarrassing is that I am actually an electrical engineer that switched to computer science and music.

Zoom L-12 monitoring outputs

So these days I am working on my stage monitoring. Of course its at least my performers dream to have wireless in-ear monitoring, but then you will find that you have to invest at least hundreds of euros and you can easily go up to several thousands. This is why I started experimenting with a simple wired stereo in-ear monitoring system. The Zoom L-12 mixer/recorder that I am using has 4 mix outputs for monitoring so that is the starting point.

Lets try to set the impedance story straight without getting too technical. For that you can go to the wiki page about the subject. In short its about getting the energy from the output (a mixer) optimally to the input (headset, amplifier) of the connected device. Otherwise its kind of like fitting a wide garden hose to something that is too small. The electrical equivalent: the output impedance should be lower than the input impedance. As a rule of thumb you can expect for outputs:

  • 100 ohm to 600 ohm output impedance from line outputs
  • 0.1 ohm or less from an amplifier

And for input impedance:

  • 10K ohm input impedance or more for line inputs
  • An average of 32 ohms for headphones, but it can range from 8-600 ohm
  • Around 8 ohms for speakers

This only applies to unbalanced outputs and inputs. So that means jack plugs and speaker connections. The transformers used in balanced outputs and inputs will usually match without you having to worry about it.

Enough theory. It is always a good idea to start with the ‘zero’ option. Lets connect a simple Shure SE215 earphone to the L-12 monitoring output. It says ‘Phones’. Easy peasy. The sound comes out, but the lows are kind of missing. I just skipped over this this, because I just thought that this was the quality of the output from the L-12. Looking back this was not surprising. If you check the SE215 spec sheet you will find that with an average input impedance of 17 ohm this earphone is quite hard to drive!

A lot of energy is therefore lost, because the output impedance of the L-12 turns out to be 100 ohms. This output qualifies as a line output driver, expecting a high-impedance amplifier to pick up the signal. Actually connecting earphones to this connector is a bad idea! Listening however with a directly connected Sennheiser HD 280 Pro is a more pleasant experience. This is easily explained by its more friendly 64 ohm impedance. Energy is transferred not very efficiently (almost halved), but much more efficiently than with the Shure!

So then I first looked at the Behringer P2, a small active monitoring amplifier. It uses two AAA batteries. You can connect XLR or a stereo jack plug. Since the L-12 has stereo jack monitoring outputs, this seemed to be the way. When connecting it all and the SE215 the result was very disappointing. Like listening to overly compressed, pumping audio, with completely random frequency dips and a lot of noise. Another impedance mismatch?

I immediately blamed the Behringer P2. But when you scout for reviews, this device invariably comes out as top rated with a lot of very happy users. How is this possible? I still don’t know. Particularly vexing is that there is no specification of the input impedance of the P2. It must be that however. Because when I connect the balanced input to a balanced output, it all sounds fine. Possibly no-one uses the unbalanced jack of the P2.

This is why have fallen back to using the Thomann mini body pack 2. It allows me to use long cables and gives me volume control on the belt mounted device. The sound isn’t perfect, because the 100 ohm output still has to drive the SE215. I am still looking for that perfect wired monitoring solution. Any ideas?

How about putting this card in your laptop?

After carrying around big and powerful laptops for years and tablets that were simply not powerful enough. I wanted to try a laptop in the ultrabook category. At that time the choice was light and powerful, but with compromises in working with graphics: the Lenovo Thinkpad T480s. These days you can buy ultrathin notebooks with additional graphics power, but that was then and this is now. Unfortunately similarly spec-ed Macbooks are out of my league.

One thing that I really checked when selecting this laptop was the support for Thunderbolt 3. This connection supports external graphics cards. Even though the onboard graphics on paper should be good enough for minimal VR support. However, I already had guessed that this would not run smoothly. Now after one year of use I finally got round to trying out the Akitio Node external housing with Thunderbolt support. Lo and behold, equipped with a ASUS GeForce GTX 1060 OC3 my laptop has now become a graphics powerhouse that easily runs VR, games and any other task smoothly as butter!

If you check the compatibility lists of Akitio, you will not find this graphics card. This list is very limited and only contains higher end cards. There is a small notice that it should work with any card, but there’s no guarantee. My idea was to try the slightly lower end, because maxing out anything like this in the end is bound to cause problems somewhere in the chain. The laptop is also a year old, so I reckoned that careful drivers go a long way. By the way, Macbooks also support Thunderbolt and external graphics cards. They don’t support the specific card I chose, because I believe you should use Radeon AMD graphics cards.

There was a struggle to get this working. When you go the Nvidia way with you graphics card, the driver installation can moan about the hardware not qualifying for installation. I got round this by checking forums and these explained that you should manually install the driver. Unpacking the software and finding and installing the driver files by hand, right clicking on .inf files did the trick.

The Akitio Node is large and slightly noisy, but you can switch it off for music work of course. Then when you want to do graphics intensive work, switch the Node on and voilà. Magic in a box! One other down side is that it does not support any other function then connecting the graphics card. There are other options with storage and other connections, like USB or network. There also is no daisy chaining of devices. The Node is a dead end.

If you too are looking for this upgrade I wanted to put this story out, because this is a working combination. There are a lot of horror stories around of combinations refusing to work. I hope this upgrade trick will work for you too!

Make your own affordable dust covers

I am a big fan of custom made covers for all studio equipment. Dust kills the quality of connectors, sliders and switches. If possible I try to use the dust covers from the instrument or equipment manufacturer. Otherwise I try to look for a Decksaver, because actually these are very clever desk space savers as well. And they fit like a glove. All too often however I find that there is no custom cover that exactly fits.

I tried to find custom covers for the Yamaha 01v and the MicroKorg, but couldn’t find any. My current solution for this is to buy flexible transparent foil and have it cut to a little more than the surface area of the device. It can attract dust, but at least the dust does not get in the equipment. It also looks quite professional and is easy to pull over the surface and slip away again.

For me this beats ill fitting cloth covers and other half baked solutions, like putting it in a box. The best alternative could be to buy thick sheets of perspex and glue a custom cover. There are shops that support you in building your own perspex cover. It will however never be as sophisticated as Decksaver covers, with extra space for knobs and bends in the device. If you’re on a budget, at least put a sheet of transparent foil over your equipment and make it last longer.

Why you should start using a 360 camera

Already four years ago I started using a 360 camera. At that time I wanted to create those videoclips where you are really in the set and I wanted viewers to experience the video. The video quality was then an issue and for me it still is, unless you have a solid budget to spend. At the 3.000 euro price point video quality is no longer a big issue. At the lower end however, things have improved slightly. I have now invested in an Insta360 ONE X at a fraction of that price, 400 euro. What has persuaded me to invest in this camera if the quality is only slightly better?

First off, it comes with software that allows you to take your full 360 degree recording and cut out a flat rectangle that looks like you recorded it with a normal camera. Where is the advantage in that? It is actually intended to allow you use it as an action camera and then in the video editing cut out, pan and zoom into any action around you. You can see samples of this in the product page. What use is that to me as a musician, you might ask. Well, how about filming a whole gig from several points and cutting, panning and zooming into all the action on stage and in the crowd? Also the software has some really captivating special effects like speeding up, turning the 360 view into a ball, fish eye etc.

Secondly, it has rock-solid stabilization, because it uses gyroscopes to record all movements. This also ensures that the recording is perfectly horizontal, even when recording at an angle. You will find that if there is too much movement in your recording, most viewers will become sea sick really fast. A smooth recording and stable recording makes the difference. I can now confidently record while walking. Also freaky is that if you use a selfie stick to hold the camera, the software will remove the stick. It will appear as if the camera is hovering above you.

Schemerstad
Schemerstad

Thirdly, it actually matters that the quality of the recordings is at least slightly better than that of the first generation of 360 cameras. The performance in low light is dramatically better and the 25% increase in pixels of camera’s in the same price range does make a difference. Am I completely happy? No of course not. I can really and wholeheartedly recommend the ONE X at the lower price tier. It has made some impossible recordings possible and I will keep using 360 as part of my video recording to capture the action and experiences.

So this is why you too (as a musician) should start using a 360 camera. Not because you want people to experience VR, but to capture everything and decide how to use the recording later. On stage and everywhere the action happens.