What people say
This product appears everywhere in timelines on social media when you’re interested in making music. I must say it immediately got my attention when I saw it. For me the appeal is that would solve the problems playing along with the computer when practicing or playing live. I don’t always have live musicians to play along with and the computer is unforgiving. Any metronome is welcome there and the SoundBrenner Metronome app is then already of great help.
But now the Pulse is there and it adds to this a haptic vibrating metronome you can feel. Now you don’t have to look at blinking lights while playing. Also, I use Ableton Live, also live, and there is even the possibility to use Ableton Link with Metronome app. If this all works together as one integrated haptic Metronome that allows me to feel the tempo while playing along with Ableton? Perfection! The ultimate gadget heaven!
Before buying I always look around for reviews and more info. One big complaint is that it is not an actual watch kind of thing. A lot of people hoped that it would also display the tempo. It doesn’t. You have to look at the screen of your phone (or tablet) to see settings and tempo. This also means that you have to keep the phone screen on. At the same time the Pulse is connected via Bluetooth. The phone is the brains, so you must at all times keep it charged and connected. A challenge, specially live.
Then there is some word going around on it not being accurate, but I think that is already fixed now through firmware updates. Another complaint is that it takes time to get used to ‘feeling’ the tempo. I guess that a lot of people send it back immediately, but I am more patient. Most new skills take time to get used to and I am quite convinced that this Pulse is a good idea. But now for first impressions.
What I say now
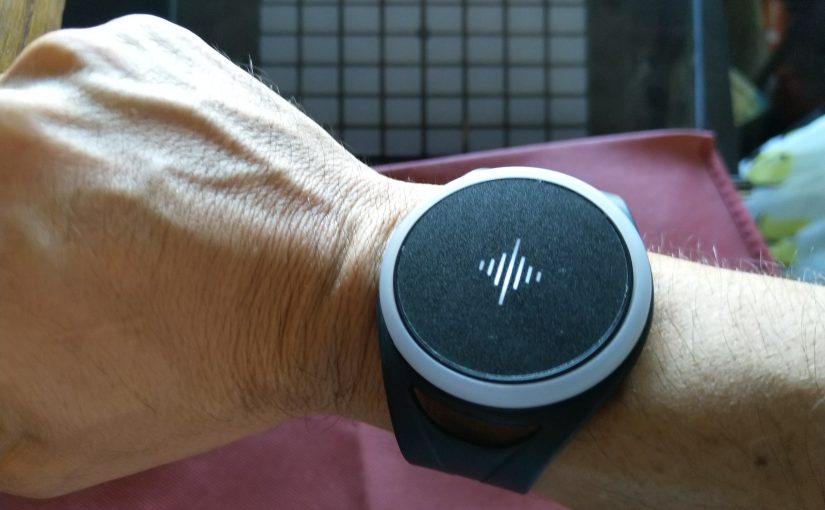
When you first start using the Pulse you will find that it is a bit fiddly to operate. You have to tap the watch face to start using it, but its not really touch sensitive. You have to really press it to pick up the taps. Then, straight out of the box it is set to really buzz the rhythm very strongly. And audibly also. Fortunately you can immediately go back to the app to set it to a more friendly and short vibration. In the lightest mode it really feels okay, but I play keyboards, When playing a more physical instrument, like drums, I can imagine you need the stronger buzz.
Charging it is also fiddly. It is a small kind of dock that has to properly connect to the device. After popping the Pulse in the band it gets even harder to let it connect to the charging dock, because the band pushes it from the dock and the dock can easily slip away, because its so light. People complain about the time that the device can be used on a full charge, but I don’t have enough experience now to say if it is really a problem for me.
Then its time to start practicing and linking it up with Ableton Link. That’s where all starts to get a little bit flakey for now. Ableton Link somehow goes in and out of the connection with the app. Which is ok for practicing in my case, but I don’t think this is ready for playing live. Also my phone sometimes loses connection with the Pulse after several minutes of playing. My phone is an Android phone, running Oreo and I know it can be very aggressive in killing background processes, specifically if they draw power. Probably that is not helping here, so I want to try it with another iOS device also.
One other thing to mention: its quite a big device. Maybe better suited for male wrists. There is another bigger strap in the box for your leg or your upper arm, but this device will have a hard time looking elegant on fragile ladies arms.
First conclusions now:
- Big. Don’t expect this device to be light to operate, you really have to tap hard
- Dive in to the settings to tune it to your preferences
- Great for practicing, but for playing live this is a really complex setup to get and keep running
I hope this helps you appreciating the device for what it is now. I will keep using it and I’ll keep you up to date. Please note that there is also a new Soundbrenner device on Kickstarter that is actually more like watch, the Core.