Streaming live with OBS Studio

Okay, like everybody else i started streaming too. I had a planned live show, but live shows will not be possible for at least another half year. Every evening my social timelines start buzzing with live streams and all the big artists have also started to stream live. No place for me with my newly created and sometimes shaky solo live performance to make a stand? After some discussions with friends i decided to make make the jump.

But how to go about it? If you already have experience with live streaming, you can skip this entire article. This is here just for the record so to say. After some looking around I came to this setup:

OBS Studio with ASIO plugin
Restream.io for casting to multiple streaming platforms
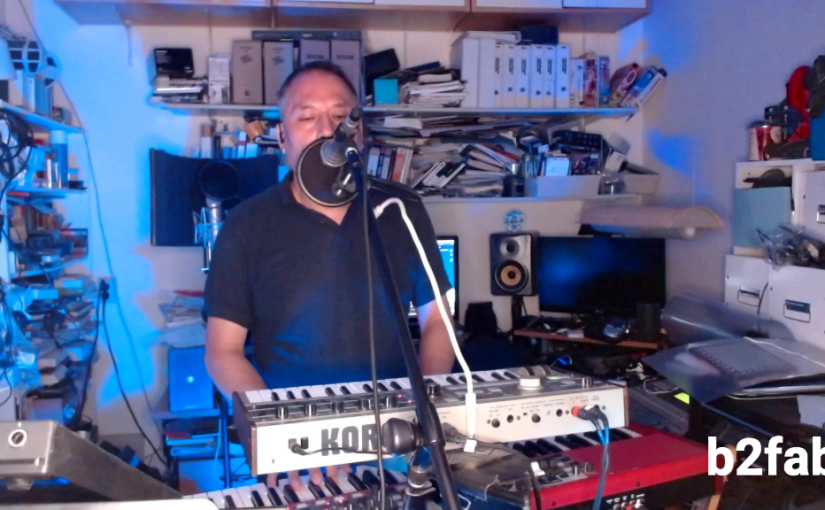
Logitech C920 webcam
Ring light
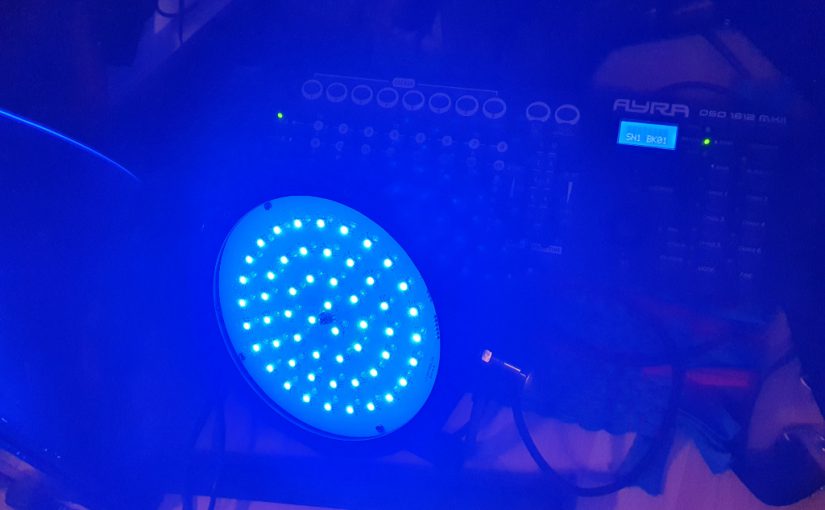
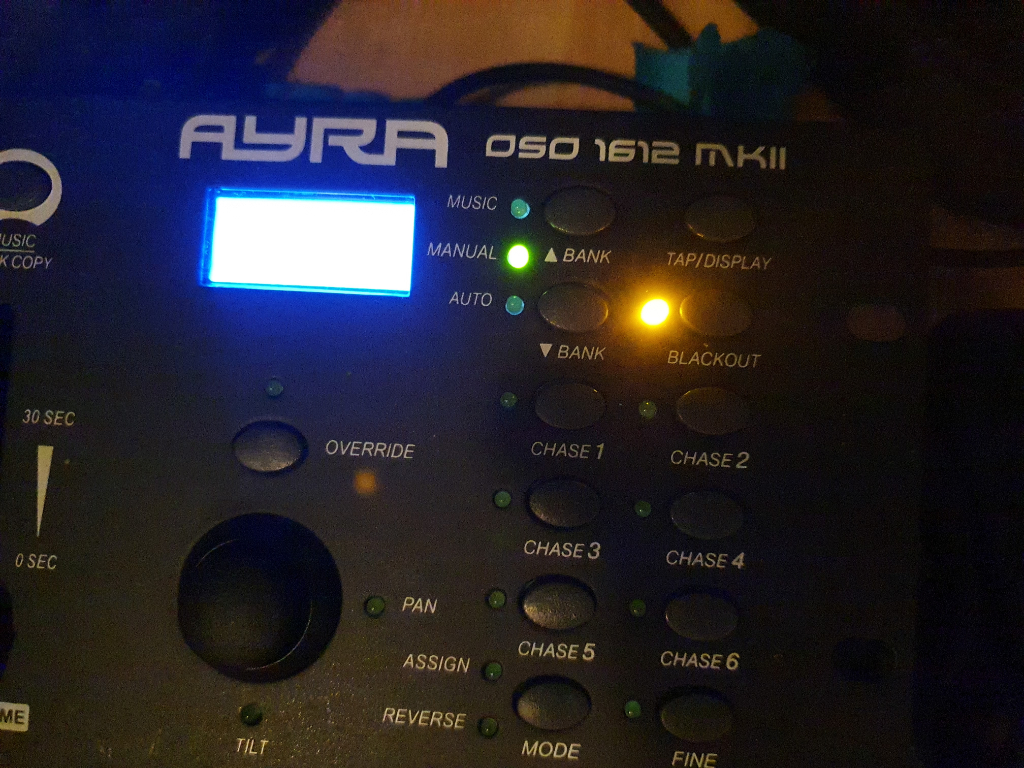
– Ayra ComPar 2 stage light see this article

OBS is surprisingly simple to set up. It has its quirks. Sometimes it does not recognize the camera, but some fiddling with settings does the trick. You define a scene by adding video and audio sources. Every time you switch from scene to scene it adds a nice cross fade to make the transition smooth. You can switch the cross fade feature off of course.

OBS Main scene setup

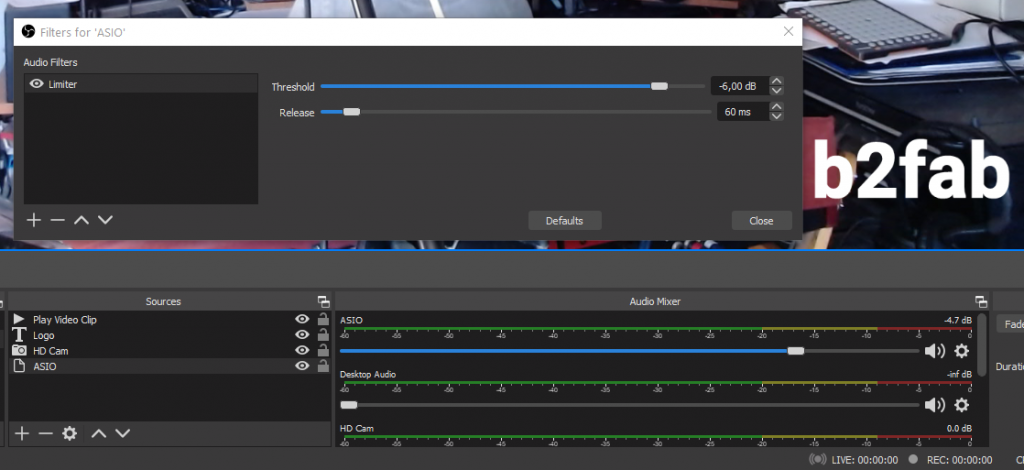
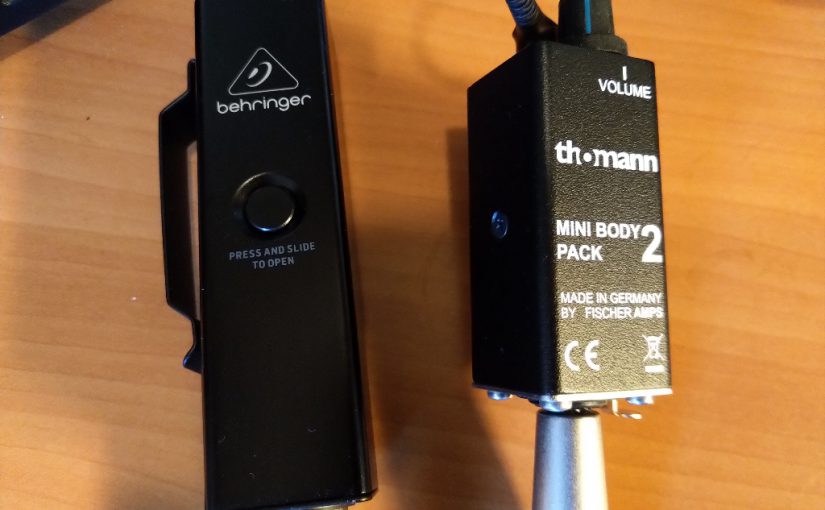
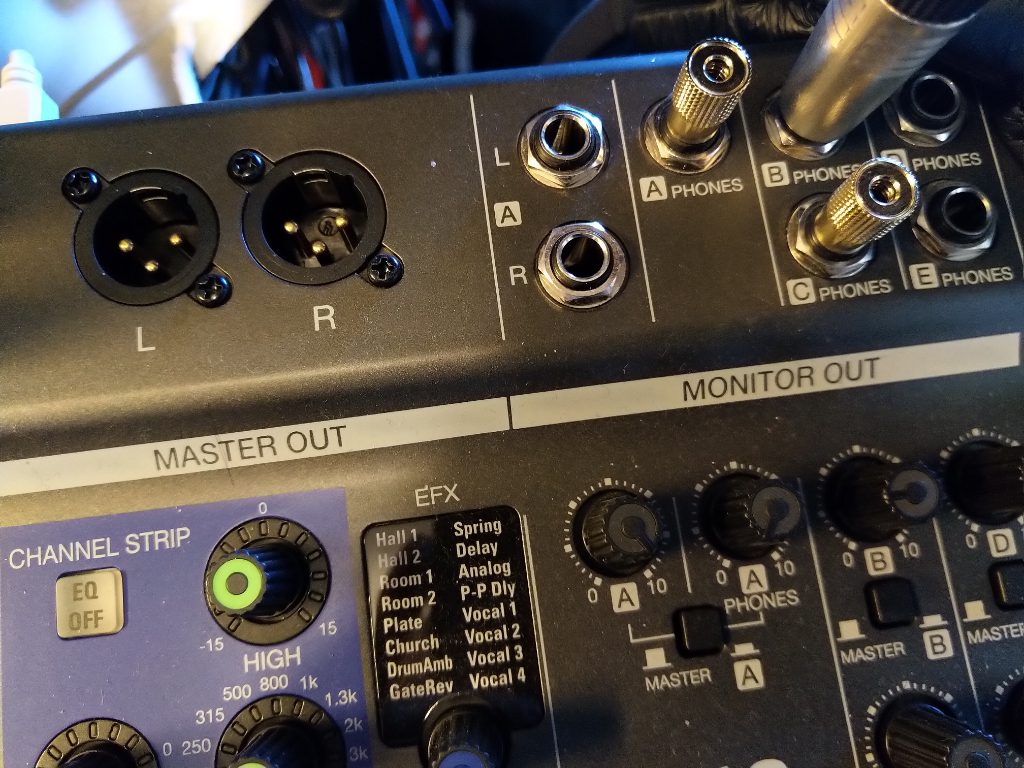
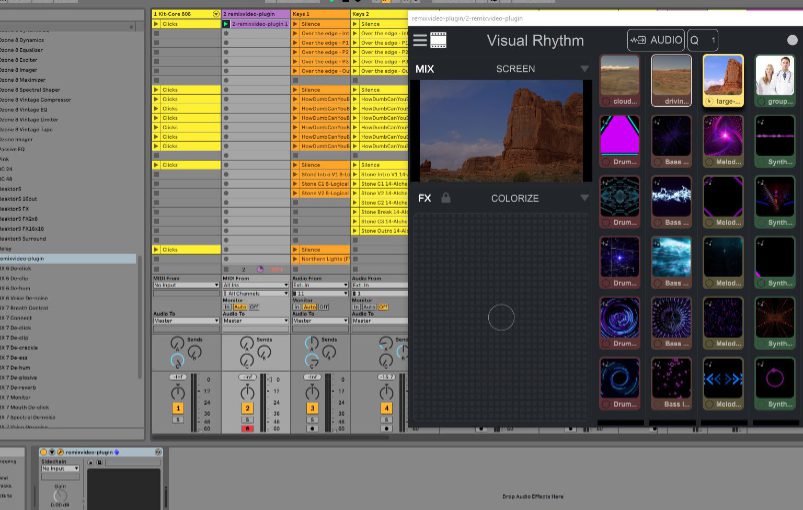
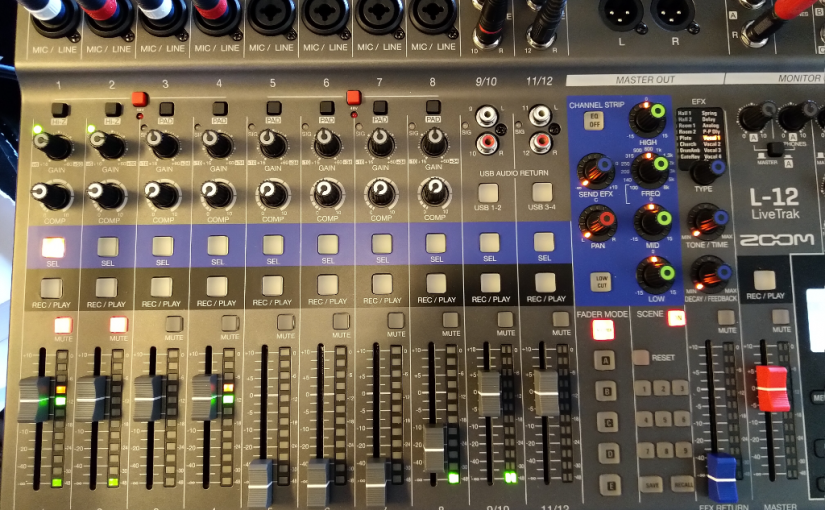
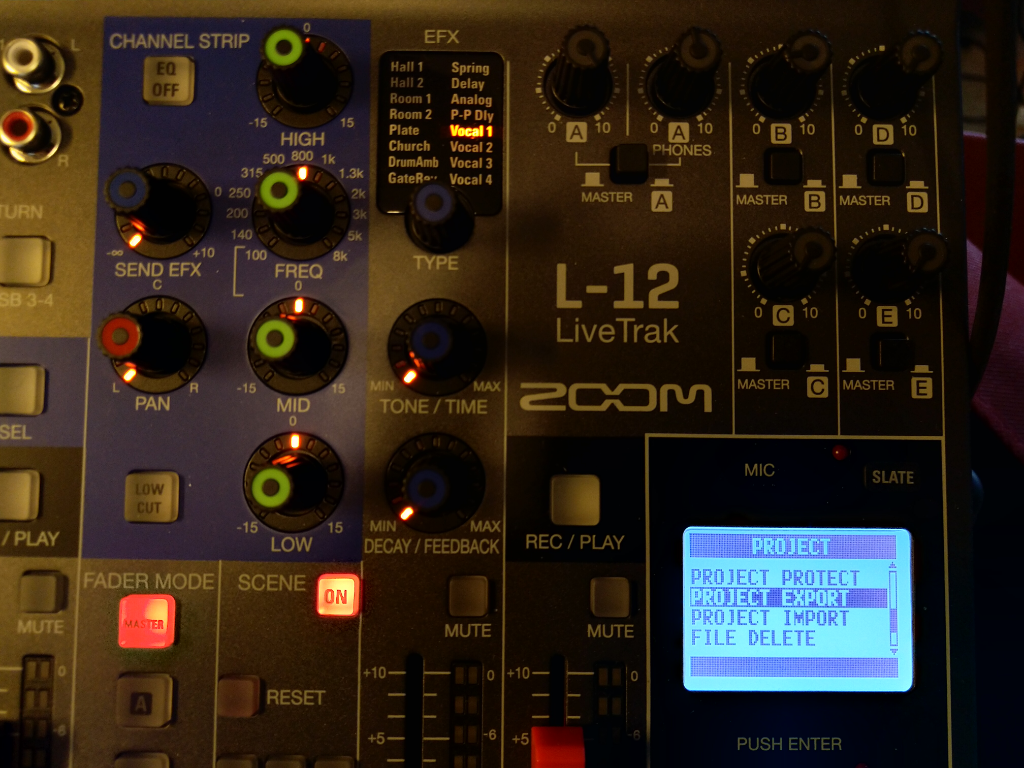
I only use one scene. The video clip is there to promote any YouTube video clip. It plays in a corner and disappears when it has played out. The logo is just “b2fab” somewhere in a corner. The HD cam is the C920 and the ASIO source is routed from my live mixer to the audio interface on the PC. I setup a limiter at -6db on the ASIO audio as a filter to make sure i don’t get distortion over any audio peaks.

I also had to choose my platform. From the start i wanted also to stream live on Facebook and Instagram. Instagram however kind of limits access to live streaming to only phones. There is software to stream from a PC, but then you have to set it up again for every session and you need to switch off two-factor authentication. For me one bridge too far for now.

I chose Restream.io as a single platform to set up for streaming from OBS. It then allows to stream to multiple platforms and bundle all the chats from the different platforms into a single session. For Facebook pages however, you need a paid subscription tier. For now I selected the free options YouTube, Twitch and Periscope. YouTube because it is easy to access for my older audience. Twitch because it seemed quite fun and i also like gaming. Periscope because it connects to Twitter.

If the live show takes shape i might step into streaming from my Facebook page. Another plan is to try the iRig Stream solution and start making separate live streams on Instagram. With high quality audio from the live mixer. I will surely blog about it if i start working with it.

For now it all works. Restream.io allows me to drop a widget on my site. Its a bit basic and only comes alive when i am live, so i have to add relevant information to it to make it interesting. If you want to drop in and join my live musings check my YouTube, Twitch and Periscope channels or my site at around 21:00 CEST.

Controlling a light show for a small solo set

I’m back on the track of my own small solo live set. The first experiment was running a video stream that would run along with the show. But now there is a new twist: The Corona virus came and there will be no live set the coming months. All public shows have been cancelled for about half a year. My first live show has been pushed to November from June. The only alternative is live streaming.

Just before the lockdown to combat the spread of the Corona virus I had bought a stage light. Just one to at least have a blue wash on stage to set a kind of moonlight mood. This was the Ayra ComPar 2. A simple LED stage light, with an IR remote and plenty of flexibility be more than just a blue stage wash.

But while staying at home and after browsing through some online articles it dawned on me: you can simply control stage lights as part of your Ableton Live set. I use Ableton Live sets to run my stage show and believe it or not I use color coding for each different song to quickly browse through all the songs without having to look up the names.

The colors match the moods of the song, so my simple idea was to use this color code to match the color of the wash on stage. A red wash for a deeply felt love song. A green wash for a song about nature. A purple wash for an up tempo hot song etc.

But why put all this effort in a stage light when there will not be a stage for months to play on? Up to then I had been a bit weary of immediately jumping to live streaming instead of playing gigs. All the bigger artists now stream live. Every night on my socials there are at least a dozen artists performing live. I’m just starting out, so what can I bring to the table?

After discussing this with a close group of musicians and my music coach it became obvious. Why not start streaming live? It’ll be fun, even if nobody watches it. I can invite friends and just have fun together. And also because I had nothing else to do I jumped in to make this stage light idea work. It would change color with the song. Not on stage, but in the attic. The attic with my home studio as my online stage.

One of the intriguing functions of the ComPar 2 is the ability to connect a XLR cable with DMX signal to control it. After diving into it and in lockdown there was a lot of time to dive into anything I found out that there are also DMX light controllers that support MIDI. From the same company I got the Ayra OSO 1612 DMX Scanmaster controller. Very friendly priced i think.

Blacked out by default

The DMX light controller simply accepts MIDI note data and maps that to programmable scenes. The controller can be connected to a chain of lights and a scene can set each light correspondingly. You can have flashing lights in a scene or movement from stage lights that can move. With 240 scenes you can probably make an interesting progression of lights for several songs, but I simply have a red, green, purple and blue scene for each song.

The controller I chose has a default setting where it blacks out all lights when starting up and that is not a bad thing at all. The only thing I must remember is to switch off the black out when playing live. That is the only attention it needs and from there everything is now running on rails. The live streaming shows allow me to test stuff out, but I’m now pretty happy with this setup.

When you need a patchbay

You might already have seen this on my socials. A nice photo of a new box stacked alongside my MIDI patchbay. Lately studio life got more complicated. I have 2 mixing tables. One for working in the studio and one for practicing live gigs. I found myself plugging instruments in and out of these mixing tables. Also, the studio mixing table, a Yamaha 01v, is getting old and some switches now already noticeably start making noise. For me this was the sign to start saving the desk and considering a patch panel.

You can spend any amount on a good one, but for my modest home studio purposes I chose the Behringer Ultrapatch Pro PX3000. With 48 channels it is well beyond my need to patch 6 channels across 12 inputs. But hey, who knows what will happen in the future. And it doesn’t break the bank at around 80 euros.

Plugging the instruments across the inputs of two tables now won’t wear down the inputs on the more expensive mixing desks any more. There is even be an option to use the patchbay in half-normal mode. In this mode I can make a setup to send the instruments to both inputs at the same time. Then you have to factor in the impedance of both mixing desks against the line outs of the instruments, but to my calculations it might just work.

Its the impedance, stupid!

This is a short story about something that you take for granted in this high-tech age. That you can connect anything to anything and that it just works. This time I tripped over something that did not work and it reminded me harshly that there are classic electrical laws to take in to account: impedance matching. Even more embarrassing is that I am actually an electrical engineer that switched to computer science and music.

Zoom L-12 monitoring outputs

So these days I am working on my stage monitoring. Of course its at least my performers dream to have wireless in-ear monitoring, but then you will find that you have to invest at least hundreds of euros and you can easily go up to several thousands. This is why I started experimenting with a simple wired stereo in-ear monitoring system. The Zoom L-12 mixer/recorder that I am using has 4 mix outputs for monitoring so that is the starting point.

Lets try to set the impedance story straight without getting too technical. For that you can go to the wiki page about the subject. In short its about getting the energy from the output (a mixer) optimally to the input (headset, amplifier) of the connected device. Otherwise its kind of like fitting a wide garden hose to something that is too small. The electrical equivalent: the output impedance should be lower than the input impedance. As a rule of thumb you can expect for outputs:

  • 100 ohm to 600 ohm output impedance from line outputs
  • 0.1 ohm or less from an amplifier

And for input impedance:

  • 10K ohm input impedance or more for line inputs
  • An average of 32 ohms for headphones, but it can range from 8-600 ohm
  • Around 8 ohms for speakers

This only applies to unbalanced outputs and inputs. So that means jack plugs and speaker connections. The transformers used in balanced outputs and inputs will usually match without you having to worry about it.

Enough theory. It is always a good idea to start with the ‘zero’ option. Lets connect a simple Shure SE215 earphone to the L-12 monitoring output. It says ‘Phones’. Easy peasy. The sound comes out, but the lows are kind of missing. I just skipped over this this, because I just thought that this was the quality of the output from the L-12. Looking back this was not surprising. If you check the SE215 spec sheet you will find that with an average input impedance of 17 ohm this earphone is quite hard to drive!

A lot of energy is therefore lost, because the output impedance of the L-12 turns out to be 100 ohms. This output qualifies as a line output driver, expecting a high-impedance amplifier to pick up the signal. Actually connecting earphones to this connector is a bad idea! Listening however with a directly connected Sennheiser HD 280 Pro is a more pleasant experience. This is easily explained by its more friendly 64 ohm impedance. Energy is transferred not very efficiently (almost halved), but much more efficiently than with the Shure!

So then I first looked at the Behringer P2, a small active monitoring amplifier. It uses two AAA batteries. You can connect XLR or a stereo jack plug. Since the L-12 has stereo jack monitoring outputs, this seemed to be the way. When connecting it all and the SE215 the result was very disappointing. Like listening to overly compressed, pumping audio, with completely random frequency dips and a lot of noise. Another impedance mismatch?

I immediately blamed the Behringer P2. But when you scout for reviews, this device invariably comes out as top rated with a lot of very happy users. How is this possible? I still don’t know. Particularly vexing is that there is no specification of the input impedance of the P2. It must be that however. Because when I connect the balanced input to a balanced output, it all sounds fine. Possibly no-one uses the unbalanced jack of the P2.

This is why have fallen back to using the Thomann mini body pack 2. It allows me to use long cables and gives me volume control on the belt mounted device. The sound isn’t perfect, because the 100 ohm output still has to drive the SE215. I am still looking for that perfect wired monitoring solution. Any ideas?

A first attempt at an automatic VJ mix on stage

For some time now I am looking for a way to add video to my Ableton Live performance. In this article I am experimenting with VideoRemix Pro from MixVibes. There are many people with a similar quest so it seems and equally as many solutions. Most solutions (Resolume, Modul8) revolve around the Apple MacOS. Since I am not in the Apple ecosystem, these are not available to me. Some quite elaborate solutions use many components that all are glued together. Sometimes with MIDI, sometimes with plugins.

As a first attempt am looking for a simple single piece of software that can run inside Ableton Live for a PC. Enter VideoRemix Pro. You need to have the Pro version to run it inside Ableton Live as a plugin. When you look at the instruction video, you can see that it runs in Session mode. Which is how I use Ableton Live live. Looking at this it seems simple enough, but there is a learning curve.

This learning curve is not helped by obvious glitches and problems when using the software. I had quite a battle installing it and getting it to run as a plugin inside Live. The first problem was Live crashing when dropping the plugin on a MIDI track. Which is how you are supposed to use it. My first reaction was to ask for a refund, but after a reboot and some experimenting I got it to work. The secret for me was to make sure that VideoRemix does not use the Windows Default audio. Once I switched to the ASIO audio option that Live also uses, the plugin stopped crashing.

VideoRemix Pro runs in desktop mode as well as plugin mode, but not at the same time. The desktop mode seems solid enough, but even there I have run into glitches. This had to do mostly with customizing the Novation LaunchPad Mini that I wanted to use to control the video. The LaunchPad Mini had been just lying around as a backup for the Ableton Push that I mainly use. It is however not supported by default. The makers of the software prefer you using the full Launchpad Mk2, which has more control options of course.

This means that in order to use it, you have to define a custom control mapping for the software. This seems easy enough, since you have a MIDI learn mode in the software. It took some learning for me to use it. In short, hover over the element in VideoRemix you want to control. Then click or turn the midi knob to link it. Press it again to see if the mapping worked. After this you will see a custom mapping in the list of midi devices in the preferences, which you could then rename.

A new custom MIDI mapping in the VideoRemix Midi Preferences

Then moving over to Ableton Live and running it as a plugin (remember: not at the same time), you will find this same list. Confusing enough there is a VST MIDI device there, but in my case that did not respond to any attempt to control the video. If you switch over to your custom mapping that you created in the desktop mode, things start moving. Now you can record your video sequence.

Creating or recording a video sequence is based on the 6×6 grid of buttons in VideoRemix. This means that you are limited to 36 clips that you can launch. One clip can run for 100 seconds. Hit a clip to start it. Hit it again to stop it. By default running clips is column oriented. You cannot start more clips running on the same column. One clip on the same column will stop a clip on another row. You can start an entire row with a single command. You can start an entire column, but only if you enable all clips playing in a grid of course.

If you want a more complex mix of clips with more than a few clips per song and more then a dozen of songs, you’re probably out of luck with 36 slots. It seems you have to simplify your VJ mix if you are using this software standalone. For now it will have to do for me.

The VideoRemix Clip Grid

The effects (FX) section is quite elaborate. You can control it as well as all the faders, through MIDI. The moment you hit full screen on the top right you will see your VJ mix full screen. Hopefully on the right video output, but I will have to look into that yet. The default set of clips also loops sound and this sound can be mixed, so you can also have sound effects playing as part of your performance.

This is my first attempt at working with video as part of a Live based performance. After quite a battle to get it working, it is now seems actually possible to have a video running as part of a Session mode sequence, like there is a real VJ at work. I am still quite worried about the overall stability of the setup and I need to get to grips with the quirks of the software.

If you have experience with this or other software setups, please comment below!

Perfect for small venues?

For a while now I have been starting up my live show. After five years of building a repertoire, I feel the next step is playing it live. I have been lucky to have had my “real pop star moment” with my previous band. A CD recording contract and live touring abroad. Now I am back to step one with my own music project.

Starting up, the most important for me is to record all practice sessions and to record all tryouts. For this purpose I have invested in multitrack recording stuff. It might just be that there is a gem in these recordings that needs exploring and investing in. This is what I learned in the previous band. Recoding, recording, recording… Learning, exploring, improving….

Multitrack live recording is easier than ever. It used to be only Tascam with analog 4 track tape recording, but now its digital 8, 12 or 16 track recording with computers, or Zoom or more exotic brands. CD quality or studio quality even. For now I focused on Zoom, because they make really affordable devices. I am not scared of using computers, but for me now it needs to be one single reliable device. Not another chain of devices with a computer at the end.

Zoom R16
Zoom R16

So I tried the Zoom R16 first. This is a true 16 track recorder. It has the shape of a mixer, but it is actually only a multitrack recorder. It can record 8 channels at once, but has a limitation for the SD card at 32GB. My problem with it was the sound quality as a mixer, that makes it difficult to make sure that the recordings are Ok. Also it tempts you to use it as a live mixer, but it does not have adequate send/return/monitoring chain at all.

Enter the Zoom LiveTrak L-12. The sound quality of the mixer is immediately a lot better. It can record 12 channels at once. It also accepts larger SD cards and record at higher bit rates then CD quality. Unfortunately, the send/return and single effect chain is still a bit meagre. You do have a compressor per channel, but when you use it, its recorded compressed as well. This might not be what you want. The monitoring chain is a different story. Its amazing. Four, or even if you really need it a fifth monitoring channel if you separate it from the master mix.

All in all, this cannot be your live mixer for all purposes. Just because of the limitations of the send/return and single effect and the compression with the penalty of also recording it. However it is probably exactly the mixer that you’ll find in any commercial practice room. So just replace it with this one and you could have a multitrack recording of all your practice sessions. Awesome! Now if you hit a gem, you can mix it down to a demo later.

Can it be your mixer for live venues? Absolutely! Connect some active speakers and you’re live. Unless you need more send/returns and effects live of course, then you need to bring a real live mixer. The challenge will then be to connect separate tracks of that mixer to the multitrack recorder. Hopefully, that live mixer has at least enough monitor channels or busses. Otherwise you’re stuck with a recording that does not give you enough options to remix the live recording.

Now in practice, how does it work when using the LiveTrak as a multitrack recording mixer? First of, as a mixer it will remember all your mix and recording settings as part of something that Zoom calls a Project. It will save it all on the SD card when you switch off and on. You will need to make sure that you do switch off and on again on the device, not just pull the power plug. When you switch projects then you can save different mix and recording settings per project.

Like an advanced digital mixer all fader settings are saved. But because it does not have motorized faders, a led shows the stored fader settings and such. When you hit that point of the fader again, you can change the value and save that again. This applies to all mixer settings in general. To extend on this you can save 10 different scenes per Project.

Zoom Export to USB
Zoom Export to USB

This is nice, but you cannot from the menu simply clone a project. There is a trick however, if you switch to USB host mode you can save and restore projects on a USB stick. The trick here is to save and restore an existing Project to a new name. This way you can start recording to a new Project with settings from an existing Project.

So there you have it. This is how I use this now and I know what it can do for me. I think it is great as a practice room mixer and for small venues. Please check the Zoom site or review sites to read more about all other modes and features of the LiveTrak. I don’t use any of the other modes, so I have no experience with any of the other features. It might work for your specific purposes as well.

Why I chose the Nord Electro 6D

This is a about choosing my main instrument. The main inspirational instrument in the studio as well as the centerpiece on the live stage. After working for almost 20 years with the Korg Triton Pro it was time for something new. The old monster weighed a ton and it was a traditional workstation with sequencer, sampler, MOSS synth and ROM synth. I actually used only half of its functionality. Storage was on either a floppy disk (!) or a noisy SCSI disk (40MB!). Why did I go to the Clavia Nord Electro 6D? Of course, the Electro 6D is a well known and excellent instrument and there are plenty of reviews, but why did I chose it?

The main appeal was a single feature that I once had on an old Roland (D10?). It kept playing the sound as you switched programs. It sounded a bit garbled, but at least it wouldn’t cut off the sound while switching. A major irritation when I switched to the Korg. The Nord 6D series and other Nord instruments of the same generation bring this back, but this time in its full glory. The notes you last played keep playing, when you switch programs. Every key you hit after the switch plays with the new sound. This is perfection for playing live!

The other thing is: I noticed that almost all my music centers around piano, strings and organ sounds. This is where the Electro 6D excels. All sounds that don’t need pitch bend and you might have noticed that the Electro 6D doesn’t have it. The occasional whoosh and bleep and bloop can come from other instruments. Because it doesn’t have all the controls and in general isn’t made to be a master midi controller I use the Komplete Kontrol A49 in the studio for that. It has a very similar touché also.

Live Mode
Live Mode

Another highlight of the Electro 6D is the Live Mode program selection in the center controls section of the keyboard. This switches the four program selectors into a set of pages with your favorite preset sounds. Including all mix and effect settings. This what I desperately need live. I used to move around sounds to have them as the first programs in the list, but with the separate Live Mode list I can put them right there and leave the program list as it is. Just to be sure I made a backup of my Live Mode favorites to have them back as I want, even when something gets twisted and accidentally saved as part of the Live Mode preset.

Organ register sliders

Then some small niceties. I chose the Electro 6D and not the Electro 6HP for the real organ sliders and its lower weight (9 kg instead of 11 kg). I have always played springy keys. In that sense I am not a true weighted keys piano player. I don’t use split keyboard sounds currently, but in the past I have used splits live also and the Electro 6D has the guidelight splits for that. In short, it has all the things that I dearly need and not a lot more or less.

Guide light splits
Guide light splits

A live setup for Ableton Live

It just does live gigs

I guess most musicians use Ableton Live live like I use it. Its kind of the standard way of building a live set. This article describes the details in the implementation as I use it.

So there is Session View with the track channels laid out with different instruments and the scene rows with the different songs. Within each song several scenes with the intro, verses, choruses, break and outro. Ableton will follow the bpm mentioned in the description and you can set the Launch Follow Action to let Ableton run the flow of each song. This way Ableton will back your song live with the right scenes with the push of a button. With effects automated or manual as you want it and in the correct tempo. Additionally I use MIDI Program Change commands to instruct the Nord and the Korg to switch to the right instruments for any scene of any song.

Ableton Live live set

In my case I play solo, or with aid of other musicians. I can choose which track to leave out, the backing vocals, the bass or at least one or more keys. On the whole Ableton Live runs the show in my case, so I should be careful not to bore the audience with too much music out of the box. I should keep working on performance, video tracks and light effects all the time. I try to use only Ableton Push, avoiding the use of the laptop to start and stop.

What’s on the monitor?

Lets start cheating a little. Because not every track has drums, I rely on a click that gets routed to the monitor. In the above picture you can see the click track on the left. It just plays and plays and gets send to the Cue out Return Track C. Return Track C works pre-fader so it is in no way linked to the master mix. The cue out goes to a separate output on the audio interface and thus can be mixed to all monitors. For now this suffices.

All live instruments, vocals output and everything from Ableton Live gets mixed in by the audio interface. The audience hears the Master Out mixed and on stage you hear the Cue Out mixed with the click.

Prepare for the worst

My live set contains an instrument rack that is setup to be a playable, plug in based copy of the most important instruments I use live.  Should an instrument break down, I will then have the option to use any MIDI keyboard to replace it. The plug in sounds are not as nice as the Nord and Korg sounds, but I will have something to play instead of nothing.

Live Instrument Rack

To make sure that I will always have a way to recover in case of emergency the entire live set is stored in the Cloud. This way I can fine tune the Ableton Live live set from home and push it to the Cloud. The moment I open the laptop for a show and there is Internet it will sync up. I use OneDrive but any Cloud product is fine. Should the laptop break down, from any other laptop I should be able to recover the Ableton Live install, a few plugins and packs and any interface and sync the live set again. At the last moment a backup laptop should be ready to swap in on the spot if needed. Lets pray it will never come to this, but if it can happen it will.


Soundbrenner Pulse wearable metronome, the verdict

After diving into the basics and getting it to work it was time to really start using it. First off, the concept really works. I have songs without drums. Practicing these can be tough, so I tried working with a click track in the monitoring. That helps if you get in the flow. But after using the Pulse a few times it was completely natural and my mind “felt the beat” and leaned into it. It was important for me to tone the default “hard buzz” of the Pulse down to a more subtle vibration level. Now it really works for me. The battery life of the device is excellent for me, I have been practicing for hours now on end and its not even half empty. Charging it is a bit fiddly though.

There are however several problems with the product. If you look over the appearance, because it looks and feels very plastic and rough at the edges, what are the real problems? At this point and time, for me the Ableton Link feature does not work reliably. If in an Ableton Live session the tempo changes for a new song, I do not know when of if the metronome app will pick this up. This should be a simple bug to fix, or I have a unique setup in my WiFi network, Android version (latest version of Android Pie – 9), or something else is wrong. I am willing to try an iPad in the near future to see if it works better.

Then there is of course the problem that its three devices. Your laptop, a phone or tablet with the Metronome app and the Pulse all have to be fully charged and setup to make this work in a live situation. On several occasions I had to reconnect the phone to the Pulse to make or keep it working. Even if sync between laptop and the Metronome app does get fixed all devices need to be on a perfect working WiFi network on stage and how realistic is that? I think you can see that this device is probably at its best while practicing or in the rehearsal room. Only if you have a dedicated professional crew on stage to keep it working it might just work.

In short, I cannot do without anymore when practicing. I would never try to get this to work in a live situation. Maybe it all gets fixed in the next version, the Core. Lets wait and see.

SoundBrenner Pulse wearable metronome, first impressions

What people say

This product appears everywhere in timelines on social media when you’re interested in making music. I must say it immediately got my attention when I saw it. For me the appeal is that would solve the problems playing along with the computer when practicing or playing live. I don’t always have live musicians to play along with and the computer is unforgiving. Any metronome is welcome there and the SoundBrenner Metronome app is then already of great help.

But now the Pulse is there and it adds to this a haptic vibrating metronome you can feel. Now you don’t have to look at blinking lights while playing. Also, I use Ableton Live, also live, and there is even the possibility to use Ableton Link with Metronome app. If this all works together as one integrated haptic Metronome that allows me to feel the tempo while playing along with Ableton? Perfection! The ultimate gadget heaven!

Before buying I always look around for reviews and more info. One big complaint is that it is not an actual watch kind of thing. A lot of people hoped that it would also display the tempo. It doesn’t. You have to look at the screen of your phone (or tablet) to see settings and tempo. This also means that you have to keep the phone screen on. At the same time the Pulse is connected via Bluetooth. The phone is the brains, so you must at all times keep it charged and connected. A challenge, specially live.

Then there is some word going around on it not being accurate, but I think that is already fixed now through firmware updates. Another complaint is that it takes time to get used to ‘feeling’ the tempo. I guess that a lot of people send it back immediately, but I am more patient. Most new skills take time to get used to and I am quite convinced that this Pulse is a good idea. But now for first impressions.

What I say now

When you first start using the Pulse you will find that it is a bit fiddly to operate. You have to tap the watch face to start using it, but its not really touch sensitive. You have to really press it to pick up the taps. Then, straight out of the box it is set to really buzz the rhythm very strongly. And audibly also. Fortunately you can immediately go back to the app to set it to a more friendly and short vibration. In the lightest mode it really feels okay, but I play keyboards, When playing a more physical instrument, like drums, I can imagine you need the stronger buzz.

Charging it is also fiddly. It is a small kind of dock that has to properly connect to the device. After popping the Pulse in the band it gets even harder to let it connect to the charging dock, because the band pushes it from the dock and the dock can easily slip away, because its so light. People complain about the time that the device can be used on a full charge, but I don’t have enough experience now to say if it is really a problem for me.

Then its time to start practicing and linking it up with Ableton Link. That’s where all starts to get a little bit flakey for now. Ableton Link somehow goes in and out of the connection with the app. Which is ok for practicing in my case, but I don’t think this is ready for playing live. Also my phone sometimes loses connection with the Pulse after several minutes of playing. My phone is an Android phone, running Oreo and I know it can be very aggressive in killing background processes, specifically if they draw power. Probably that is not helping here, so I want to try it with another iOS device also.

One other thing to mention: its quite a big device. Maybe better suited for male wrists. There is another bigger strap in the box for your leg or your upper arm, but this device will have a hard time looking elegant on fragile ladies arms.

First conclusions now:

  • Big. Don’t expect this device to be light to operate, you really have to tap hard
  • Dive in to the settings to tune it to your preferences
  • Great for practicing, but for playing live this is a really complex setup to get and keep running

I hope this helps you appreciating the device for what it is now. I will keep using it and I’ll keep you up to date. Please note that there is also a new Soundbrenner device on Kickstarter that is actually more like watch, the Core.