AI generated images are still not perfect, but why?

So I enjoy making pretty visuals that go along with the music, photography and video. It is always tricky to get what you are looking for. And what if you want a video of a burning car, or a picture of a woman falling from the sky? Meet the new kid on the block: AI. Wouldn’t be great if you could prompt your perfect AI generated image or video? Anything you wish for and then get it. Ready for use in any music visual? Sign me up!

Maybe you tried it like I did. Prompt something interesting or funny in Dall-E and and then the results were either amazing or hilariously bad. Well, lets look at it this way. Pandora’s box is open and there is no way it will close again. At first I dismissed AI imagery as uncontrollable, but these last months I found a a way to control it. I will explain how and then probably you will see why i still feel like I’m collaborating with a sorcerer’s apprentice.

In this article I will try to explain how generating images with AI works. And I will try to explain recent progress that has been made so you see that much more is possible than you maybe suspect. All my findings resulted in the AI generated images you find in this article and yes they are sometimes amazing and sometimes hilarious. I did at one time write about faceswap techniques, another way to use AI in much the same way. The old article is now a bit dated. Lets first understand more about image generation.

AI generated image of “a grand piano on a beach”

Training the sorcerer’s apprentice

There are many online services that offer magic straight out of the box. But what happens behind the curtains is well hidden. For all services it all starts with tagged visual content. Images with textual descriptions that correctly describe what’s in the picture. AI is just about recognizing patterns and qualifying these. So how is it possible that an AI generates something?

The clever trick is that people found out you could pit two AI’s against each other. Imagine a student and a teacher. The student AI (generator) is good at messing around with an image. Starting with just random noise. In endless cycles it shows the results of messing around with the image and showing it to the teacher AI (discriminator). The teacher then gives a grade that indicates which result better matches the given prompt.

But the problem is that the AI is mindless. Even though the image can match the prompt it doesn’t have to be realistic. Five fingers or six? Eyes a bit unfocussed? An extra limb? It is best compared with dreaming, sometimes even hallucinating. There is no logic that corrects the result, just random luck or accident. It seems that the human touch is to maybe be able to imagine things, but then make sure it is within the bounds of reality. The wizard’s apprentice is doing some uncontrollable magic.

AI generated images come at a cost

The whole training process and the the work of of generating images costs a lot of time and computing power. You will always have to pay in one way or another for generating images, let alone video, which is just lots and lots of images. In the case of video another AI trick needs to be done. Guessing what image will follow another image and have this pre-trained and processed. More training, more time, more computing power.

Create your own magic

Getting a lot of images and having them all perfectly described is the magic sauce of AI imagery. This is what the student and the teacher need to make the right images. It determines what kind of images can be generated and also the quality. All images are turned into small markers and then there are clever algorithms to find and combine the markers (vectors) to recreate an image. By letting the student and the teacher use sampling to navigate these markers you can start to generate images. The teacher tries to make sure it matches the prompt for the image.

Now is it possible to have an AI generate a specific person? Specific clothing? Specific settings? Yes this is possible. If I pretrain with only images of me, doing all kinds of things, the result will be that I’m the main character in all generated images. If you then prompt “A man playing a violin on the beach”, it will be me playing the violin. Now hopefully there were also images of playing the violin and images of a the beach. But so many images with correct descriptions? An almost impossible complex task it seems.

Or tame the magic

Let’s assume you don’t have these large sets of perfectly described images to pre-train. Now here is progress of the whole AI image generation in the past year. Imagine that you can start with a well pre-trained set of markers with lots of well described images. Clever people found out that you can just add to any of this AI generating stuff a few hints, a Low Rank Adaptation (LoRA). For images, imagine this. Take a smaller set of well described images and allow these to just tweak the results of the original sampling of a pre-trained set of images. And you trigger the results with new keywords in the descriptions.

The results are stunning. I found a way to get this all working on servers with enough computing power. Starting with a good pre-trained set of images called Flux, I then learned how to start training LoRA’s with my own images and descriptions. Now i can simply ask for an AI generated image of me playing the piano on the beach. Flux knows how to get to an image of someone playing the piano on the beach. The LoRA knows how to make this picture look like me. Of course I trained a LoRA with a set of pictures of myself. I trained it with a set of pictures of Alma, my imaginary persona. When Swiss DJ Oscar Pirovino visited me for Amsterdam Dance Event he wanted to participate and I generated another LoRA.

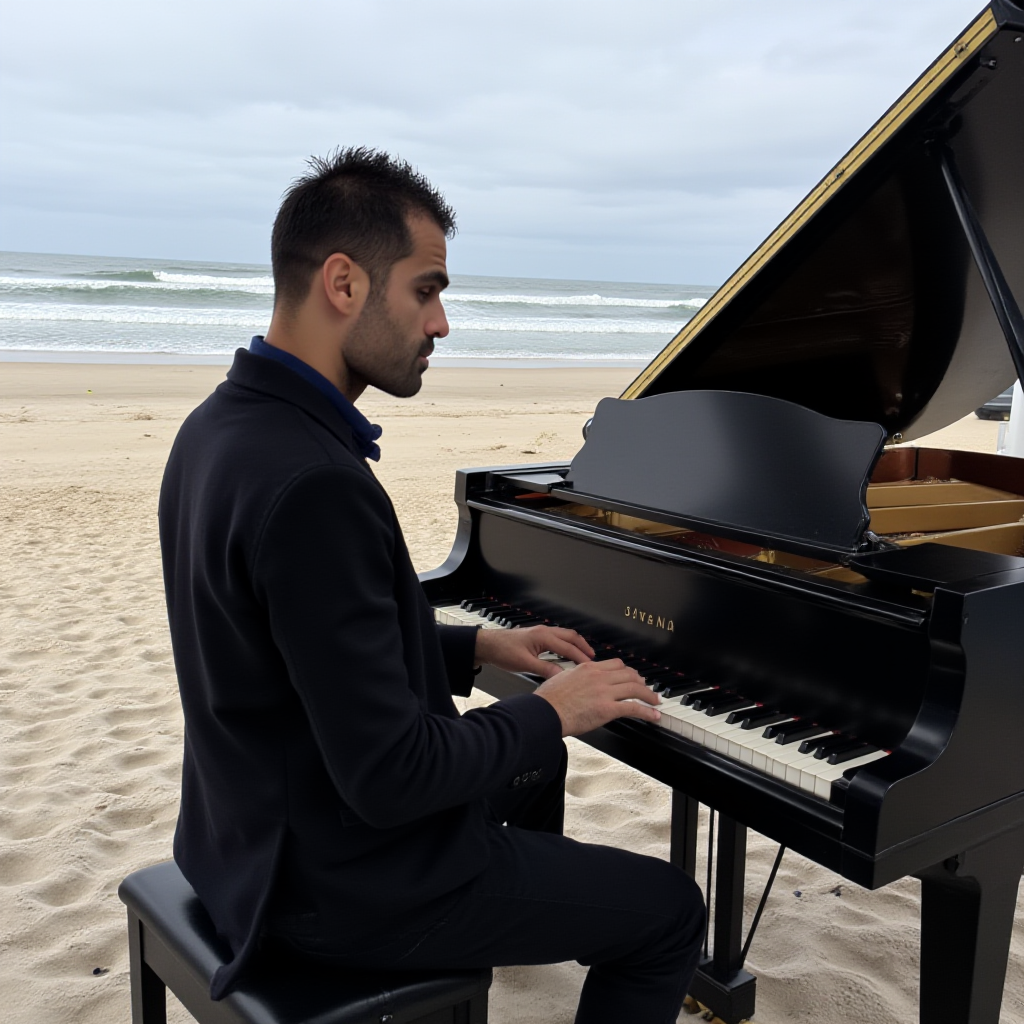
AI generated image of “oscar in a black suit playing a black grand piano on the beach”

The computing power needed is still immense, but now the results are much more controllable. The Flux pre-trained set is good enough to make sure that I can generate a nice photographic setting. A small set of well described additional images can tweak the results to have me, Alma or Oscar in the picture every time. The results are still unpredictable in details of course. In a way the results of a photoshoot are also a bit unpredictable, but in a real life photoshoot I can rearrange stuff and try different poses on the spot. No doubt AI generated images are getting there and maybe in a few years it will be just like a photoshoot. We will see!

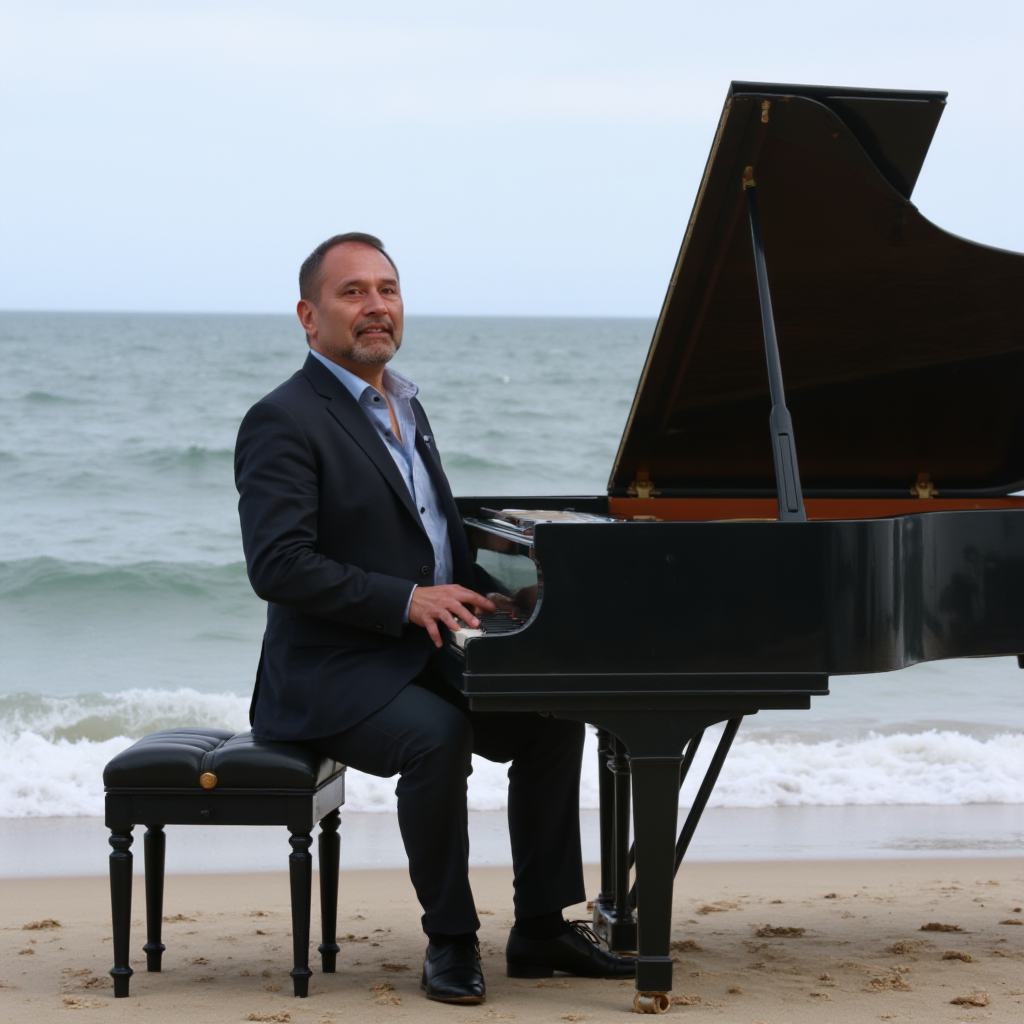
AI generated image of “thewim in a black suit playing a black grand piano on the beach”

Make MIDI control a reliable part of your live stream

Yes I am using MIDI control as part of my live streaming. How? In a very straightforward way. Playing a new song will trigger a video clip playing as a backdrop for the stream. It can also trigger a scene in the lighting unit. Live streaming is my way to improve my live performances, even though a live stream is not the same as a live show. Anyway, hence my endeavors to still improve my live streams and make MIDI control a reliable part of the live stream.

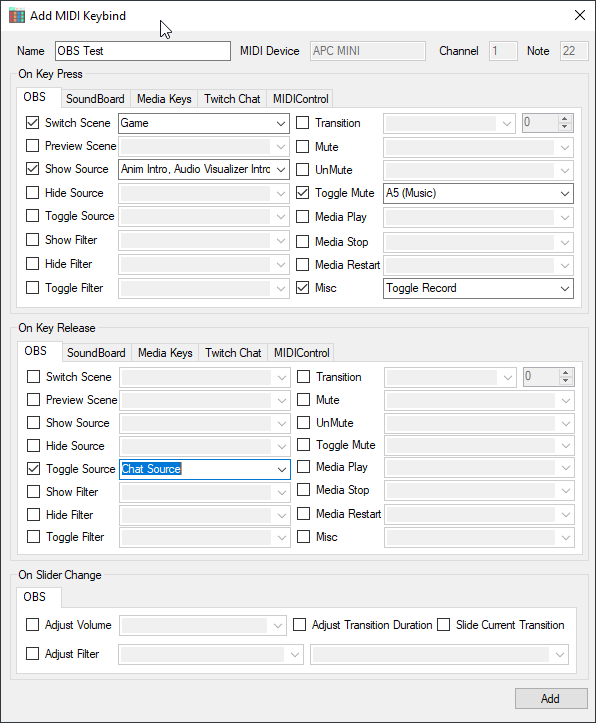
The old way: MIDIControl

Up to now I had to rely on a separate program MIDIControl to catch MIDI events and relay these to OBS . I can tell you that any chain of devices or software is easily broken in a live stream. More then once I was in a situation where it simply didn’t work. No harm done musically, but the show does look a bit more bland. Lately a new version of OBS broke the link permanently. I had to wait for an update for the MIDIControl program.

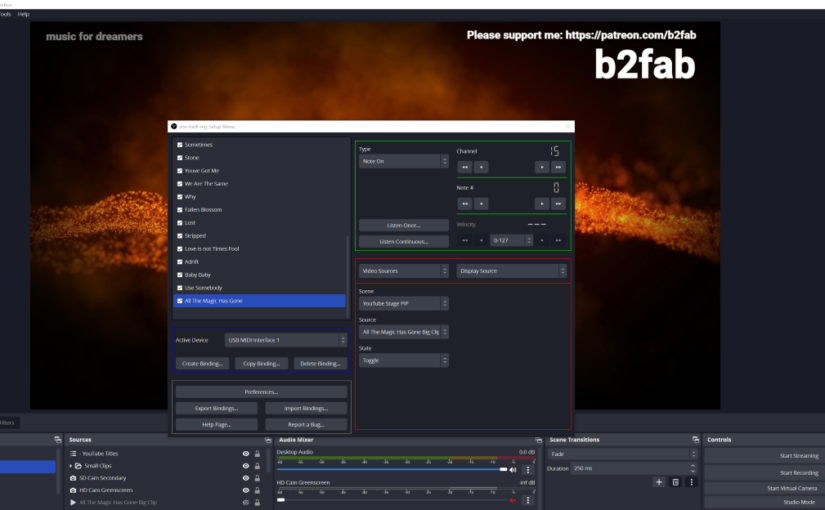
This triggered a new search for alternatives and I found one in the form of a true OBS plugin: obs-midi-mg. The first version I used was a 1.x version, the latest version 2.2 has lots of improvements in the UI. In the first version you had to step into binding, step out and step into action to make a scene change work. Now it’s all on one page, like you can see in the screenshot in the header. The big improvement for me is that it is simply there when you start OBS. No need for the chain of programs to be up and running and connected.

For capturing MIDI I use a simple and cheap USB MIDI interface. It even does not have a brand I think. MIDI on windows is very sensitive to plugging it into a different USB port, that is why I put it on a separate interface that never moves. The plugin is setup to listen for a note being played and then trigger a video source to be shown. The video source starts playing from the start when becoming visible and never loops. I keep a spreadsheet with all the bindings to keep track of the note numbers used on different channels.

I hope I have inspired you to make MIDI control a reliable part of your live stream. There are many more useful applications possible. Also for instance using a Launchpad to trigger actions on sources in your Scenes.

Akai Force: First impressions

After having played live for more then one and half year I was eying this baby: the Akai Force. My live setup when playing solo, or as a duo now with a bass player, centers around Ableton Live on a laptop with a Focusrite sound interface. In previous articles you can find out how I use Ableton Live live and it is great to be able to play songs live, just like they have been recorded in the studio.

Now I am also playing more acoustic (Stripped) versions of my song, without a laptop and that is also because in a way it still feels like cheating to use the computer to play along when playing live. I know it is now very common to play like this and my audience never questioned it, but still it bothers me that people might think I am checking my email while playing a live show. Of course, to prevent me constantly working on the laptop I control it with a Novation Launchpad, but I do have to check the laptop screen once in a while.

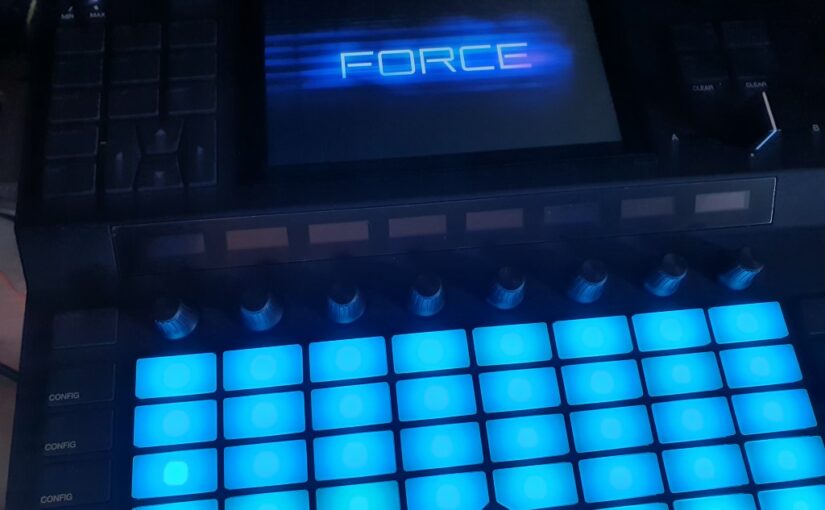
Enter the Akai Force. Not only an MPC (Midi/Music Production Center/Controller) , but also a standalone live instrument. It promises to be able to read an Ableton Live set and converting it to an MPC live set. This way it potentially does a way with the laptop, sound interface and launchpad. It is all in one and looks like a music instrument. These are my first impressions of the Akai Force.

Unboxing it, reveals a heavy and sturdy device. Larger then an Ableton Push, but the same idea. It has a nice touch screen, and it strangely wants you to either start a new project or open an existing, before allowing you to access other functions, like browsing or configuring the device. It is possible to change this behavior in the preferences.

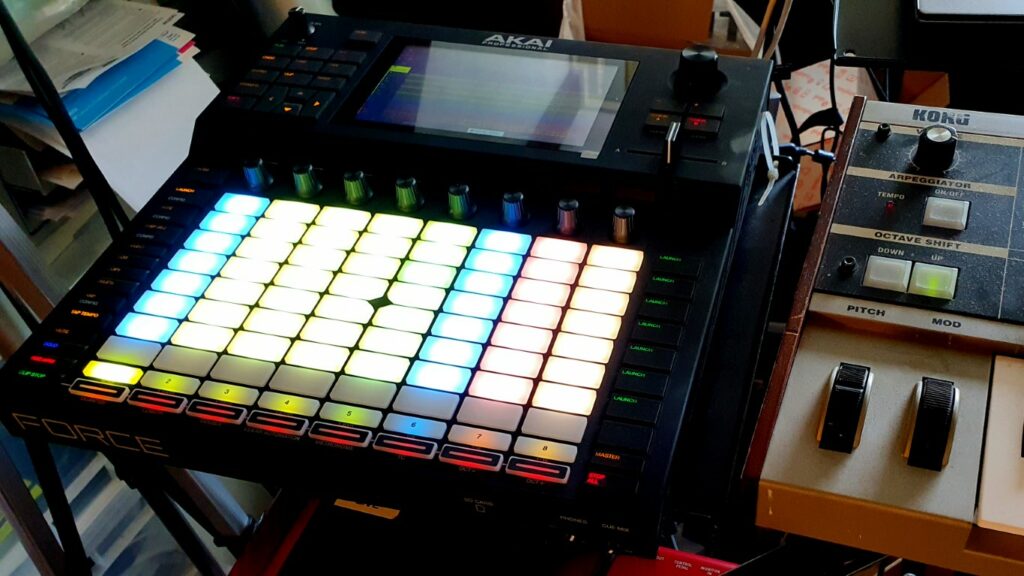
Akai Force in the live setup

The device starts up in Standalone mode, but can be put into Computer mode. In this mode it allows access to connected storage, but strangely not internal storage. It also turns into a dumb audio interface in Computer mode. The best thing to do first is to mount an 2.5 inch SSD drive inside. There is a lid that has room to add an SSD and this was actually for me a pleasant surprise. I thought I had to replace the internal storage. Internal storage is only 16 GB of which 6 GB is available. After initializing, formatting (eFat) and naming the internal drive it now shows up as Force SSD. Nice.

After copying my Ableton Live live set it all begins. This was my first real unpleasant surprise. My live set runs itself, if I let it, by using Follow Actions on clips and scenes in the live set. None of this works on the Force. Fortunately this can be simulated by cutting up the songs where I used this in separate live sets and creating an Arrangement. The Arrangements import perfectly in the Force. Also it is still possible to leave the arrangement and trigger clips and scenes yourself manually. Phew!

Another unpleasant surprise. Only 8 audio tracks in a live set. Yes, I was not well prepared for this I must admit. It was quite hard to find these kind of details. I only found it in forum discussions. This needs some work on my side to review and mixdown parts of the live sets before importing. I’m still working on that.

Then a nice surprise, the internal mixer outputs to two sets of outputs 1/2 and 3/4. This quite nicely works with my in-ear monitoring channel with clicks and the live mix without click. The number of inputs however seems limited with only two. Only enough to accommodate me playing solo. Not enough for my bass player, so I still have the need for a separate live mixer when doing a show.

Next steps for me to find out is the effect section for playing live and also using it as a musical instrument live and for production. Stay tuned for more about this new addition to the studio. If you have experience with the Force, please comment or send me a message! Let me know what other questions you have about the Force!

Better fix it before it breaks!

It is only the most important part of my setup. The launchpad for triggering songs and samples and visuals. And ok, I broke it… again! This time just before a live show. How did it happen? A fall from the stand with the cable connected ripped the connector from the internal circuit board. First my Ableton Push some time ago, now my Novation Launchpad. Now let’s fix it before it breaks!

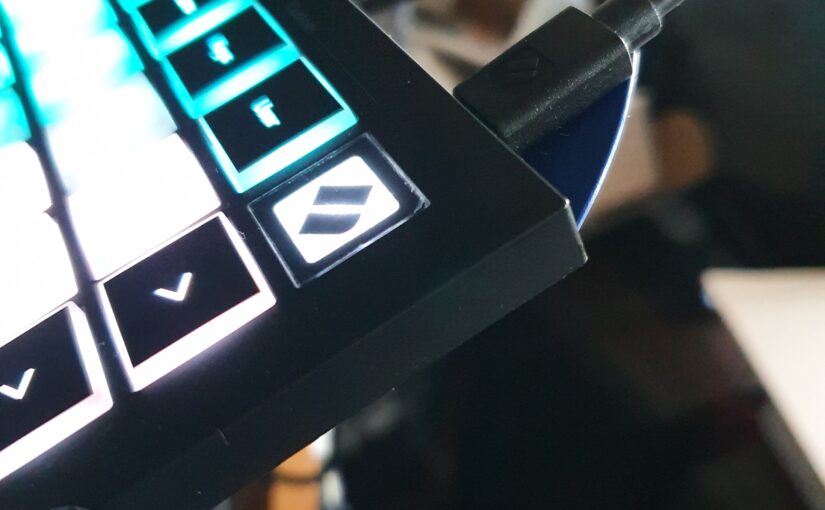
In the picture above you can see my attempt to fix this before it happens again. I glued a plectrum to the bottom side of the new Launchpad where the connector is. I hope this effectively catch some of the impact to the connector if it falls or bumps. In a live situation I will also tape it with duct tape. My advice is to check all of your gear for protection of connectors. I am quite happy now that my 19 inch rack mountable stuff is now solidly protected in a case.

Of course, I shall not rest before both the Push and the old Launchpad have been fixed again. In both cases these are connectors soldered to the surface of the circuit board. So if you drop the device or it bumps against something solid it kind of gets torn and ripped off the surface. In the end it this is a cheap way to manufacture a device. The alternative would be to protect the connector or wire it separately. The manufacturers of these devices do take this into account and ruggedize the connector a little bit.

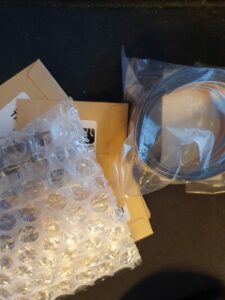
I already bought some stuff to make this work. So here is my stuff to fix it. Soldering something surface mounted manually is hard. My alternative is to wire the connector. It will be ugly, but if it works it it works and I hope these will find new use in the studio. Throwing away this beautiful gear would be a waste! But: better fix it before it breaks!

You need a 4K display, but…

The start of this year is already well on it’s way and I wanted to start it right with an upgrade to the studio. As you know I am into making music, but also video content that goes with the music. In the end video clips, but I like to think more about it as “visuals for the music”. A way to tell the story of the music again, but different. Working with 4K content is quite normal for me now, even though the end result might simply be an HD 1920×1080 YouTube video, or even a 1080×1080 Instagram post. In the end 4K can really make the difference and will also affect the quality of your lower resolution end result.

A 4K display has now become a no-brainer. I invested in a 32 inch ergonomic screen with good, but not high-end, color reproduction. The LG Ergo 32UN88A also fitted nicely on my desk. Immediately after connecting the screen to both my studio PC and a Thunderbolt laptop dock the problems started. Blackouts. Every minute or so the screen would just blackout on both devices. Both should be able to drive a 4K screen, but nonetheless it seemed to fail. Maybe you immediately know what happened, but I was stuped.

My fault was that I was just too new to 4K upgrades like this. So I had to find out the hard way that there is more to hooking up a higher end display like this. Yes, there are limits to driving a 4K screen. One part of the chain is the video output, but the other is the cabling. I had to learn the hard way now that HDMI cables have specifications. Up to now I only had a 1920×1440 to drive maximum and that turned out to be easy. I had to run to the shop and buy new cables. Cables with specs that could meet 3840×2160 and 60Hz.

After connecting that only the laptop dock kept flickering and I had to turn down the refresh rate to 30Hz. A dock like this is not the same as a video card. I do have a Thunderbolt external video card, but I only want to start that up when playing games. It makes quite some noise and is not suited for studio use. So just as I found out in live streaming that not any PC USB bus can drive multiple HD cameras, using 4K displays is a good way to tax any connected PC or device and the cabling. So if you are thinking about upgrading your studio workhorse, be prepared!

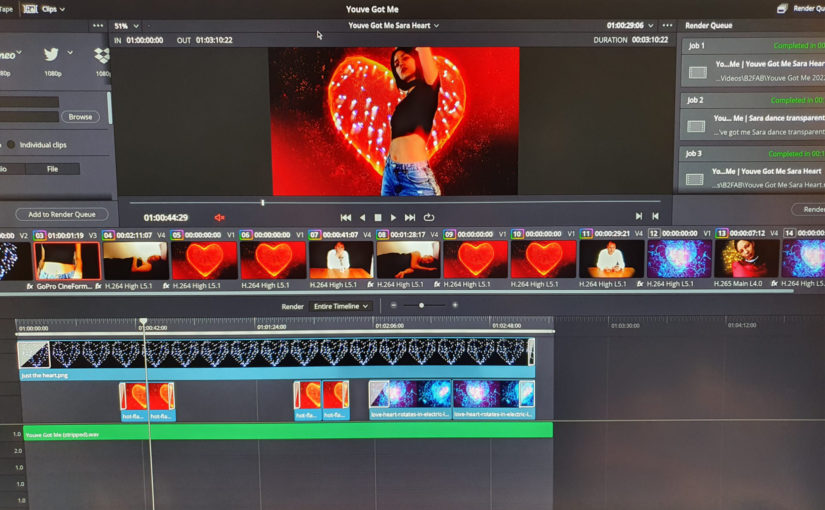
Another thing might be that the picture I shot above is from editing video in Blackmagic DaVinci Resolve Studio. The moment I started Resolve for the first time on a 4K screen the UI was microscopic small! It was completely useable, but totally not how I expected to work with Resolve. After some googling I found out that in order to see the normal layout on a 4K screen, you need to make the following changes to your system environment variables:

QT_AUTO_SCREEN_SCALE_FACTOR: 1
QT_DEVICE_PIXEL_RATIO: 1

There is a good chance you already have a 4K display, or maybe even multiple. If you don’t and want to upgrade you may be warned now that it might just not be a simple and light upgrade.

Understanding audio mixing and routing in OBS

Last Friday I had a Halloween themed livestream in OBS. I wanted point the viewers to my upcoming song release and I wanted to play back a video with an interview I had with Pi.A about our collaboration on the new song. I tested everything in the afternoon and in the evening it turned out that there was no sound on the stream from my audio system. Bummer. After restarting the stream seemed to work again. Just a touch of real Halloween horror? I hope I can help you troubleshoot or make more advanced use of audio mixing and routing in OBS.

I spent this whole afternoon checking and rechecking my audio mixing and routing in OBS and I found no problem at all. It turns out that these things just happen. Let’s say that that is the charm of performing live, lol. However, it was something that had been long on my list to check out thoroughly, because I also had problem earlier with audio. So here is a recap of everything I know now.

Since you are probably a musician reading this, I won’t bore you with mixer basics like dBs and I’ll assume that you know how clipping sounds on audio output. I will also assume that you have no interest in Twitch Video On Demand stuff that is baked into OBS, because it is more geared towards gaming streamers.

It all starts with the sources

Every OBS source that outputs sound will appear in your center Audio Mixer panel. You can adjust the levels to your needs. Green is the safe area. Yellow is where your speech and music should ideally be. Red is the danger zone where the dreaded clipping might occur. You can mute a source to make sure it will not be recorded or streamed. By default all audio sources will be mixed to your stream or recordings.

OBS for now misses a master output level indicator. It might be added in the future. So if you mix in many different sources you end up guessing if the output will be OK. For now I exclusively mix the ASIO source, so that makes it easy to make sure the output is right. I mix in the Desktop audio just in case I have a sound from the PC I want to quickly mix in.

Just to be sure I added the Limiter as a filter. It’s not impossible to get an overcooked sound in the livestream, but the risk of clipping or overcooking goes down.

On the right track

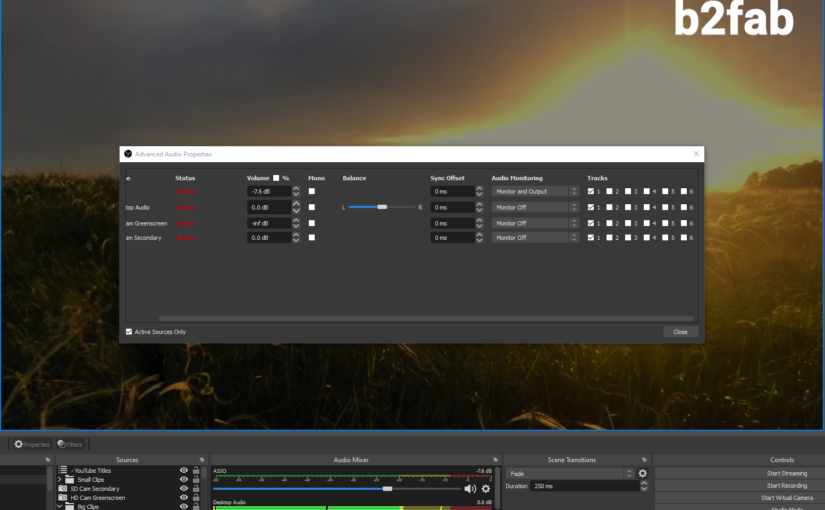
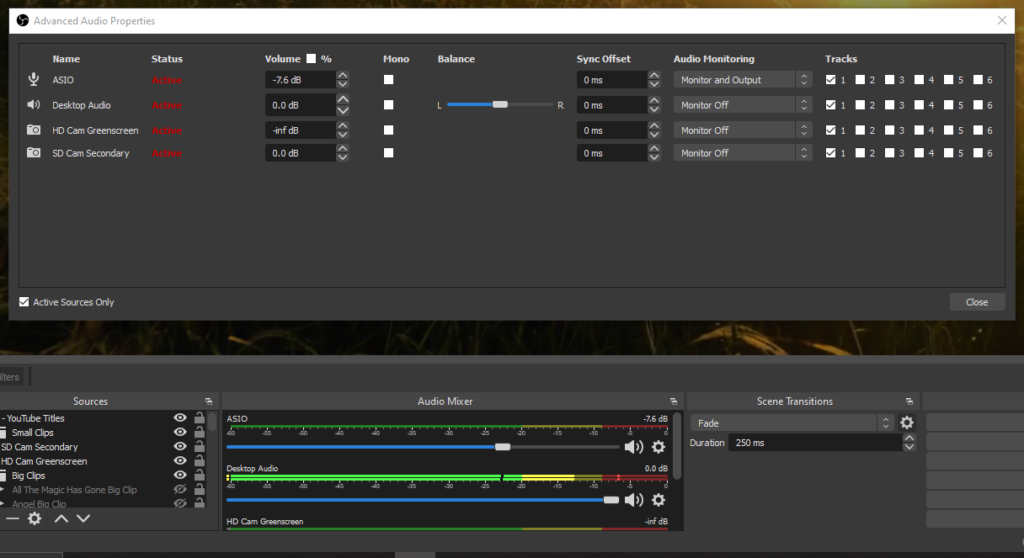
If you right click in the Audio Mixer section you can go to the Advanced Audio Properties. Here you see all your sources, that is to say you can still choose to see only active sources. I have more complex scenes where I choose per song I play live which sources are active. On the right side you will see a block of six Tracks. These are stereo tracks you can mixdown to, so in fact you have a mixer before you with six stereo tracks.

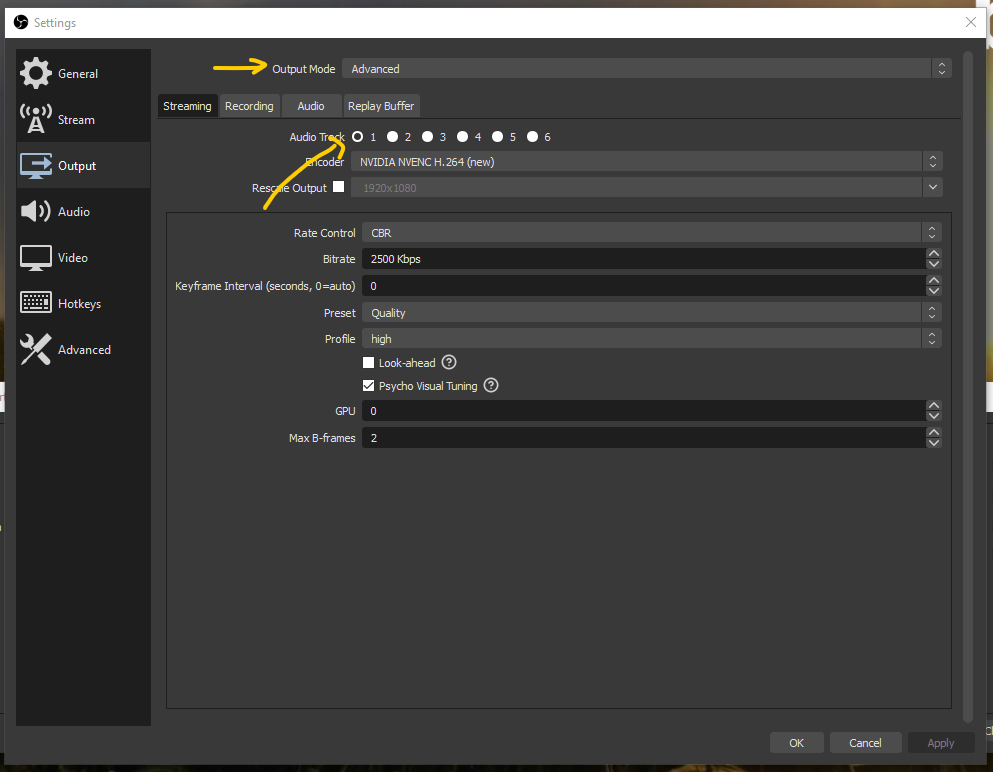
Your live stream will use only one track. You can choose which one in the Advanced Streaming Settings for Output. By default it will be track 1. Now what is the use of having separate tracks to mix to? These tracks can be used for recording video with OBS. The tracks will end up written separately in the video file it records.

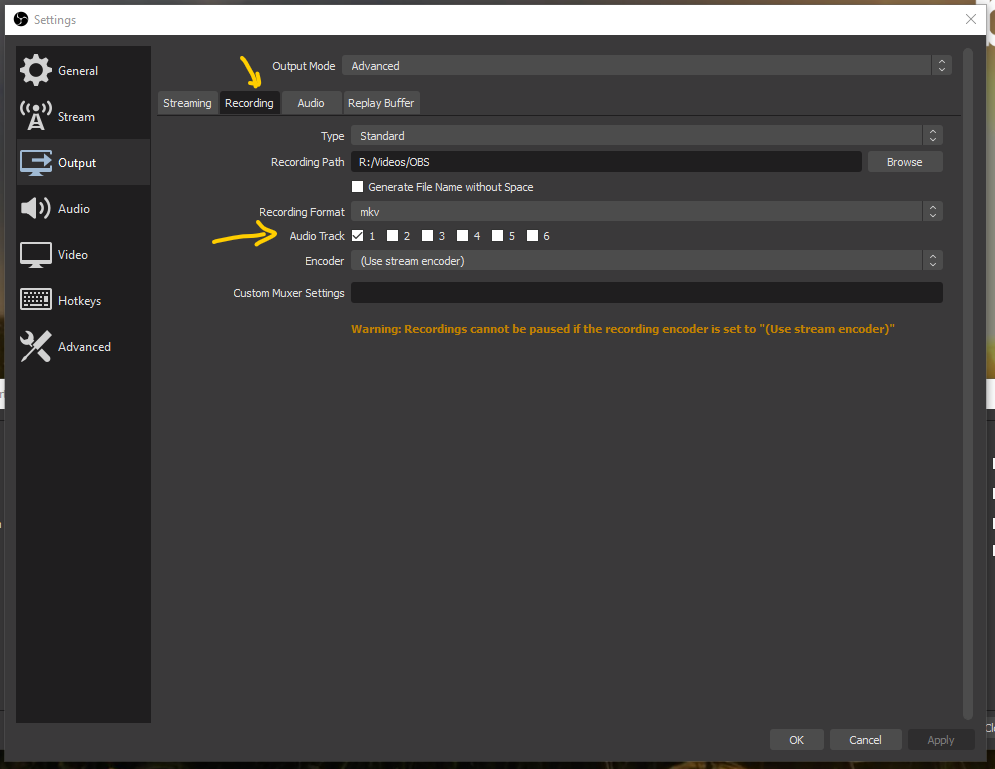
Gamers use this to have a track with the sound of the game and a track with their voice-over. Maybe also a separate track for sound effects and one for music. Then when they stream to Twitch they can leave out copyrighted music and still upload to YouTube with music. In the Advanced Recording Settings for Output you can choose which tracks will be written into the video output file.

Monitoring the output

If you leave everything set up as it is by default, all audio sources will output to your stream or recordings as you have just set it up. However there will not be any monitoring of the streamed or recorded output. This makes it heard to find the balance between different sources, if you have them. If you want to start monitoring you will have to select a Monitor option in the Audio Mixer settings. So there is also a stereo monitoring channel next to the six tracks.

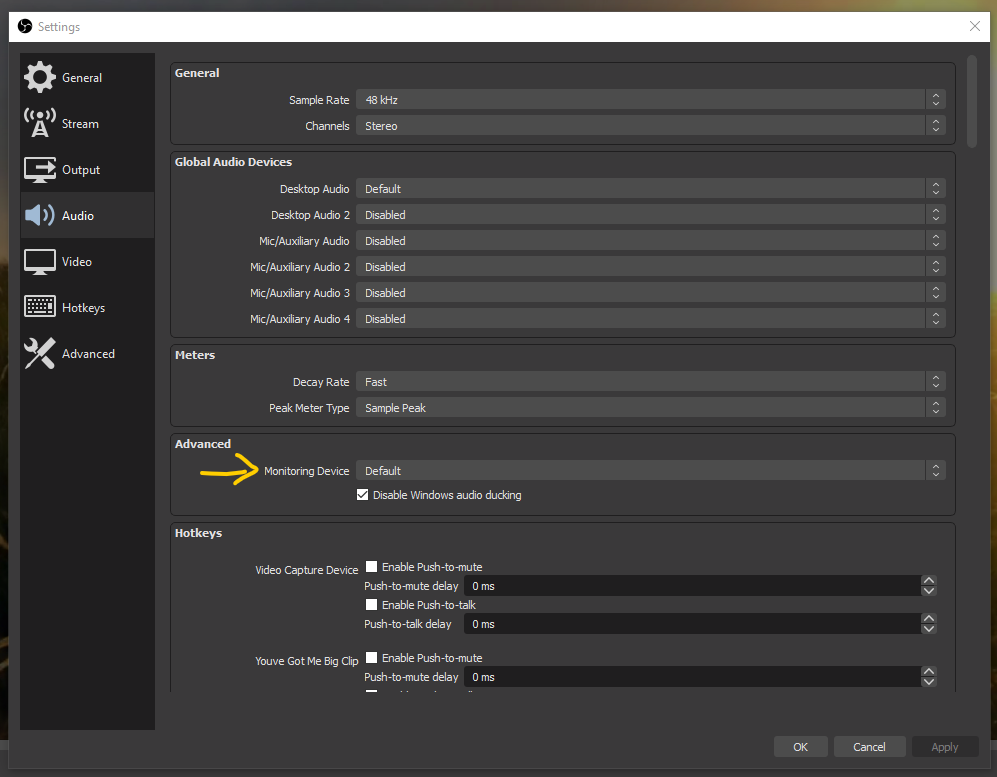
In the Audio Settings, you will find the monitoring section. Here you can choose where to output the monitoring to. Please be aware of the latency that OBS introduces on the monitor output. You can’t use it live. You can just use it to find the right balance between different audio sources.

So what if there is no sound?

If you look in the monitoring options for an audio source in the Audio Mixer, there is even option to output sound to the monitoring channel, but not to the output tracks! So there is the option to set the level of an audio source to -inf, to mute the output and the option to switch off output to any of the output tracks. On top of that you could choose a track that does not get mixed to your stream. Very flexible, but it can also make it hard to find out why you have no sound on your stream.

There are only two ways to test your audio before really going live. The first one is to make sure you output the same track as your streaming track on a recording and then record a short video. The second one is to stream to an unlisted (YouTube) or private (FB) stream and then check the result. In short it is a miracle that this was the first time in maybe 50 livestreams that I had audio problems. Because it is live it is hard to know what the audience is hearing. I always ask at the start of a stream. Audio is really a tricky thing in a livestream to get right.

Let’s fix it in the mix!

Of course, a good mix starts with a good recording. Buzzes, clicks, mouth noise, pronunciation problems, phrasing, irritating transients can all spoil the core of your song. For me in the home studio it’s just a question of starting over again, but for you it might mean booking more studio hours. Always hoping to get the same setup as before and the same flow.

If all else fails: let’s fix it in the mix!

After many years of working in the studio I think I have all the tools ready to fix all of the problems I described above and more. I had one article before about Fixing phase problems in a mix. Another time I got to fix the audio of a precious video recording that was completely blown out and clipped. After having fixed maybe thousands of instrument and vocal recordings, I can now truly say:

If you have a precious recording or anything that needs to be rescued to bring it back to useable in your mix, please contact me to have it fixed.

Home Studio Recording Side

Practicing on the road with a mini keyboard

So here I am. I’m back from a short vacation. Just one and a half weeks. Long enough to have this feeling of really having traveled, but probably short enough to pick up the daily routines in no time. Usually I need a full week slow down to idle mode and then a week to start up again. One and a half week does not really cut it then, but it will have to do.

The choice for me was to just step out of the daily routines of practicing and playing live and then step in again, or bring some gear and practice on the road. Actually the only thing you need is anything between a phone and a laptop to be able to sing here and there, but if you also want to practice playing keys and singing there are some choices to make.

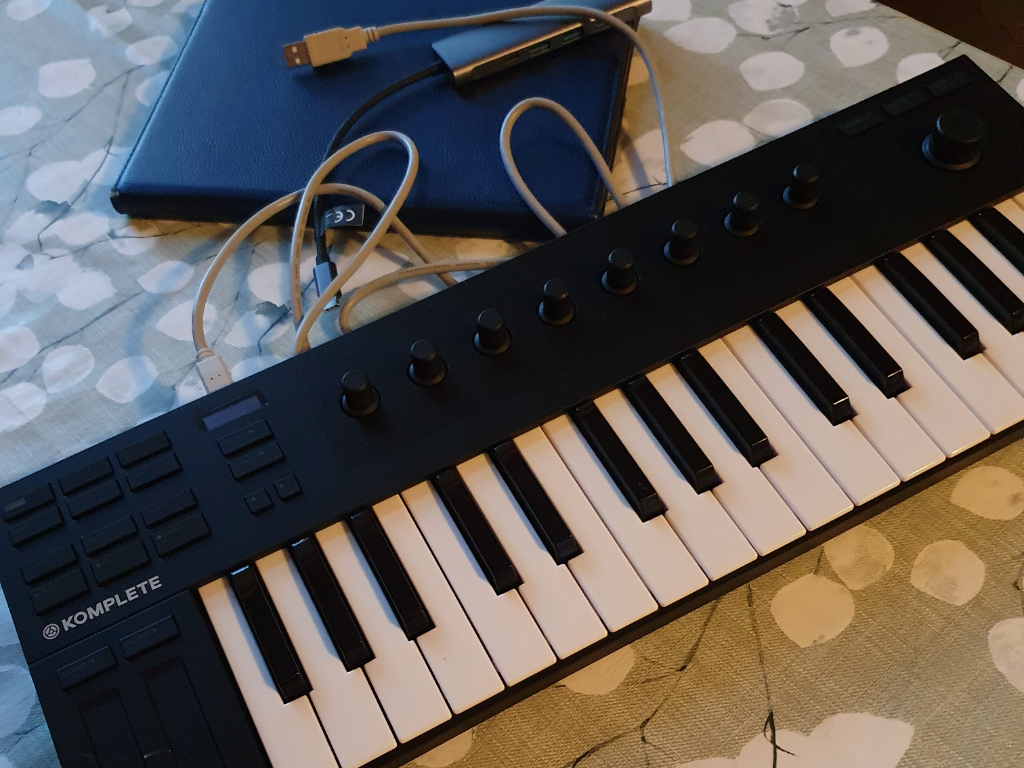
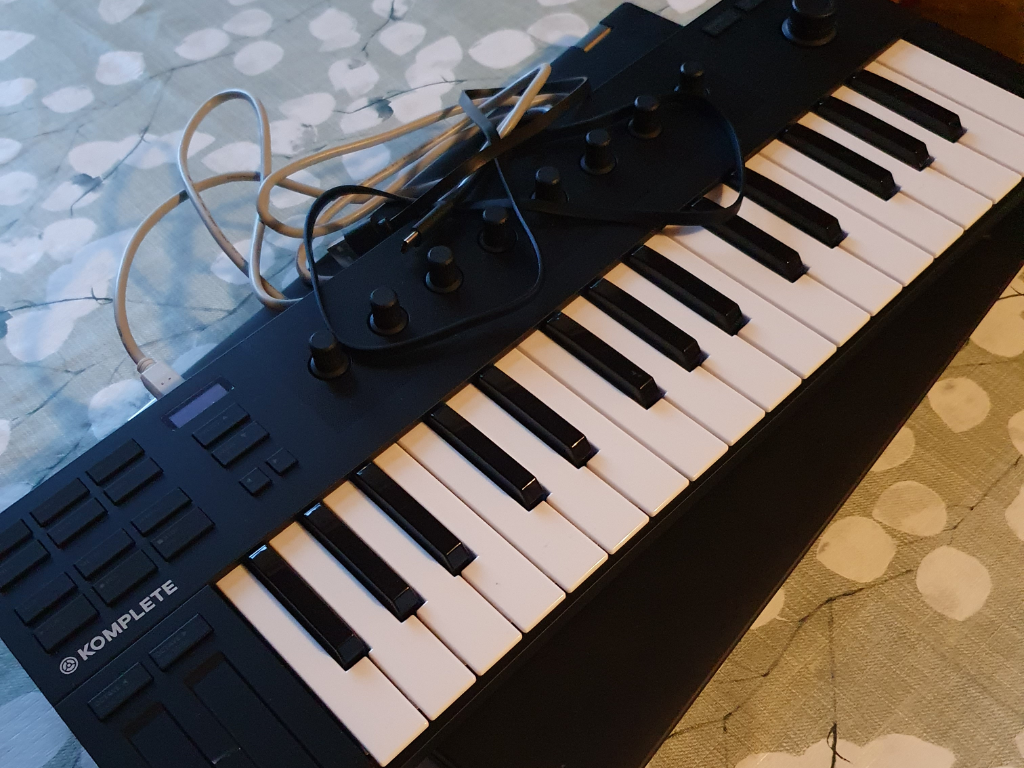
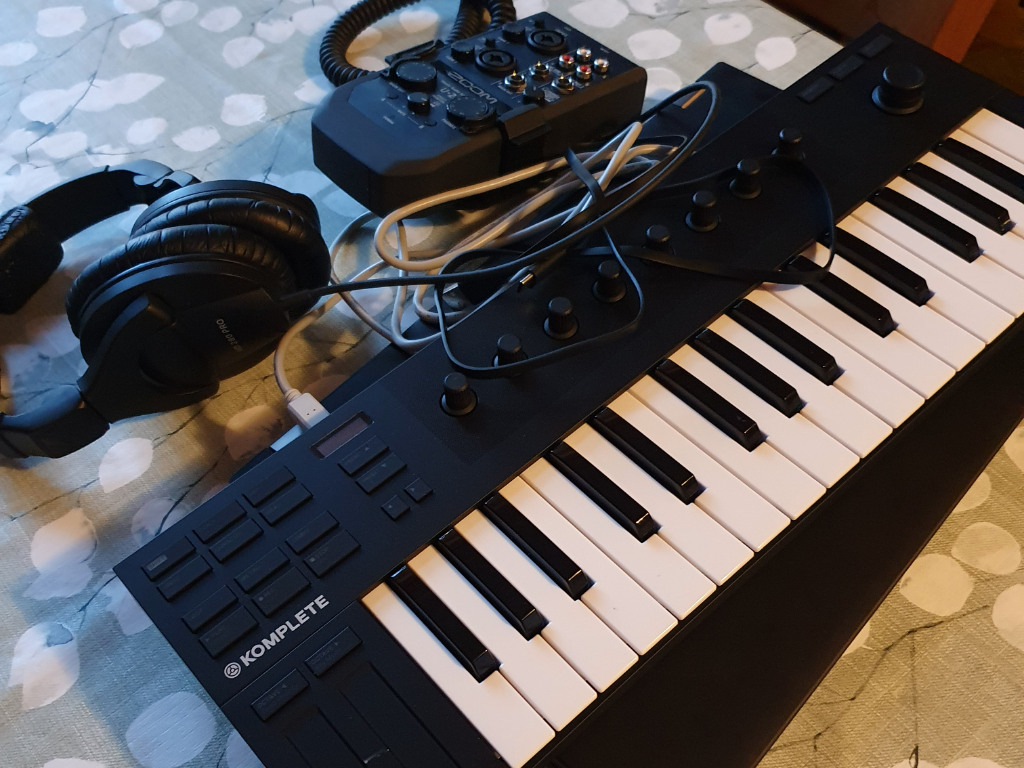
This time I chose to bring an iPad, a (Windows) laptop, the Zoom U-24 audio interface and a mini keyboard, the Komplete Kontrol M32. It gave me several options of practicing singing and playing the keyboard. The good thing about the M32 is its build quality and the playability given its limitations.

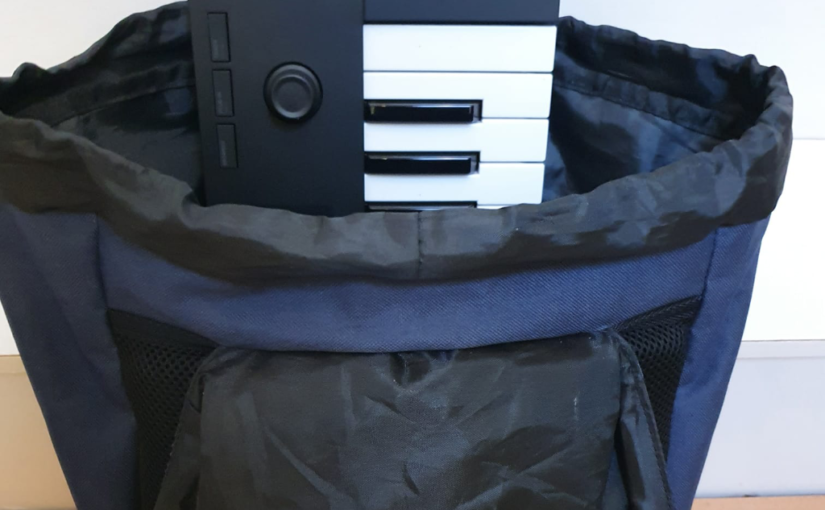
Is a midi keyboard with 32 mini keys something you can play on? Maybe. I found out that it is just a little too cramped and limited for my songs, but it was close to having a keyboard most of the time. It does fit into a backpack. Maybe it’s more suited to just playing around then practicing full songs? Jamming along some new song ideas? I brought it along, so it would have to make do. Your mileage may vary.

An iPad, an USB-C hub and a mini keyboard

The most lightweight option is the iPad and the M32, but I had to bring a small USB-C hub to connect the two. Once connected and loading up Garageband, I was practicing a few songs in no time. Perfect for a few songs I really wanted to practice on. The iPad speaker audio quality is reasonable.

A laptop and a mini keyboard

Then there is the option to scale up a little. Bringing the laptop allowed me to load up Ableton Live and the full live sets, or just load a basic setup to play piano sounds with the M32. A Windows laptop however only gives you Windows audio output which is notoriously slow and gives you latency. Unless you load Asio4All drivers of course. I tried it and it worked fine. The laptop speaker audio quality was not very special maybe even a bit too soft.

A laptop, a compact audio interface, a headset and a mini keyboard

The full scale option was also at my disposal. By connecting the audio interface I had my full live set and low latency audio and I could practice any song just like always. Except of course for being limited to the 32 mini keys. The full set was also great for writing songs, or just some playing around. This time I needed a headset to hear something or portable speakers. The audio quality was outstanding.

All in all the experiment was a success. I have practiced a few songs. My vocal coach assured me that a short vacation is actually good for your voice, so I did not practice every day. I must admit I accepted the risk of using the mini keyboard also because I use a microKorg in my live setup. Mini keys are not a no-go area for me. I hope you can use these experiences to choose your own on-the-road-practice-setup.

Using Davinci Resolve the right way

For more than a year now I have embraced Blackmagic Davinci Resolve as my go to video editor. Slowly and gradually I found out how to do a bit of color grading. Its an art form that I do not claim to have mastered, but I know what happens if I turn the dials and it really brings consistency in a video. This then in turn helps to tell a story without distractions. The video editing itself, I just took for granted and I found a way that works in the Edit page of Resolve.

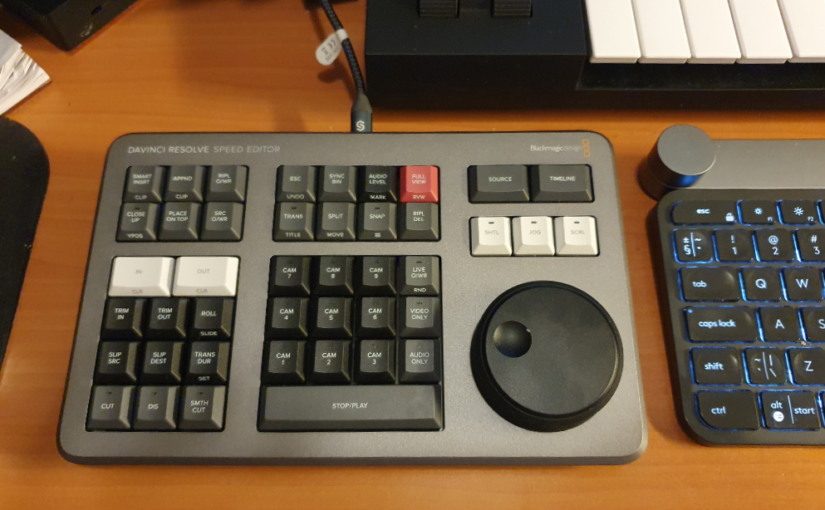
After a year it became clear that it would be also necessary to dive into the full Davinci Resolve Studio product and I found out that the right way to do this would be to buy the Davinci Resolve Speed Editor that comes free with a license. I thought it was a just a keyboard with shortcuts to help you navigate the editing process faster. How wrong could I have been?

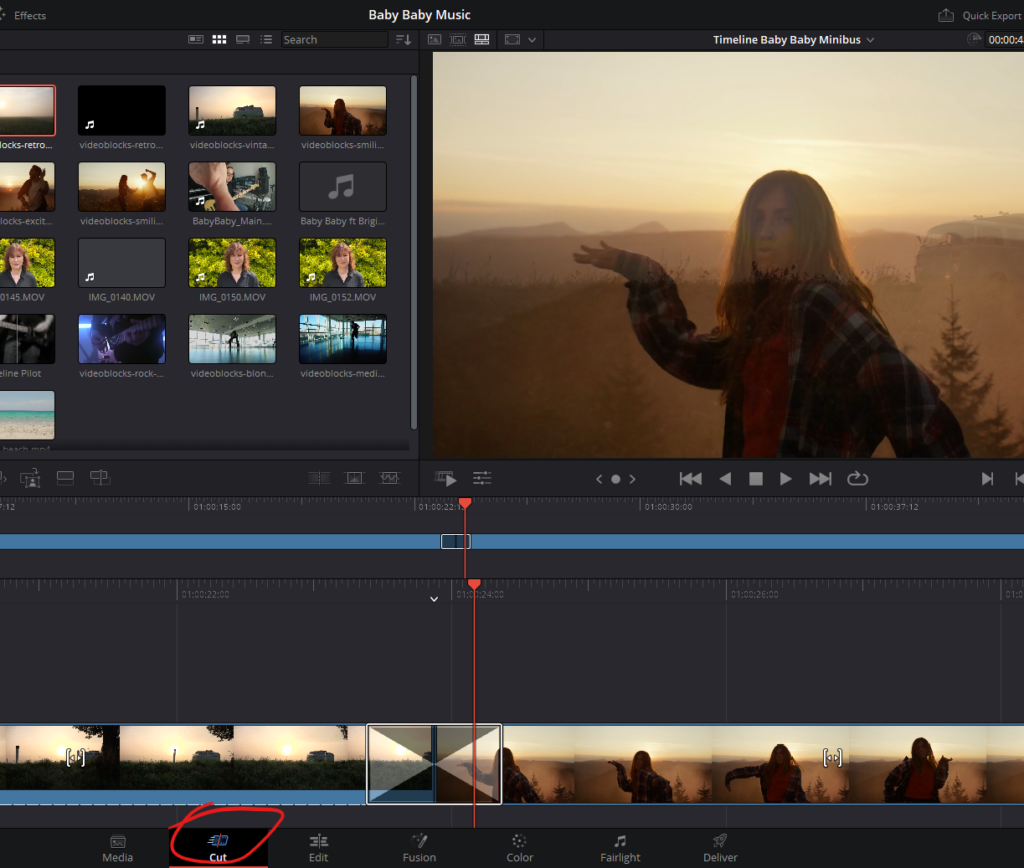
This keyboard showed me that I had mistakenly skipped one step in the editing process. The process of sorting and selecting source material and trimming it to fill the timeline. It All Happens In The Cut Page. This was the page I always skipped over, because I thought it was just intended to cut stuff. Sorry, you knew this maybe all along. I had to learn because I bought the license and the keyboard came with it for free.

Davinci Resolve Cut Page

This changes everything. The Cut page is the start of the editing process. The Edit page is only for finetuning the main work done in the Cut page. The Speed Editor keyboard makes the start of the editing process a breeze. The complete edit above was done without touching the mouse or another keyboard. I can tell you, you need this keyboard even though you thought you didn’t. I’m bummed that I found this out late. For now I am just happy that I found the right way to use Davinci Resolve.

Livestreaming with good audio quality with the Zoom Livetrak L-12

In a previous post I discussed how I try to have good audio quality for my livestream with OBS, by linking up a mixing desk I use for all live performances with a studio audio interface that I use for live streaming. So the idea is that when I know how to mix my live performance I can also livestream that mix with good audio quality. OBS supports high quality audio with an ASIO plugin, so all is great.

The mixing desk I use for live shows and streaming is the Zoom LiveTrak L-12. Lately I started using a separate laptop to do the livestreaming, not hooked up to the studio. For a livestream I would switch over the interface cable to the laptop. Only a few days ago I realized that the L-12 itself is an audio interface and I slapped my forehead.

Sure enough, when installing the L-12 driver software and starting up OBS with the ASIO plugin, I could find the Zoom device. After assigning the master output channels to the OBS inputs it worked immediately. So now the setup is way simpler. The livestreaming laptop is hooked up directly to the mixing desk. The master mix now is hooked up directly to OBS.

Livestreaming setup simplified the L-12 connects to the streaming laptop

Now I asked myself, can I use the same trick to hook the L-12 directly to an iPad or iPhone to do livestreaming on Instagram, or other phone based streaming platforms? The L-12 can connect as a class compliant interface, so its no problem to hook it up to iOS devices. Software like Garageband will find its way in the Zoom inputs and outputs. You have to set a switch for this on the back next to the USB port.

Zoom LiveTrak L-12 Backside USB connector and switches

However, the master outputs are not output channels 1 and 2, so iOS devices cannot pick it up as the default audio input. So no easy live streaming on the iPad or iPhone directly from the L-12 unfortunately. For this you will need to hook up another class compliant interface that picks up the mix desk outputs and does output the master mix on channels 1 and 2.