Silently hiding under the mixing desk: Roland A-880

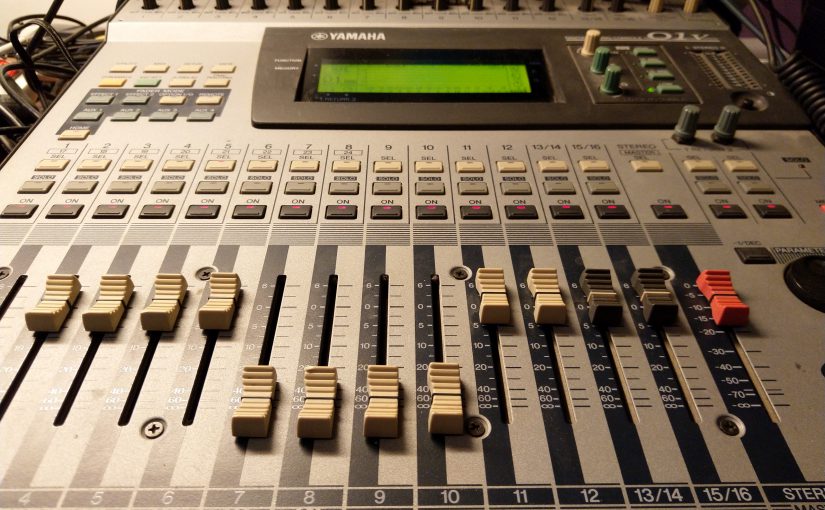
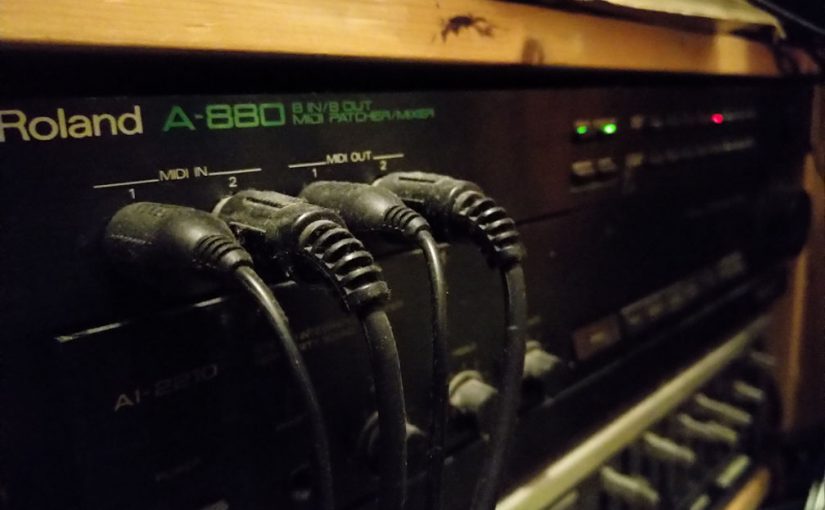
Recently I had to revise some cabling and routing under the mixing desk, when I found a rack device. A MIDI patch bay, the A880. It was happily blinking and had silently done its useful job there for at least 10 years. After looking it up, it turned out to be an actually more than 30 years old product from Roland! You can also see the dust on the cables in my setup.

Then the question is: do you need a MIDI patch bay? The answer is twofold. MIDI itself is an ancient protocol. If you have MIDI devices and a computer hooked up via MIDI, I will say that you cannot do without a MIDI patch bay. However, MIDI is showing its age and probably some of you are using USB instead. Also, new MIDI standards are now seriously being discussed. Possibly resulting in something altogether new that may not be supported by the A-880.

The current standard MIDI protocol is ancient. And when you look at it technically it is also slow and limited. Of course it is fast enough to connect a keyboard to an instrument or a computer. Most devices allow daisy-chaining to connect any chain of computer and keyboard and MIDI instruments you have. However, that is when you will find that MIDI has its limitations. If you daisy-chain more than three devices you will likely hit one of its limitations: bandwidth. When too much information passes through a single chain, then you will get traffic jams and you might start hearing hick ups.

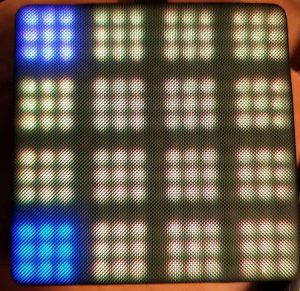
This is where a MIDI patch bay kicks in. Instead of daisy-chaining you can now connect devices in parallel. The A-880 connects 8 inputs to 8 outputs. Each of the individual connections to a midi device from the patch bay can now pass the maximum amount of data without traffic jams. Also with some simple button presses you can determine which input gets sent to which output. Allowing you to have more keyboards and route inputs from there to more devices. The forever friendly blinking lights show you which inputs go to which outputs.

Inputs 1 and 2 are special. They are positioned on the front panel and easily reachable when you assign those as merging inputs (<- edited because of Fred’s comment below). I use the patch bay in its most simple and useful form. The inputs from my main master keyboard are mixed with the input from the computer and then sent out through all remaining outputs at once. This is the blinking pattern that been the core of my setup for more than a decade. Only occasionally I push the Signal button. Then the blinking lights show which devices actually send data.

It may be that the future of MIDI does not include the A-880. This will be the moment when I will switch off this blinking, silently working work horse. And I will remove it from its hidden place under the mixing desk.

Komplete Kontrol A49, you’re not using it right

Please note: starting with version 10.0.5, support for the A40 keyboard is integrated in Ableton live. If you use a new version of Ableton Live please read this article.

After a month of working on singing and performing. Everything but working in the studio, I wanted to get up and running again with making music. As always, I started with updating the studio software. When updating the Native Instruments (NI) suite I am using, the A49 was part of the updates. When playing around in Ableton Live after that it soon became obvious that things did not work quite right. So it was time to reserve some hours diving into this.

The NI Native Access manager was updated and the first step is then of course to check all the software installations inside it. It soon turned out that the VST installation path of Komplete Kontrol was not correct anymore. NI likes to think that it is the only source for plugins on your computer, so I needed tot tell it that VSTs are located elsewhere on the computer. The Komplete Kontrol installation was then fixed by reinstalling. Nice.

After checking if both the version of Komplete Kontrol inside Live and Komplete Kontrol as a standalone application were matching. Things started working again. A plugin rescan was needed to pick up all NI instruments in both versions, so a lot of instrument settings were not matching up apparently. Also a quick scan of the MIDI integration settings revealed that the integration was still correct.

I use the Komplete Kontrol Rack VST in Ableton Live, but when you update your NI software this is not automatically updated in Ableton Host Integration. Time to copy vst files (vst) all over again from C:\Program Files\Common Files\Native Instruments\Host Integration\Ableton Live to D:\Documents\Ableton\Library\Presets\Instruments\Instrument Rack. Or some equivalent on a Mac.

This Komplete Kontrol instrument rack can host any plug in instrument and map the A49 knobs to macros to controls in the instrument. Please note: Only use this for all instruments other than NI instruments! You must manually map any control to any control inside the instrument. Not very pretty, but once you’ve set it up it works.

And what if you do want to use a NI instrument? I also found out that instead of adding Kontakt to a track to start working with a NI instrument, as I always did, its better to use the Komplete Kontrol plugin. This immediately gives you full control with the A49 and allows you to quickly switch instruments on the fly. Oh well. Never too old to learn.

Do you need a digital mixer in your home studio?

This is something that has puzzled me for some time. Do I actually need a digital mixing desk in my home studio? Well, technically no. Modern audio interfaces have a mixer on-board. So if you need 8 inputs, you could just make sure that you have an audio interface with 8 inputs. Starting at around 200 euros. Going up all the way to 3000 euro’s if you can or want to spend it for top quality. Now there are several reasons for me opting for a digital mixing desk and it all comes down to flexibility.

What you don’t want is a chain of devices that add noise on every recording. So an analog desk connected to your digital audio interface is probably a bad idea. Unless it is a very high quality analog desk with a unique sound. Something that would set you back the price of a new car. So lets try to stay in the digital domain for a better price/quality ratio.

One of the reasons to eye the higher priced segment of audio interfaces is the option of a direct cue mix. A singer, or solo musician is usually best recorded dry if you don’t have the luxury of working in a room with a nice sound or at least a quiet room. On the other hand lots of singers like to have monitoring with a bit of ‘room’ on it. A bit of reverb or even echo. When you can at least make a cue mix with just a touch of some effects on it, it can make the difference.

Now lets have the best of both worlds and flexibility. I chose the Focusrite Scarlett 18/8 2nd gen. It has 16 inputs, 8 analog and 8 digital and 6 analog outputs. Additionally it has stereo S/PDIF digital in/out. hence the total of 18 in and 8 outputs. Now connect the digital mixing desk to the ADAT 8 digital inputs of the Scarlett audio interface and there you have it: 16 inputs and enough cue mix options to accommodate recording of a complete band.

Ok, I was lucky to get my hands on a classic Yamaha 01V with ADAT interface, but I think it is still possible to get your hands on it or something equivalent for around 500 euros. Add to that about 300 euro’s for the Focusrite and there you have it: an affordable and also flexible setup that can accommodate any home studio recording session.

Why I chose the Nord Electro 6D

This is a about choosing my main instrument. The main inspirational instrument in the studio as well as the centerpiece on the live stage. After working for almost 20 years with the Korg Triton Pro it was time for something new. The old monster weighed a ton and it was a traditional workstation with sequencer, sampler, MOSS synth and ROM synth. I actually used only half of its functionality. Storage was on either a floppy disk (!) or a noisy SCSI disk (40MB!). Why did I go to the Clavia Nord Electro 6D? Of course, the Electro 6D is a well known and excellent instrument and there are plenty of reviews, but why did I chose it?

The main appeal was a single feature that I once had on an old Roland (D10?). It kept playing the sound as you switched programs. It sounded a bit garbled, but at least it wouldn’t cut off the sound while switching. A major irritation when I switched to the Korg. The Nord 6D series and other Nord instruments of the same generation bring this back, but this time in its full glory. The notes you last played keep playing, when you switch programs. Every key you hit after the switch plays with the new sound. This is perfection for playing live!

The other thing is: I noticed that almost all my music centers around piano, strings and organ sounds. This is where the Electro 6D excels. All sounds that don’t need pitch bend and you might have noticed that the Electro 6D doesn’t have it. The occasional whoosh and bleep and bloop can come from other instruments. Because it doesn’t have all the controls and in general isn’t made to be a master midi controller I use the Komplete Kontrol A49 in the studio for that. It has a very similar touché also.

Live Mode
Live Mode

Another highlight of the Electro 6D is the Live Mode program selection in the center controls section of the keyboard. This switches the four program selectors into a set of pages with your favorite preset sounds. Including all mix and effect settings. This what I desperately need live. I used to move around sounds to have them as the first programs in the list, but with the separate Live Mode list I can put them right there and leave the program list as it is. Just to be sure I made a backup of my Live Mode favorites to have them back as I want, even when something gets twisted and accidentally saved as part of the Live Mode preset.

Organ register sliders

Then some small niceties. I chose the Electro 6D and not the Electro 6HP for the real organ sliders and its lower weight (9 kg instead of 11 kg). I have always played springy keys. In that sense I am not a true weighted keys piano player. I don’t use split keyboard sounds currently, but in the past I have used splits live also and the Electro 6D has the guidelight splits for that. In short, it has all the things that I dearly need and not a lot more or less.

Guide light splits
Guide light splits

A live setup for Ableton Live

It just does live gigs

I guess most musicians use Ableton Live live like I use it. Its kind of the standard way of building a live set. This article describes the details in the implementation as I use it.

So there is Session View with the track channels laid out with different instruments and the scene rows with the different songs. Within each song several scenes with the intro, verses, choruses, break and outro. Ableton will follow the bpm mentioned in the description and you can set the Launch Follow Action to let Ableton run the flow of each song. This way Ableton will back your song live with the right scenes with the push of a button. With effects automated or manual as you want it and in the correct tempo. Additionally I use MIDI Program Change commands to instruct the Nord and the Korg to switch to the right instruments for any scene of any song.

Ableton Live live set

In my case I play solo, or with aid of other musicians. I can choose which track to leave out, the backing vocals, the bass or at least one or more keys. On the whole Ableton Live runs the show in my case, so I should be careful not to bore the audience with too much music out of the box. I should keep working on performance, video tracks and light effects all the time. I try to use only Ableton Push, avoiding the use of the laptop to start and stop.

What’s on the monitor?

Lets start cheating a little. Because not every track has drums, I rely on a click that gets routed to the monitor. In the above picture you can see the click track on the left. It just plays and plays and gets send to the Cue out Return Track C. Return Track C works pre-fader so it is in no way linked to the master mix. The cue out goes to a separate output on the audio interface and thus can be mixed to all monitors. For now this suffices.

All live instruments, vocals output and everything from Ableton Live gets mixed in by the audio interface. The audience hears the Master Out mixed and on stage you hear the Cue Out mixed with the click.

Prepare for the worst

My live set contains an instrument rack that is setup to be a playable, plug in based copy of the most important instruments I use live.  Should an instrument break down, I will then have the option to use any MIDI keyboard to replace it. The plug in sounds are not as nice as the Nord and Korg sounds, but I will have something to play instead of nothing.

Live Instrument Rack

To make sure that I will always have a way to recover in case of emergency the entire live set is stored in the Cloud. This way I can fine tune the Ableton Live live set from home and push it to the Cloud. The moment I open the laptop for a show and there is Internet it will sync up. I use OneDrive but any Cloud product is fine. Should the laptop break down, from any other laptop I should be able to recover the Ableton Live install, a few plugins and packs and any interface and sync the live set again. At the last moment a backup laptop should be ready to swap in on the spot if needed. Lets pray it will never come to this, but if it can happen it will.


Controlling Ableton with the Komplete Kontrol A49

Please note: starting with version 10.0.5, support for the A40 keyboard is integrated in Ableton live. If you use a new version of Ableton Live please read this article.

I was looking out for a MIDI controller and control surface for Ableton Live. The Komplete Kontrol S series and comparable Novation controllers were strong contenders, but then came the news of the new Komplete Kontrol A series. This caught my eye, because the pricing of these was well below that of the S series. Previously I switched out my old faithful but battered Korg Triton workstation for a Nord Electro 6D. The Nord is absolutely the right keyboard for my purposes, but I already knew I would miss the pitch bend and modulation controllers. The Push is perfect control surface, but there is some flow missing when you really want to play on the keyboard and interact with the sounds.

Enter the Komplete Kontrol A49. I first tried the controller at the Amsterdam Dance Event and there I noticed that some things were not working right. The person that demonstrated the device there said that it needed some firmware updates. This was some weeks before the official release. After the official release I ordered it and started working with it. Immediately it showed the same limitations in controlling even the Komplete Kontrol application that comes with it. Selecting a sound works fine. You can browse instruments in the Komplete Kontrol application with a ‘prelisten’ sample for every sample by just clicking, turning and nudging the Browse button as a joystick. All other buttons and knobs remained dead.

Komplete Kontrol A49 Browser

An update!

Then after a week an update to Komplete Kontrol rolled out and a firmware update for the A49 controller. Only after that the knobs came to life as macro controllers within the Komplete Kontrol application. Then the next step came where I installed the keyboard on my desk to work as the main controller for writing songs within Ableton.

Ableton can use ready made scripted or compiled templates to allow MIDI controllers to work as control surfaces. Sure enough when you dig into the documentation of the A series MIDI controllers, you will find reference to copying the right scripts into the Ableton system folders. Essentially you need to copy over scripts from a Host Integration/Ableton folder to Ableton program data control surface script directories. This allows the control surface scripts to appear in the Preferences popup of Ableton under the Link MIDI tab. Once the script is selected, the A49 should not only be able to control instruments and play them, but it should also be able to control Ableton itself. Also the transport controls, like Play/Record etc.

Do not follow the instructions!

However, that’s where it all breaks down. When following the instructions you will end up with just the MIDI template on the controller. The transport controls remain dead. Fortunately when browsing several forums, I found that the instructions are wrong. Probably copied and pasted from the S series. The essence is that you have to ignore the part where it says that you don’t need to specify templates for the Input and Output settings of the control surface scripts. Setting these to the Komplete Control A DAW options magically enables the transport controls. From then on you have to manually switch back to the MIDI controller template by using SHIFT – Plug In/Midi. Don’t forget to also enable the Remote settings for the Komplete Kontrol MIDI ports and you will have it all.

Select Komplete Kontrol DAW input output

The instructions from Native Instruments will also give you a Kontakt instrument rack that maps controller inputs to Kontakt instrument macro’s and now you are completely in control (or Kontrol hahaha). By all means it is not that easy to get to all the good stuff, but at least its there. This is now my workflow:

  • Want to browse Kontakt instruments? Start the Komplete Kontrol application and use the Browse option to quickly browse instruments. Also the sounds from others then Native Instruments can be browsed I noticed. I am using Spitfire eDNA Earth and Epica for instance.
  • Want to start recording in Ableton? Use the Track/Instance transport controls. Even including the loop , metronome and tempo tap options. The controller knobs control the mixer levels of the Session channels.
  • Want to play and control instruments? Press SHIFT Plug-In/MIDI and make sure you have MIDI mapping to the controls. Make sure you have the knob controls mapped to macros in your instrument. You may need the Kontact instrument rack for that.

The verdict? Its not very intuitive and it takes some getting used to, but all in all you get a very playable semi weighted MIDI controller and a controller surface that really can give you the basic controls that replace the keyboard and the mouse. A nice touch is the touch sensitivity of the knobs. The tiny display informs you of the current function of a knob if you only touch it.

Soundbrenner Pulse wearable metronome, the verdict

After diving into the basics and getting it to work it was time to really start using it. First off, the concept really works. I have songs without drums. Practicing these can be tough, so I tried working with a click track in the monitoring. That helps if you get in the flow. But after using the Pulse a few times it was completely natural and my mind “felt the beat” and leaned into it. It was important for me to tone the default “hard buzz” of the Pulse down to a more subtle vibration level. Now it really works for me. The battery life of the device is excellent for me, I have been practicing for hours now on end and its not even half empty. Charging it is a bit fiddly though.

There are however several problems with the product. If you look over the appearance, because it looks and feels very plastic and rough at the edges, what are the real problems? At this point and time, for me the Ableton Link feature does not work reliably. If in an Ableton Live session the tempo changes for a new song, I do not know when of if the metronome app will pick this up. This should be a simple bug to fix, or I have a unique setup in my WiFi network, Android version (latest version of Android Pie – 9), or something else is wrong. I am willing to try an iPad in the near future to see if it works better.

Then there is of course the problem that its three devices. Your laptop, a phone or tablet with the Metronome app and the Pulse all have to be fully charged and setup to make this work in a live situation. On several occasions I had to reconnect the phone to the Pulse to make or keep it working. Even if sync between laptop and the Metronome app does get fixed all devices need to be on a perfect working WiFi network on stage and how realistic is that? I think you can see that this device is probably at its best while practicing or in the rehearsal room. Only if you have a dedicated professional crew on stage to keep it working it might just work.

In short, I cannot do without anymore when practicing. I would never try to get this to work in a live situation. Maybe it all gets fixed in the next version, the Core. Lets wait and see.

SoundBrenner Pulse wearable metronome, first impressions

What people say

This product appears everywhere in timelines on social media when you’re interested in making music. I must say it immediately got my attention when I saw it. For me the appeal is that would solve the problems playing along with the computer when practicing or playing live. I don’t always have live musicians to play along with and the computer is unforgiving. Any metronome is welcome there and the SoundBrenner Metronome app is then already of great help.

But now the Pulse is there and it adds to this a haptic vibrating metronome you can feel. Now you don’t have to look at blinking lights while playing. Also, I use Ableton Live, also live, and there is even the possibility to use Ableton Link with Metronome app. If this all works together as one integrated haptic Metronome that allows me to feel the tempo while playing along with Ableton? Perfection! The ultimate gadget heaven!

Before buying I always look around for reviews and more info. One big complaint is that it is not an actual watch kind of thing. A lot of people hoped that it would also display the tempo. It doesn’t. You have to look at the screen of your phone (or tablet) to see settings and tempo. This also means that you have to keep the phone screen on. At the same time the Pulse is connected via Bluetooth. The phone is the brains, so you must at all times keep it charged and connected. A challenge, specially live.

Then there is some word going around on it not being accurate, but I think that is already fixed now through firmware updates. Another complaint is that it takes time to get used to ‘feeling’ the tempo. I guess that a lot of people send it back immediately, but I am more patient. Most new skills take time to get used to and I am quite convinced that this Pulse is a good idea. But now for first impressions.

What I say now

When you first start using the Pulse you will find that it is a bit fiddly to operate. You have to tap the watch face to start using it, but its not really touch sensitive. You have to really press it to pick up the taps. Then, straight out of the box it is set to really buzz the rhythm very strongly. And audibly also. Fortunately you can immediately go back to the app to set it to a more friendly and short vibration. In the lightest mode it really feels okay, but I play keyboards, When playing a more physical instrument, like drums, I can imagine you need the stronger buzz.

Charging it is also fiddly. It is a small kind of dock that has to properly connect to the device. After popping the Pulse in the band it gets even harder to let it connect to the charging dock, because the band pushes it from the dock and the dock can easily slip away, because its so light. People complain about the time that the device can be used on a full charge, but I don’t have enough experience now to say if it is really a problem for me.

Then its time to start practicing and linking it up with Ableton Link. That’s where all starts to get a little bit flakey for now. Ableton Link somehow goes in and out of the connection with the app. Which is ok for practicing in my case, but I don’t think this is ready for playing live. Also my phone sometimes loses connection with the Pulse after several minutes of playing. My phone is an Android phone, running Oreo and I know it can be very aggressive in killing background processes, specifically if they draw power. Probably that is not helping here, so I want to try it with another iOS device also.

One other thing to mention: its quite a big device. Maybe better suited for male wrists. There is another bigger strap in the box for your leg or your upper arm, but this device will have a hard time looking elegant on fragile ladies arms.

First conclusions now:

  • Big. Don’t expect this device to be light to operate, you really have to tap hard
  • Dive in to the settings to tune it to your preferences
  • Great for practicing, but for playing live this is a really complex setup to get and keep running

I hope this helps you appreciating the device for what it is now. I will keep using it and I’ll keep you up to date. Please note that there is also a new Soundbrenner device on Kickstarter that is actually more like watch, the Core.

Experimenting with alternatives for the piano keyboard

Eek a mouse!

Inputting music with a mouse and a computer keyboard, even though its possible in most DAWs, is (as I see it) very limited. Firstly in its expression, it misses touch sensitivity so by default every note typed has the same velocity. Not good. Secondly because when you start adding expression, for instance by drawing it with the mouse, you are focusing on the details not on the song.

Keyboard input
Keyboard input

What better way than a MIDI piano keyboard that allows you to input music in an expressive way in one go? Well, it might be that the piano keyboard is not your thing, but a guitar or flute is. Then you might want to use that to input notes. But other than recording the sound from the instrument is that any use when you want to record different sounds? Probably not. The most flexible way to record music is through MIDI notes and expression. The recorded notes can be connected with different synthesized or sampled sounds and voila. Lots of room for experimentation.

Enter the pads

As a keyboard player I am used to find my way on a piano keyboard, but why would I then be interested in alternatives? In short, I personally am not. Until now I have tried finding my way on new pad based alternatives:

The last one is the latest addition and the inspiration to start writing about it. The Push and the Launchpad were in a way less inspiring to use than the Lightpad M or so it seems. Also, the Lightpad M is nice and soft.

When trying to find my way on the Push, I found that its main inspiring purpose for me is controlling the Ableton Live Session View. For the Launchpad this also seems to be the main purpose. This is the view that you would use when playing live, or when jamming and piecing together a new song. The jamming and piecing together a new song has some clever tricks to allow you to enter musical notes and make sure you’re never out of key.

Push chord key
Push chord key

But then you have to set the right key to play in. And what if your song modulates through several keys? Not very intuitive there when I tried it. Most dance mixes keep it simple, so fair enough. And of course since its first inception these products have evolved and I might not have caught up. It is probably better than ever, but probably most for people that do not enjoy playing on a regular piano keyboard.

Triggered!

Maybe you noticed that I said musical notes, because its different for drums. When the pad changes to a drum pad it is actually better than hitting the piano keys. The mapping on screen is already a square 4×4 pad in Ableton and when you have the same mapping on the pads of Push or the Lightpad M it all starts to make sense.

Ableton Drum Kit
Ableton Drum Kit

Lightpad M Drum Kit
Lightpad M Drum Kit

I found that the Lightpad M takes some practice (for me), but in the end really results in inspiring drum tracks. Until now I used Xfer Nerve as a drum machine and then layered real drum loops and recording over it. Starting with the Lightpad M I see an alternative. Expressive in the Roli way and intuitive.

Also this year I saw a lot of pads appearing on stage supplementing regular keyboards, mostly not synths but controllers by the way. I imagine that these pads mostly trigger a few notes and samples

Dua Lipa live keys and pad

The labeling on these is so tiny that you can’t see it from the audience, but I’m guessing its mostly the Launchpad. The Lightpad M is, like others of its kind can also be charged and used wirelessly, MIDI over Bluetooth. I would personally not bet my live performance on a wireless Bluetooth connection, but that’s just me.

So in short. I am sold on the concept of using pads for triggering sounds and drums, being a piano keyboard player. If I look around on the live stages, its here to stay. When you are not a piano keyboard player it might just be your new way to play notes.

Connecting the Logitech Craft knob to Ableton Live

Just in, the gadget of the month: the Logitech Craft. I was looking out for some more control over the mixing process and of course there are many controllers. When you already have an Ableton Push what more do you need? Well actually there is a thing about me and Push. I cannot use it blindly, so I always have to look at either the screen, or the controls, or the display. When mixing in the Ableton Live arrangement view it gets worse. Mouse, keyboard, screen, Push… It is at its best in Session View.

There were two things I was looking for. A high quality ‘chicklet’ keyboard like on my new Lenovo and it has an extra: A Knob. A dial that is touch sensitive and clickable to perform specific actions in any part of any program that has focus on your desktop. I am quite sure that your regular keyboard and a Microsoft Dial controller wil also make up good combo, but I chose the Craft to replace my old and clunky keyboard with media controls.

Unpacking and installing was the easy part. The previous keyboard was also a Logitech and it used the same Unified remote. Switch on and off and the keyboard was connected. Then a disappointment! No profile for Ableton Live. With a profile the keyboard recognizes the program its in and it immediately adds some shortcuts to the knob to control. For instance in a browser you can select a tab with the knob. In Photoshop you can zoom. In Lightroom you can change the exposure, or so I’m told. Standard functionality in other applications is controlling the volume of the PC and clicking it will pause/play music.

So there I was staring at Ableton, without being able to use the knob. I started diving into the settings, and there i found the Development Mode. Click it and you will need to also enable sending stats to Logitech. Tough but there is no escape.

From there you can select more programs to control with the knob and yes, Ableton Live is there!

And lo and behold, assigning up and down buttons allows you to control Ableton Live mixing with the knob. A new world opens up, where you can look at the screen. Listen to the mix and control a setting in Ableton Live with the knob. This was what I was looking for, more control and a better keyboard for the daily typing chores. Yay!