Soundbrenner Pulse wearable metronome, the verdict

After diving into the basics and getting it to work it was time to really start using it. First off, the concept really works. I have songs without drums. Practicing these can be tough, so I tried working with a click track in the monitoring. That helps if you get in the flow. But after using the Pulse a few times it was completely natural and my mind “felt the beat” and leaned into it. It was important for me to tone the default “hard buzz” of the Pulse down to a more subtle vibration level. Now it really works for me. The battery life of the device is excellent for me, I have been practicing for hours now on end and its not even half empty. Charging it is a bit fiddly though.

There are however several problems with the product. If you look over the appearance, because it looks and feels very plastic and rough at the edges, what are the real problems? At this point and time, for me the Ableton Link feature does not work reliably. If in an Ableton Live session the tempo changes for a new song, I do not know when of if the metronome app will pick this up. This should be a simple bug to fix, or I have a unique setup in my WiFi network, Android version (latest version of Android Pie – 9), or something else is wrong. I am willing to try an iPad in the near future to see if it works better.

Then there is of course the problem that its three devices. Your laptop, a phone or tablet with the Metronome app and the Pulse all have to be fully charged and setup to make this work in a live situation. On several occasions I had to reconnect the phone to the Pulse to make or keep it working. Even if sync between laptop and the Metronome app does get fixed all devices need to be on a perfect working WiFi network on stage and how realistic is that? I think you can see that this device is probably at its best while practicing or in the rehearsal room. Only if you have a dedicated professional crew on stage to keep it working it might just work.

In short, I cannot do without anymore when practicing. I would never try to get this to work in a live situation. Maybe it all gets fixed in the next version, the Core. Lets wait and see.

Metapop! Check it out!

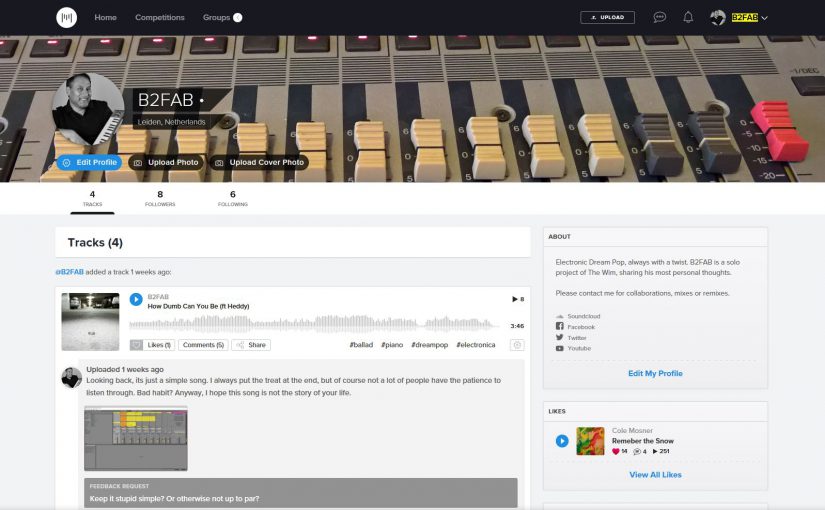
Metapop started apparently out as a site for mixers and remixers a few years ago, but got acquired by Native Instruments. Now its starting to become a home for all musicians, mixers and remixers. There is a continuous set of running competitions and a place to post your latest creations. You can either compete with a song or remix or run your own competition. The concept itself is not that new, but the execution is good. The Native Instruments sauce is quite heavy. Every competition has some kind of Native Instrument prize attached, so you’d better be using or be in the game for this stuff.

Where it gets interesting is the commenting on each other’s tracks. If you comment on someone’s track you are allowed to upload a track where you can ask for comments. Its a bit broken, because you don’t build up commenting karma. This means you have to plan your commenting carefully to the uploading of a track where you ask for comments. Strange.  There is also a set of Groups that focus on Mixing, or Mastering and such. This misses a bit of structuring inside the discussions I think, but it works for now.

As always this stands or falls with the community aboard and for now it looks like a good place to roam around. A little bit too friendly at times. A lot of comments go along the line of “This is great, I like it”. Which is not always that helpful I think. It breeds a nice atmosphere though where there’s not a lot of burning down. Criticism is appreciated I noticed, so there is also helpful commenting. There is also a few “mentors” roaming around that try to give very detailed comments on tracks.

I participated in a competition and a few discussions about tracks. All in all not bad at all. If you, like me are looking for a friendly community where you can post your music and maybe even collaborate on songs, I suggest you check it out. Maybe it can grow to another alternative to the now commercialized SoundCloud community.

SoundBrenner Pulse wearable metronome, first impressions

What people say

This product appears everywhere in timelines on social media when you’re interested in making music. I must say it immediately got my attention when I saw it. For me the appeal is that would solve the problems playing along with the computer when practicing or playing live. I don’t always have live musicians to play along with and the computer is unforgiving. Any metronome is welcome there and the SoundBrenner Metronome app is then already of great help.

But now the Pulse is there and it adds to this a haptic vibrating metronome you can feel. Now you don’t have to look at blinking lights while playing. Also, I use Ableton Live, also live, and there is even the possibility to use Ableton Link with Metronome app. If this all works together as one integrated haptic Metronome that allows me to feel the tempo while playing along with Ableton? Perfection! The ultimate gadget heaven!

Before buying I always look around for reviews and more info. One big complaint is that it is not an actual watch kind of thing. A lot of people hoped that it would also display the tempo. It doesn’t. You have to look at the screen of your phone (or tablet) to see settings and tempo. This also means that you have to keep the phone screen on. At the same time the Pulse is connected via Bluetooth. The phone is the brains, so you must at all times keep it charged and connected. A challenge, specially live.

Then there is some word going around on it not being accurate, but I think that is already fixed now through firmware updates. Another complaint is that it takes time to get used to ‘feeling’ the tempo. I guess that a lot of people send it back immediately, but I am more patient. Most new skills take time to get used to and I am quite convinced that this Pulse is a good idea. But now for first impressions.

What I say now

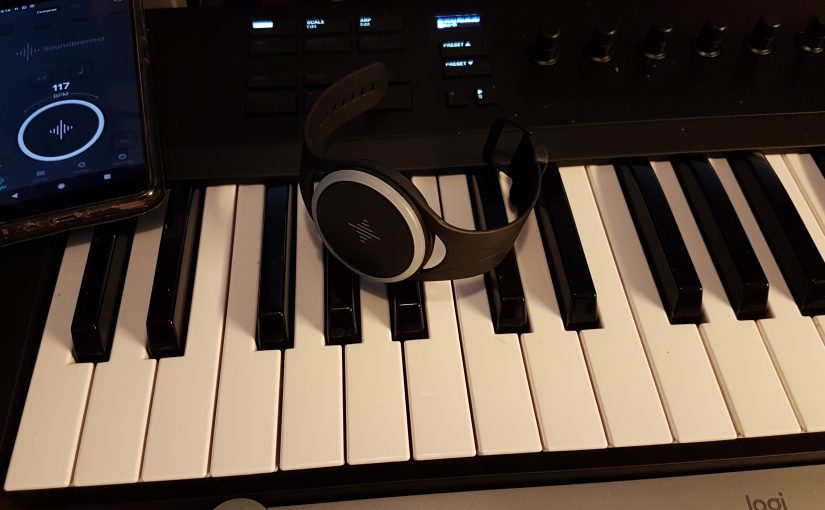
When you first start using the Pulse you will find that it is a bit fiddly to operate. You have to tap the watch face to start using it, but its not really touch sensitive. You have to really press it to pick up the taps. Then, straight out of the box it is set to really buzz the rhythm very strongly. And audibly also. Fortunately you can immediately go back to the app to set it to a more friendly and short vibration. In the lightest mode it really feels okay, but I play keyboards, When playing a more physical instrument, like drums, I can imagine you need the stronger buzz.

Charging it is also fiddly. It is a small kind of dock that has to properly connect to the device. After popping the Pulse in the band it gets even harder to let it connect to the charging dock, because the band pushes it from the dock and the dock can easily slip away, because its so light. People complain about the time that the device can be used on a full charge, but I don’t have enough experience now to say if it is really a problem for me.

Then its time to start practicing and linking it up with Ableton Link. That’s where all starts to get a little bit flakey for now. Ableton Link somehow goes in and out of the connection with the app. Which is ok for practicing in my case, but I don’t think this is ready for playing live. Also my phone sometimes loses connection with the Pulse after several minutes of playing. My phone is an Android phone, running Oreo and I know it can be very aggressive in killing background processes, specifically if they draw power. Probably that is not helping here, so I want to try it with another iOS device also.

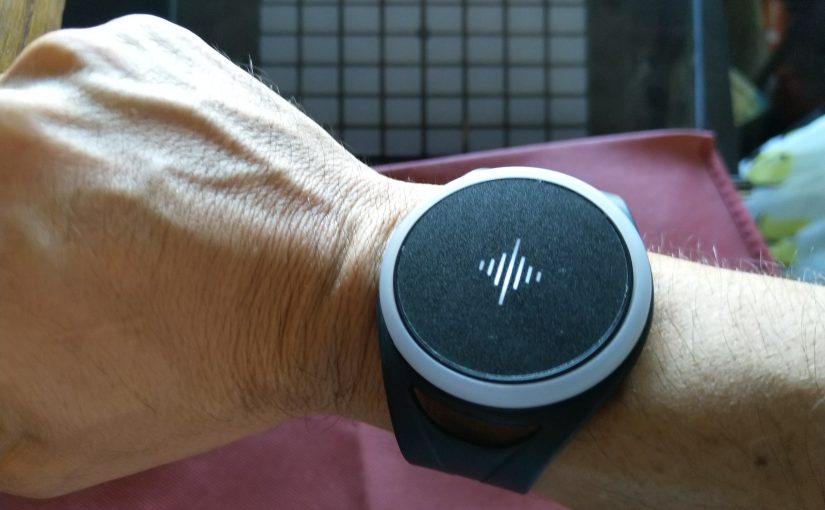
One other thing to mention: its quite a big device. Maybe better suited for male wrists. There is another bigger strap in the box for your leg or your upper arm, but this device will have a hard time looking elegant on fragile ladies arms.

First conclusions now:

  • Big. Don’t expect this device to be light to operate, you really have to tap hard
  • Dive in to the settings to tune it to your preferences
  • Great for practicing, but for playing live this is a really complex setup to get and keep running

I hope this helps you appreciating the device for what it is now. I will keep using it and I’ll keep you up to date. Please note that there is also a new Soundbrenner device on Kickstarter that is actually more like watch, the Core.

Editing a music video for IGTV

From lying down to upright

Instagram took everyone by surprise by introducing the new upright video format IGTV video channel for all users. Shooting a video was obviously a horizontally oriented wide screen experience, matching the orientation of TVs and cinema. Instagram stories however were always vertically oriented to match the way you naturally hold your phone. IGTV nicely cultivates that. Some people always record vertically and that footage is then hard to show on TV, YouTube and such. Now you have a new outlet for that, enter IGTV.

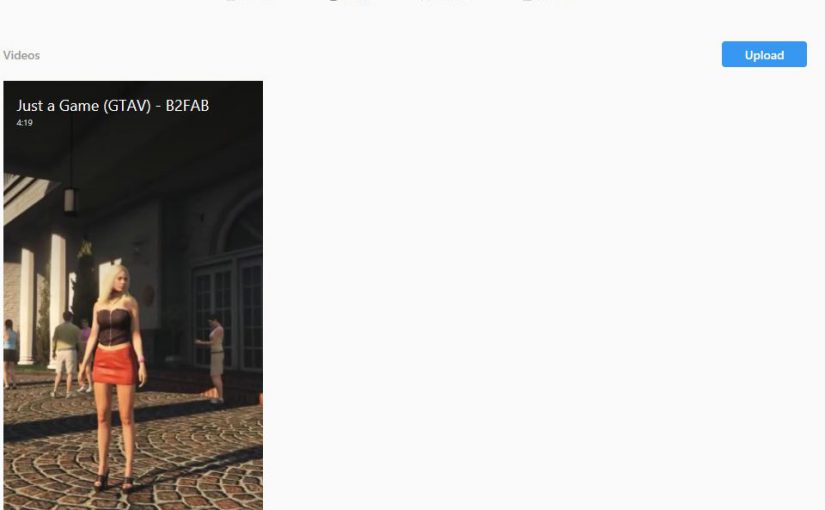
If you have your material for your music video already recorded in upright position then you are so ready to edit it for IGTV! What I can see however is that not many existing recordings were ready for IGTV, so many decided to just clip off some footage from the left and right to keep the middle bit. The worst ones cut off parts of the titling so you can clearly see that its not the right IGTV stuff. As a viewer you feel cheated, because obviously you’re missing parts of the video.

But what if you have already recorded a video clip to be shown on YouTube and its in the landscape format? How to reuse that recording to make something that looks right on IGTV? What are the technicalities of the new IGTV video format?

Tunnel vision

The first step for me with the landscape clip for the Just a Game video, was to render it without the titling. All titling that does not fit the vertical format. The format to go for is HD, but then with reversed horizontal and vertical resolutions. So 1080×1920. With lengthy music video clips, you will find that upright portrait HD results in files that are too big in size. There is a size limit for regular video uploads, a maximum 10 minutes length and 650MB. The error messages from IGTV are not at all revealing unfortunately. A clip of 4 minutes length or more however, can easily go over 650MB. Then you will have to consider HDReady 720×1280.

IGTV Pan and Zoom
IGTV Pan and Zoom

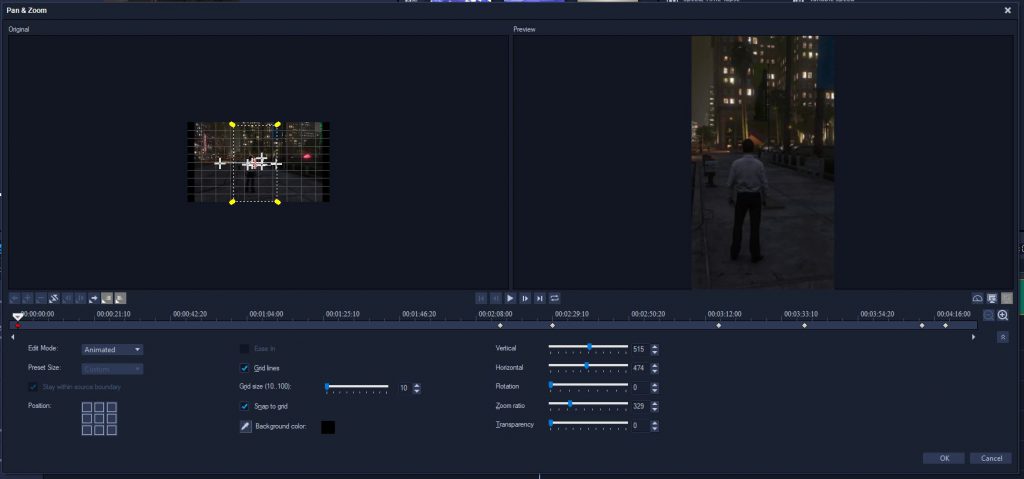
If you removed the titling because of the landscape format, now is the time to redo the titling for the vertical format to show the viewer that you have intended this clip to be in IGTV format. After that, all you will have to do is to use pan and zoom to cut out the upright sections of the clip that really show the user all the action in the clip. This way you don’t have to give away that the clip recording was not intended for IGTV. As always I am using Corel VideoStudio for the simple work and its capable of rendering the required output for IGTV. Now its time to upload! Tell me about your experiences!

Experimenting with alternatives for the piano keyboard

Eek a mouse!

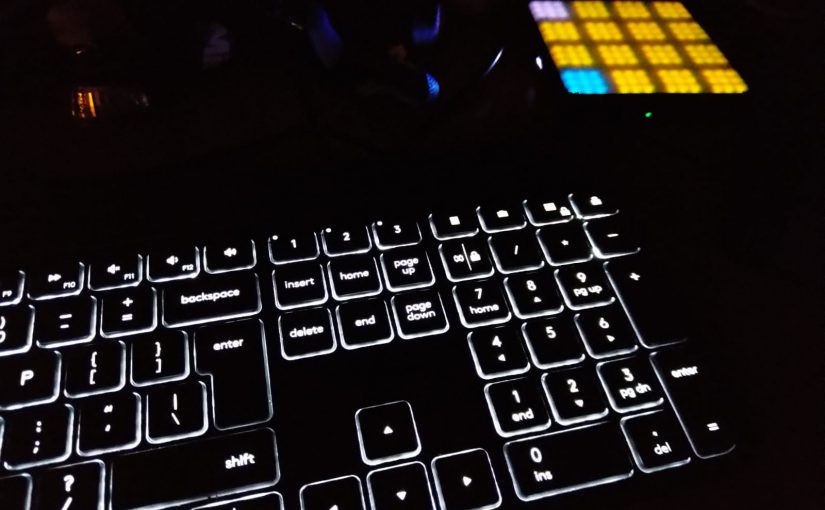
Inputting music with a mouse and a computer keyboard, even though its possible in most DAWs, is (as I see it) very limited. Firstly in its expression, it misses touch sensitivity so by default every note typed has the same velocity. Not good. Secondly because when you start adding expression, for instance by drawing it with the mouse, you are focusing on the details not on the song.

Keyboard input
Keyboard input

What better way than a MIDI piano keyboard that allows you to input music in an expressive way in one go? Well, it might be that the piano keyboard is not your thing, but a guitar or flute is. Then you might want to use that to input notes. But other than recording the sound from the instrument is that any use when you want to record different sounds? Probably not. The most flexible way to record music is through MIDI notes and expression. The recorded notes can be connected with different synthesized or sampled sounds and voila. Lots of room for experimentation.

Enter the pads

As a keyboard player I am used to find my way on a piano keyboard, but why would I then be interested in alternatives? In short, I personally am not. Until now I have tried finding my way on new pad based alternatives:

The last one is the latest addition and the inspiration to start writing about it. The Push and the Launchpad were in a way less inspiring to use than the Lightpad M or so it seems. Also, the Lightpad M is nice and soft.

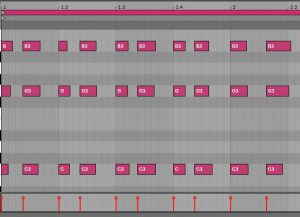
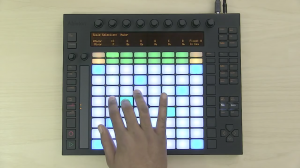
When trying to find my way on the Push, I found that its main inspiring purpose for me is controlling the Ableton Live Session View. For the Launchpad this also seems to be the main purpose. This is the view that you would use when playing live, or when jamming and piecing together a new song. The jamming and piecing together a new song has some clever tricks to allow you to enter musical notes and make sure you’re never out of key.

Push chord key
Push chord key

But then you have to set the right key to play in. And what if your song modulates through several keys? Not very intuitive there when I tried it. Most dance mixes keep it simple, so fair enough. And of course since its first inception these products have evolved and I might not have caught up. It is probably better than ever, but probably most for people that do not enjoy playing on a regular piano keyboard.

Triggered!

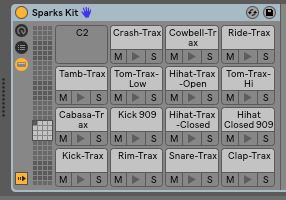
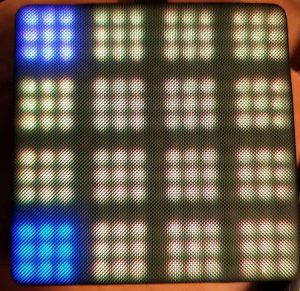
Maybe you noticed that I said musical notes, because its different for drums. When the pad changes to a drum pad it is actually better than hitting the piano keys. The mapping on screen is already a square 4×4 pad in Ableton and when you have the same mapping on the pads of Push or the Lightpad M it all starts to make sense.

Ableton Drum Kit
Ableton Drum Kit
Lightpad M Drum Kit
Lightpad M Drum Kit

I found that the Lightpad M takes some practice (for me), but in the end really results in inspiring drum tracks. Until now I used Xfer Nerve as a drum machine and then layered real drum loops and recording over it. Starting with the Lightpad M I see an alternative. Expressive in the Roli way and intuitive.

Also this year I saw a lot of pads appearing on stage supplementing regular keyboards, mostly not synths but controllers by the way. I imagine that these pads mostly trigger a few notes and samples

Dua Lipa live keys and pad

The labeling on these is so tiny that you can’t see it from the audience, but I’m guessing its mostly the Launchpad. The Lightpad M is, like others of its kind can also be charged and used wirelessly, MIDI over Bluetooth. I would personally not bet my live performance on a wireless Bluetooth connection, but that’s just me.

So in short. I am sold on the concept of using pads for triggering sounds and drums, being a piano keyboard player. If I look around on the live stages, its here to stay. When you are not a piano keyboard player it might just be your new way to play notes.

Connecting the Logitech Craft knob to Ableton Live

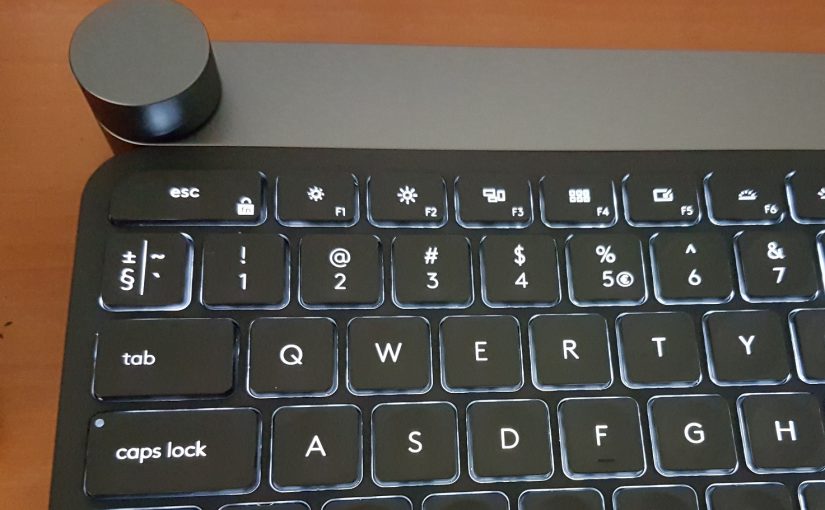
Just in, the gadget of the month: the Logitech Craft. I was looking out for some more control over the mixing process and of course there are many controllers. When you already have an Ableton Push what more do you need? Well actually there is a thing about me and Push. I cannot use it blindly, so I always have to look at either the screen, or the controls, or the display. When mixing in the Ableton Live arrangement view it gets worse. Mouse, keyboard, screen, Push… It is at its best in Session View.

There were two things I was looking for. A high quality ‘chicklet’ keyboard like on my new Lenovo and it has an extra: A Knob. A dial that is touch sensitive and clickable to perform specific actions in any part of any program that has focus on your desktop. I am quite sure that your regular keyboard and a Microsoft Dial controller wil also make up good combo, but I chose the Craft to replace my old and clunky keyboard with media controls.

Unpacking and installing was the easy part. The previous keyboard was also a Logitech and it used the same Unified remote. Switch on and off and the keyboard was connected. Then a disappointment! No profile for Ableton Live. With a profile the keyboard recognizes the program its in and it immediately adds some shortcuts to the knob to control. For instance in a browser you can select a tab with the knob. In Photoshop you can zoom. In Lightroom you can change the exposure, or so I’m told. Standard functionality in other applications is controlling the volume of the PC and clicking it will pause/play music.

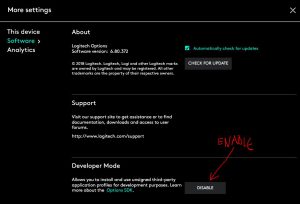
So there I was staring at Ableton, without being able to use the knob. I started diving into the settings, and there i found the Development Mode. Click it and you will need to also enable sending stats to Logitech. Tough but there is no escape.

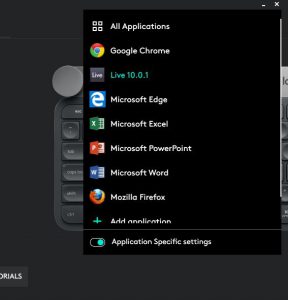
From there you can select more programs to control with the knob and yes, Ableton Live is there!

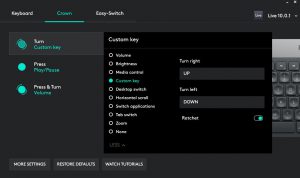
And lo and behold, assigning up and down buttons allows you to control Ableton Live mixing with the knob. A new world opens up, where you can look at the screen. Listen to the mix and control a setting in Ableton Live with the knob. This was what I was looking for, more control and a better keyboard for the daily typing chores. Yay!

How to remain creative

I know its quite pretentious to state that I would know how you can remain creative, but this is for me just a space to remind myself how I get things done. I hope this can help you in some way and inspire you to be creative. Please comment if you have your own tricks to remain creative. Maybe these will also help me.

So this is how I work:

#1 Keep a notebook at hand
I always have my phone on me and even if i am on the train or on holiday, I always have my online notebook at hand on my phone: OneNote. It can be something I hear. It can be something I think of or feel. I know I have to write it down immediately. As part of a general notes page, or as title of a new song or as a part of new lyrics for a new song. Even though I am quite sure that I would remember it again in the evening or even five minutes later, this usually turns out not to be true. So I Write It Down!

I let OneNote sync to the cloud and use the same notebook in the studio. Notes that change while on the road sync to the studio and vice versa. Eventually lyrics take their ‘final’ shape and then they are updated and saved as such. New versions get added and my OneNote pages always contain all lyrics from all songs and all lyrics and remarks that I collected while on the road.

#2 Work out of the box
Nothing is more inspiring than a real instrument. Even though it is entirely possible to write a song with a mouse and keyboard, its not my thing. Usually after practicing just playing away can easily result in new ideas. I try to record ideas immediately and with any fitting name its a joy to browse through all loose ideas and stumble upon a new song.

#3 Do not repeat
The thing that will surely kill creativity is putting some section of a new song on repeat. Even when perfecting a part of a song or a new idea I avoid putting it on repeat. After three times its time to look at another part of the song or start working on something new. All kinds of controllers, like the Ableton Push might try to make me work in a repeat loop, but I stay as far away from it as possible.

#4 Work fast, keep focus
Know your gear, don’t get stuck in finding stuff out while you need to be recording. Eventually when working on one song for a long time the dreaded hearing fatigue will kick in. Time to stop and do something different. Preferably not related to making music. Start listening again the next day at the earliest. Preferably in a different setting. Al too famous is listening in a car of course. If it sounds right there, you’re getting somewhere.

The making of a video clip

Telling stories through songs. When there is no story I have no drive. Sometimes I actively scout for interesting stories. A sequence of words. A thought. Serendipity. Usually a picture forms in my head that shapes the story and that is when I start thinking about a clip. Last year this was very strong when Sam came to work on Memories. Its actually one of the first songs that I posted on SoundCloud, but Sam shaped it, rewrote the lyrics and sang it in the attic.

The original song was inspired by a school reunion. A magic event that reshaped my past, because most of what I remembered actually was wrong or incomplete. It seemed apt to make a video clip for it that somehow would take you back to school and down memory lane. But, how shape this image?

Usually I try to cast the original singer and maybe let him or her sing at least a few lines in the clip. I got into contact with the head of my old school, not far from Leiden, in Sassenheim. He arranged the possibility to shoot a video in the school. First everything seemed fine, but then came the terrible news that Sam could no longer take part in the project. No conflict, but personal problems. Disaster. Sam recovered, but still could not take part in the project. However, she agreed that I could use a stand in. She took part in the final result from the sideline.

A clip needs a story!

The first thing I try to do is write down the story of the clip, but in this form. A form that works for me:

  • The premise: the initial state of affairs that drives the plot. In this case: Coming back to your old school to look around and remember all the fun and nice memories of your school years after a school reunion.
  • Scenes: all the images I have in my head. The locations. The video shots. How to shoot the video, moving the camera or on a tripod.
  • All necessary props and assistance needed for every scene

This way I can answer all questions that people involved usually have. How long do you need to shoot in the school? Which locations? What to wear? Earlier I would just take my camera and go, but I found that when you start filming that its nice to come prepared. Also, it really helped a lot that I already knew the school and made an extra visit to fill in some details.

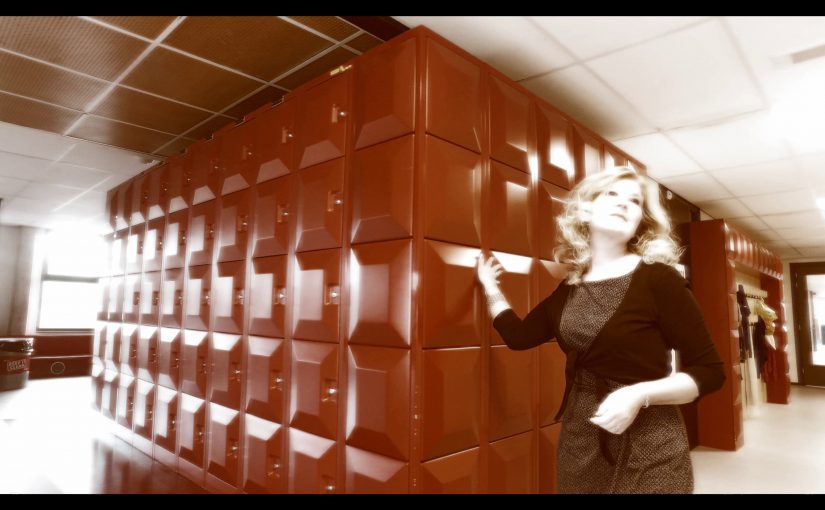
Ingrid in school
Ingrid in school

In this case Ingrid saved the whole project. She agreed to be the stand in for this clip and she is such a graceful and beautiful lady. Throughout shooting she remained strong and focussed. Even when we somehow seemed to be locked up in school by the cleaning ladies.

We have stuff…

A short word on equipment. I have invested in a Panasonic system camera that is capable of shooting 4K. It has image stabilization, but when shooting a shot while moving I now insist on using a gimball. When movement is not smooth its just not right, or it has to be a special effect. For shooting while moving I use the DJI Osmo that has a 4K camera attached. Earlier I found out that insufficient lighting can ruin recordings, so I also invested in special 1000W video lights. I always try to reuse the recordings in the form of making-ofs. For this shoot I also brought the VR 360 camera and an action camera to shoot the recording setups while recording. Makes sense? I hope so.

Why 4K? I have found that when the starting material is 4K, a resulting HD movie is of higher quality than a movie shot with HD equipment. Its the pixel interpolation that somehow results in a sharper image. Also, if the end result is a 4K edited movie, it is also ready for the foreseeable future of video. And if the end result somehow has imperfections, it is possible to cut out the best bits while keeping a HD quality result. Also 4K has overall better quality. No more jaggies much less moire. The only thing that I have saved on for now is framerate. My budget unfortunately does not allow me to shoot 4K at more than 25 frames a second. For now it will have to do.

…but how to use it

What I try to do is to set up all equipment manually. This is extra hassle and extra risky, but what I try to avoid is to have all equipment think for itself. These camera’s all have auto-everything settings. These settings make smart decisions to make sure the subject(s) that you film are well lighted and in focus. However, when filming I find that a camera may suddenly shift to new settings for the best lighting and focus in the middle of a recording. This will make it more difficult in the final video production to choose the correct color tones and lighting. Shifting focus in the middle of a recording will probably make the recording useless. So everything is set to manual, focus and lighting will be fixed.

In the school setting the use of my video lights with a fixed color tone makes sure that the prevailing color tone of the recordings is also fixed. For the final video production I chose to give the whole clip a warm summer tone. Even when the clip was shot on a cold and cloudy autumn afternoon.

And there is more

For this clip I also made sure that Eline from Beauty & Visagie could be there. While recording I am already juggling all the equipment and video shooting. Eline made sure that Ingrid looked her best and remained stunningly beautiful throughout the whole afternoon. She also checked clothing and made sure that colors did not clash and that contrasts were in check. Walter also assisted, supported Ingrid, guarded stuff while we were running around and made sure we had power.

During recording I continuously play the music from the clip to make sure that the ‘rhythm’ of all movements matches. It also helps making sure that the mood is correct. Even though the final production might not be very pro. This way at least it will have the right flow and mood to match the music.

Also I always make sure that everyone in the clip is aware that it will be put on YouTube and made public. For these occasions I always carry paper release forms that people can sign to agree to ‘be in the movie’. For the people directly involved I just ask, but for strangers it might be best to let them sign a form.

As always: this is just the way I try to work and this is a reminder to self. Maybe it helps you.

If you want to support me making higher quality VR 360 video clips, please click here:


Fixing phase problems in a mix

Please note: If you are experienced in mixing this article will probably state the obvious. This blog is mostly intended as a “note to self” and everybody else that cares to take interest.

Recently one of my music friends Hanny told me that she had performed at a gig with her new band HannaH (check it out) that was broadcast live on local radio. Of course, she had asked for a recording that could be used for promotional purposes. There seemed to be no problems with the actual broadcast, but the recording behaved very strangely. When listening on a phone, the guitar disappeared. When you listened with headphones, your head would explode. The whole mix seemed strangely unbalanced. Phase problems… But we got out of it with a result that was even better than the original!

How did we get here?

These kind of phase problems probably have a very simple reason. In a stereo mix, somehow two wires in one channel were wired the wrong way. One bad cable can do the trick. What happens if some or left or right channel wires are wired the wrong way? The signals cancel each other out. Simple math shows it:

But the top signal seems ok, right? Well its drawn maybe a little incorrectly. The top signal actually has a little more richness of the waveforms to it and a little of cancellation. When used right, you will have a Phaser effect. Something you can find in any DAW and set of guitar effects as an effect that also wobbles the phase to add a little excitement and widening to a otherwise boring signal. Overdo it, or mistreat a stereo signal and you get cancellations and left and right stretched to far. It can result in headaches while listening.

How to get out of here?

So you now you have a mix with phase problems and its not your mix, just a stereo sound file. Aside from plugins with the purpose of fixing phase problems, is there a way to get out with just the tools you have? Fortunately for me there is. Ableton has a utility effect section that centers around treating left, right and mono signals from a track. I am quite sure that your DAW has similar built in effects.

The trick here was to duplicate the signal and create one track with the phase difference signal and one track where left and right were mixed into a mono signal.


Now one track only featured the guitar. Proof that there was a phase problem with just the guitar in the stereo mix. The other track featured everything except the guitar. When mixing both in mono suddenly I as able to remix the recording! Do you want more or less guitar in this song? No problem? All problems solved for HannaH. Good enough in mono, because the audio was for promotional purposes. Once again like in a Dutch football proverb: Every downside has its upside. Happy mixing!

Editing VR 360 video

In the previous post showed you how i currently currently record VR 360 video. The Gear 360 does not output large video files (typically 100 MB). On the whole these files can be processed on any laptop or PC easily. The bit rate is not as extreme as the 4K output of professional camera’s. The GB files from these camera’s can bring a lower spec PC to its knees immediately. Expect this also with balls of GoPro camera’s. You shouldn’t have problems with Gear 360 video.
You can process these files with any video editing software, as long as you only use cross fades or other basic transitions. Slow motion or any speed effects will be ok. Even some special effects will apply, like vignette effects. These will blur or darken parts of the 360 video and that can work out quite ok. Coloring effects are also fine of course. One of the effects that does not apply is anti shake, because that will snip the edges of the video and thereby breaks the stitching of full 360 video. Actually technically anti shake could be done by rolling in and out parts of the video on opposing sides. I didn’t find any effect that can do that yet.
Now, titling and logos. If you want any titling you will either have to accept that it will be curved in strange ways, or you will need software that can apply the necessary curving to mix in the titling at the right viewing distance and angle. You can try to do this using Hugin. You can find instructions on how to create images that can be blended into your VR 360 video for logo’s and titling.

Hugin 360 title
Hugin 360 title

So now you’ve got mixing of different shots covered and titling and thus your basic needs. But is this enough for you? The remaining problem is that you can only see the final result after finishing editing, rendering and outputting to your VR device. This makes editing a chore. Fortunately, VR 360 is catching on and there is software that allows you to edit in a real 360 way. Even on a classic flat PC monitor.
Enter Pinnacle Systems Studio 20 Ultimate. The first affordable editing software for VR 360 movies. Now you get a 360 preview window and a way to place 2D content, like logo’s and titling, in the 360 space and preview the result immediately. This also means that you can mix in flat 2D video as part of your 360 video. You still need to be aware which effects and transitions apply in the VR world, but at least you can see the results without first rendering it and move it to the viewer. I am quite sure that more video editors will support VR 360 video. For now your starting point can be Studio 20 Ultimate, or just keep it basic and simple. The end result is worth the effort!